

space design

FULL AGENDA UNTIL THE END OF MARCH

ATTENTION!
Sara currently has a full agenda (NOT CLOSED) of designs until the END OF MARCH
We will not close the agenda, but it is important that if you are interested in making a design, talk to Sara, buy the design on the website so you can be on the waiting list and start as soon as possible.
DESIGNS WILL BE MADE IN ORDER OF COME IN.
⎯⎯⎯⎯⎯⎯⎯⎯⎯⎯⎯⎯⎯⎯⎯⎯⎯⎯⎯⎯

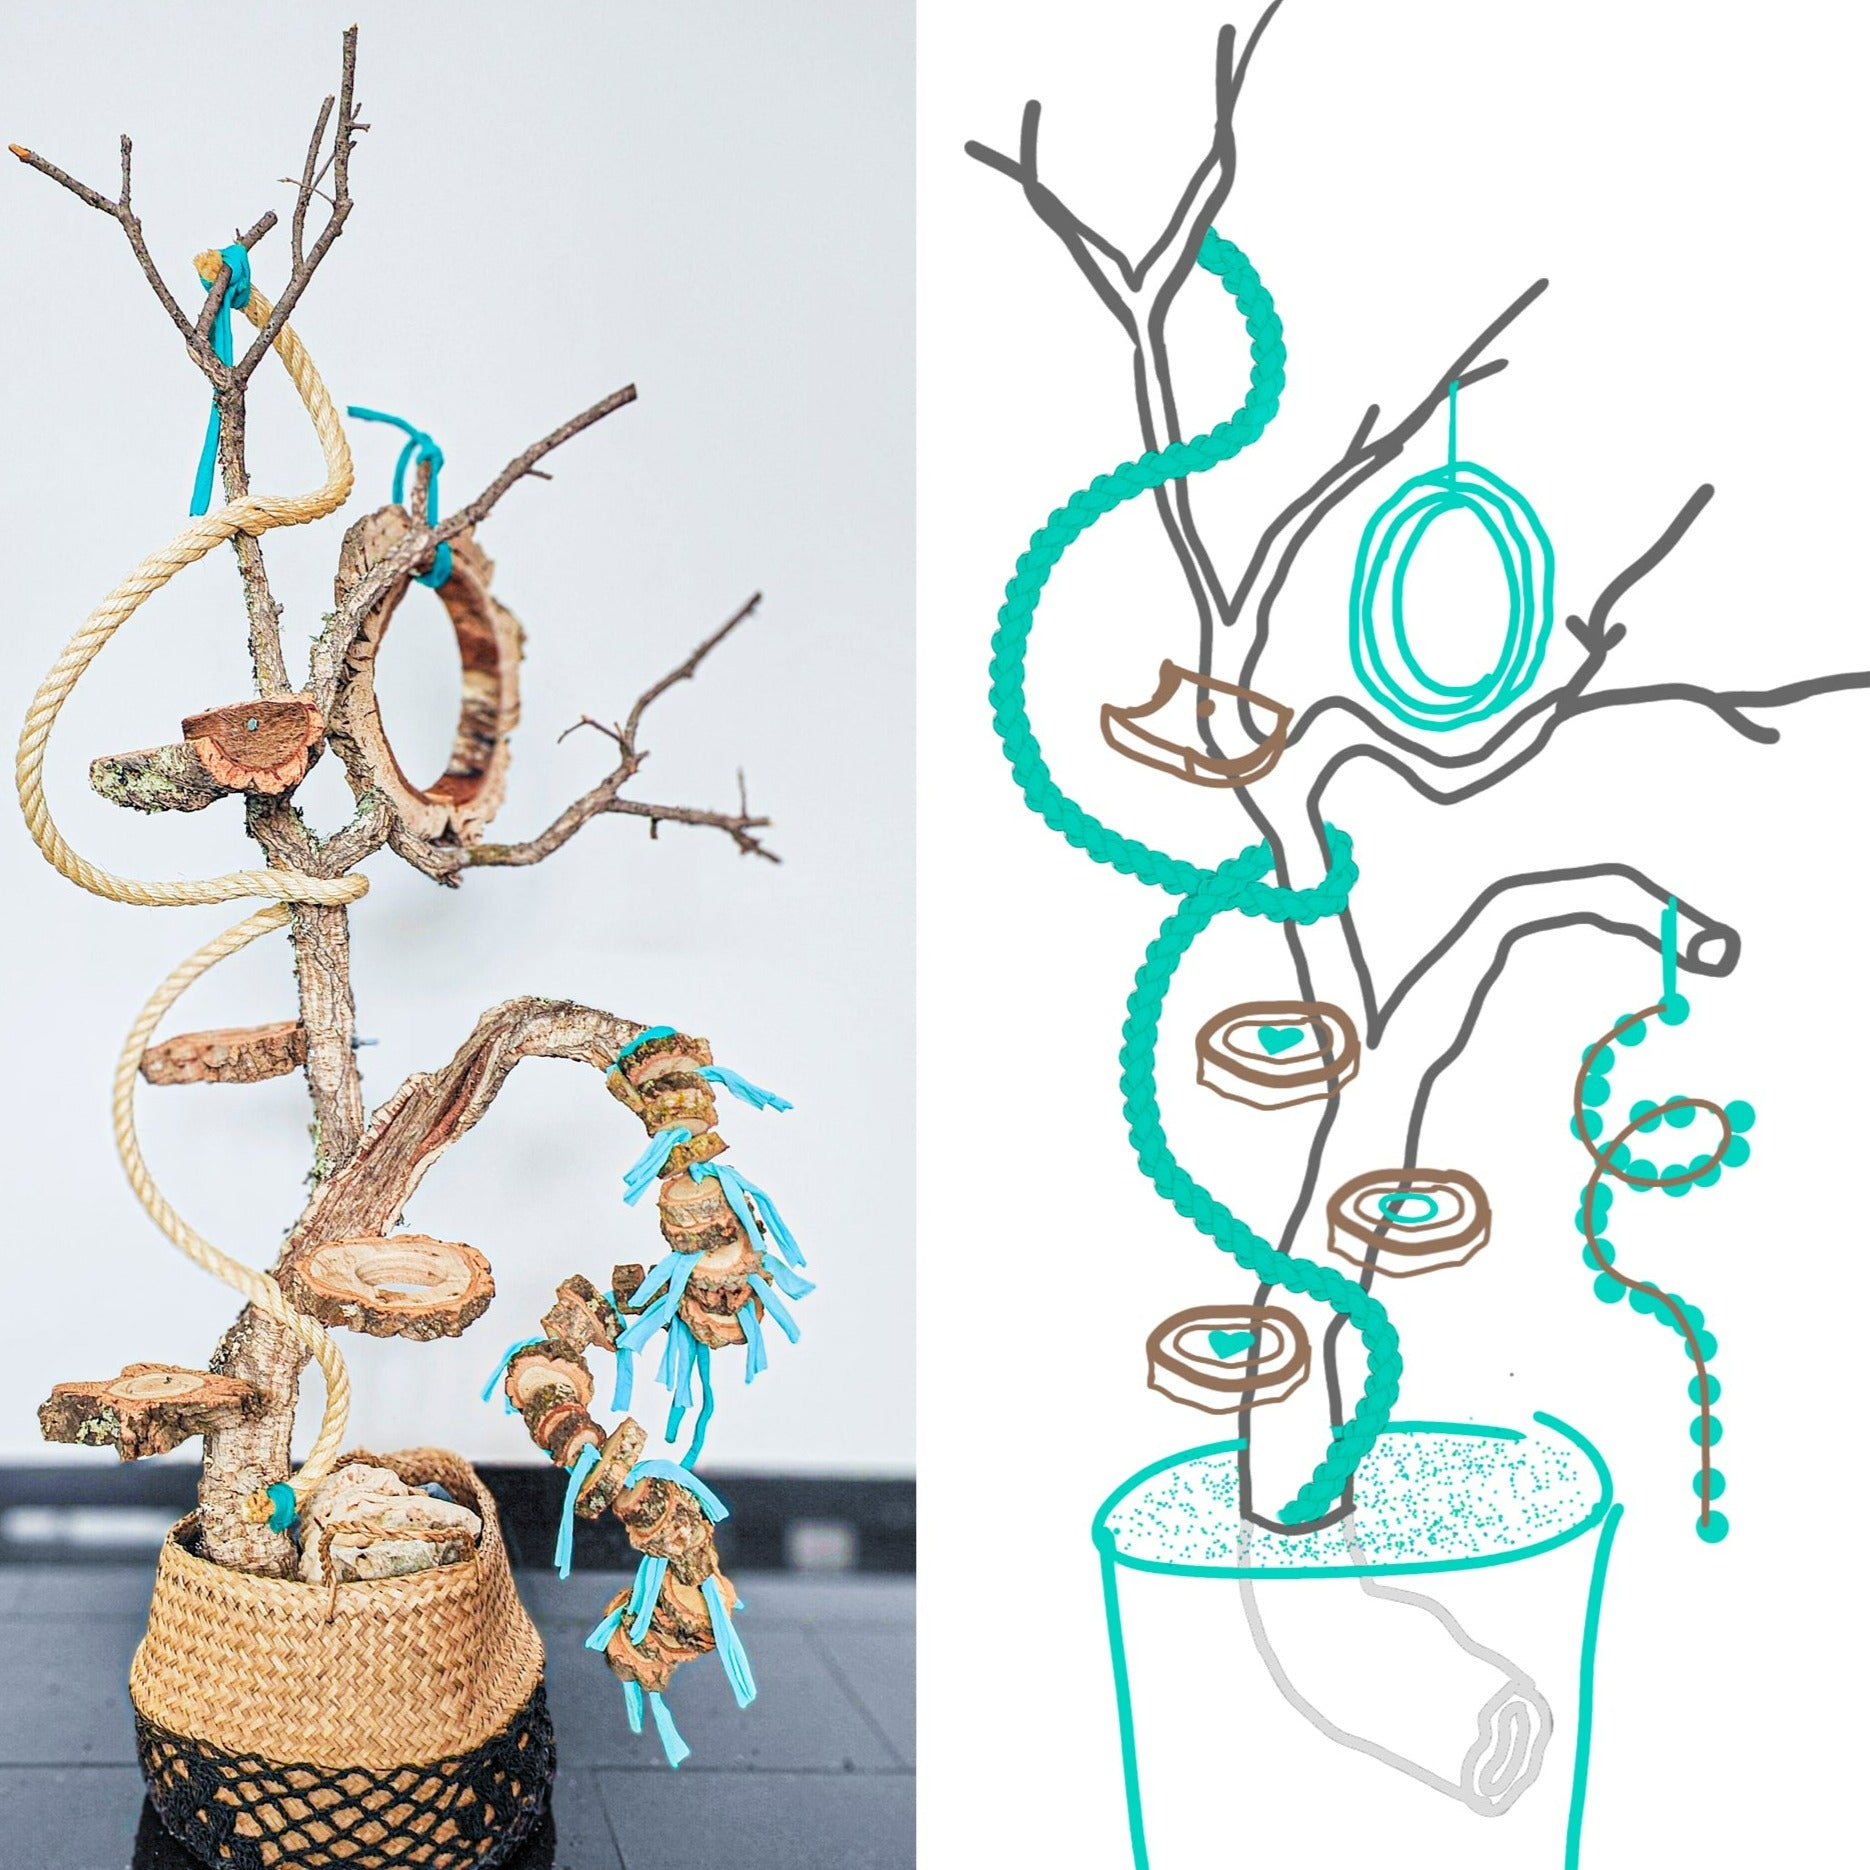
drawing
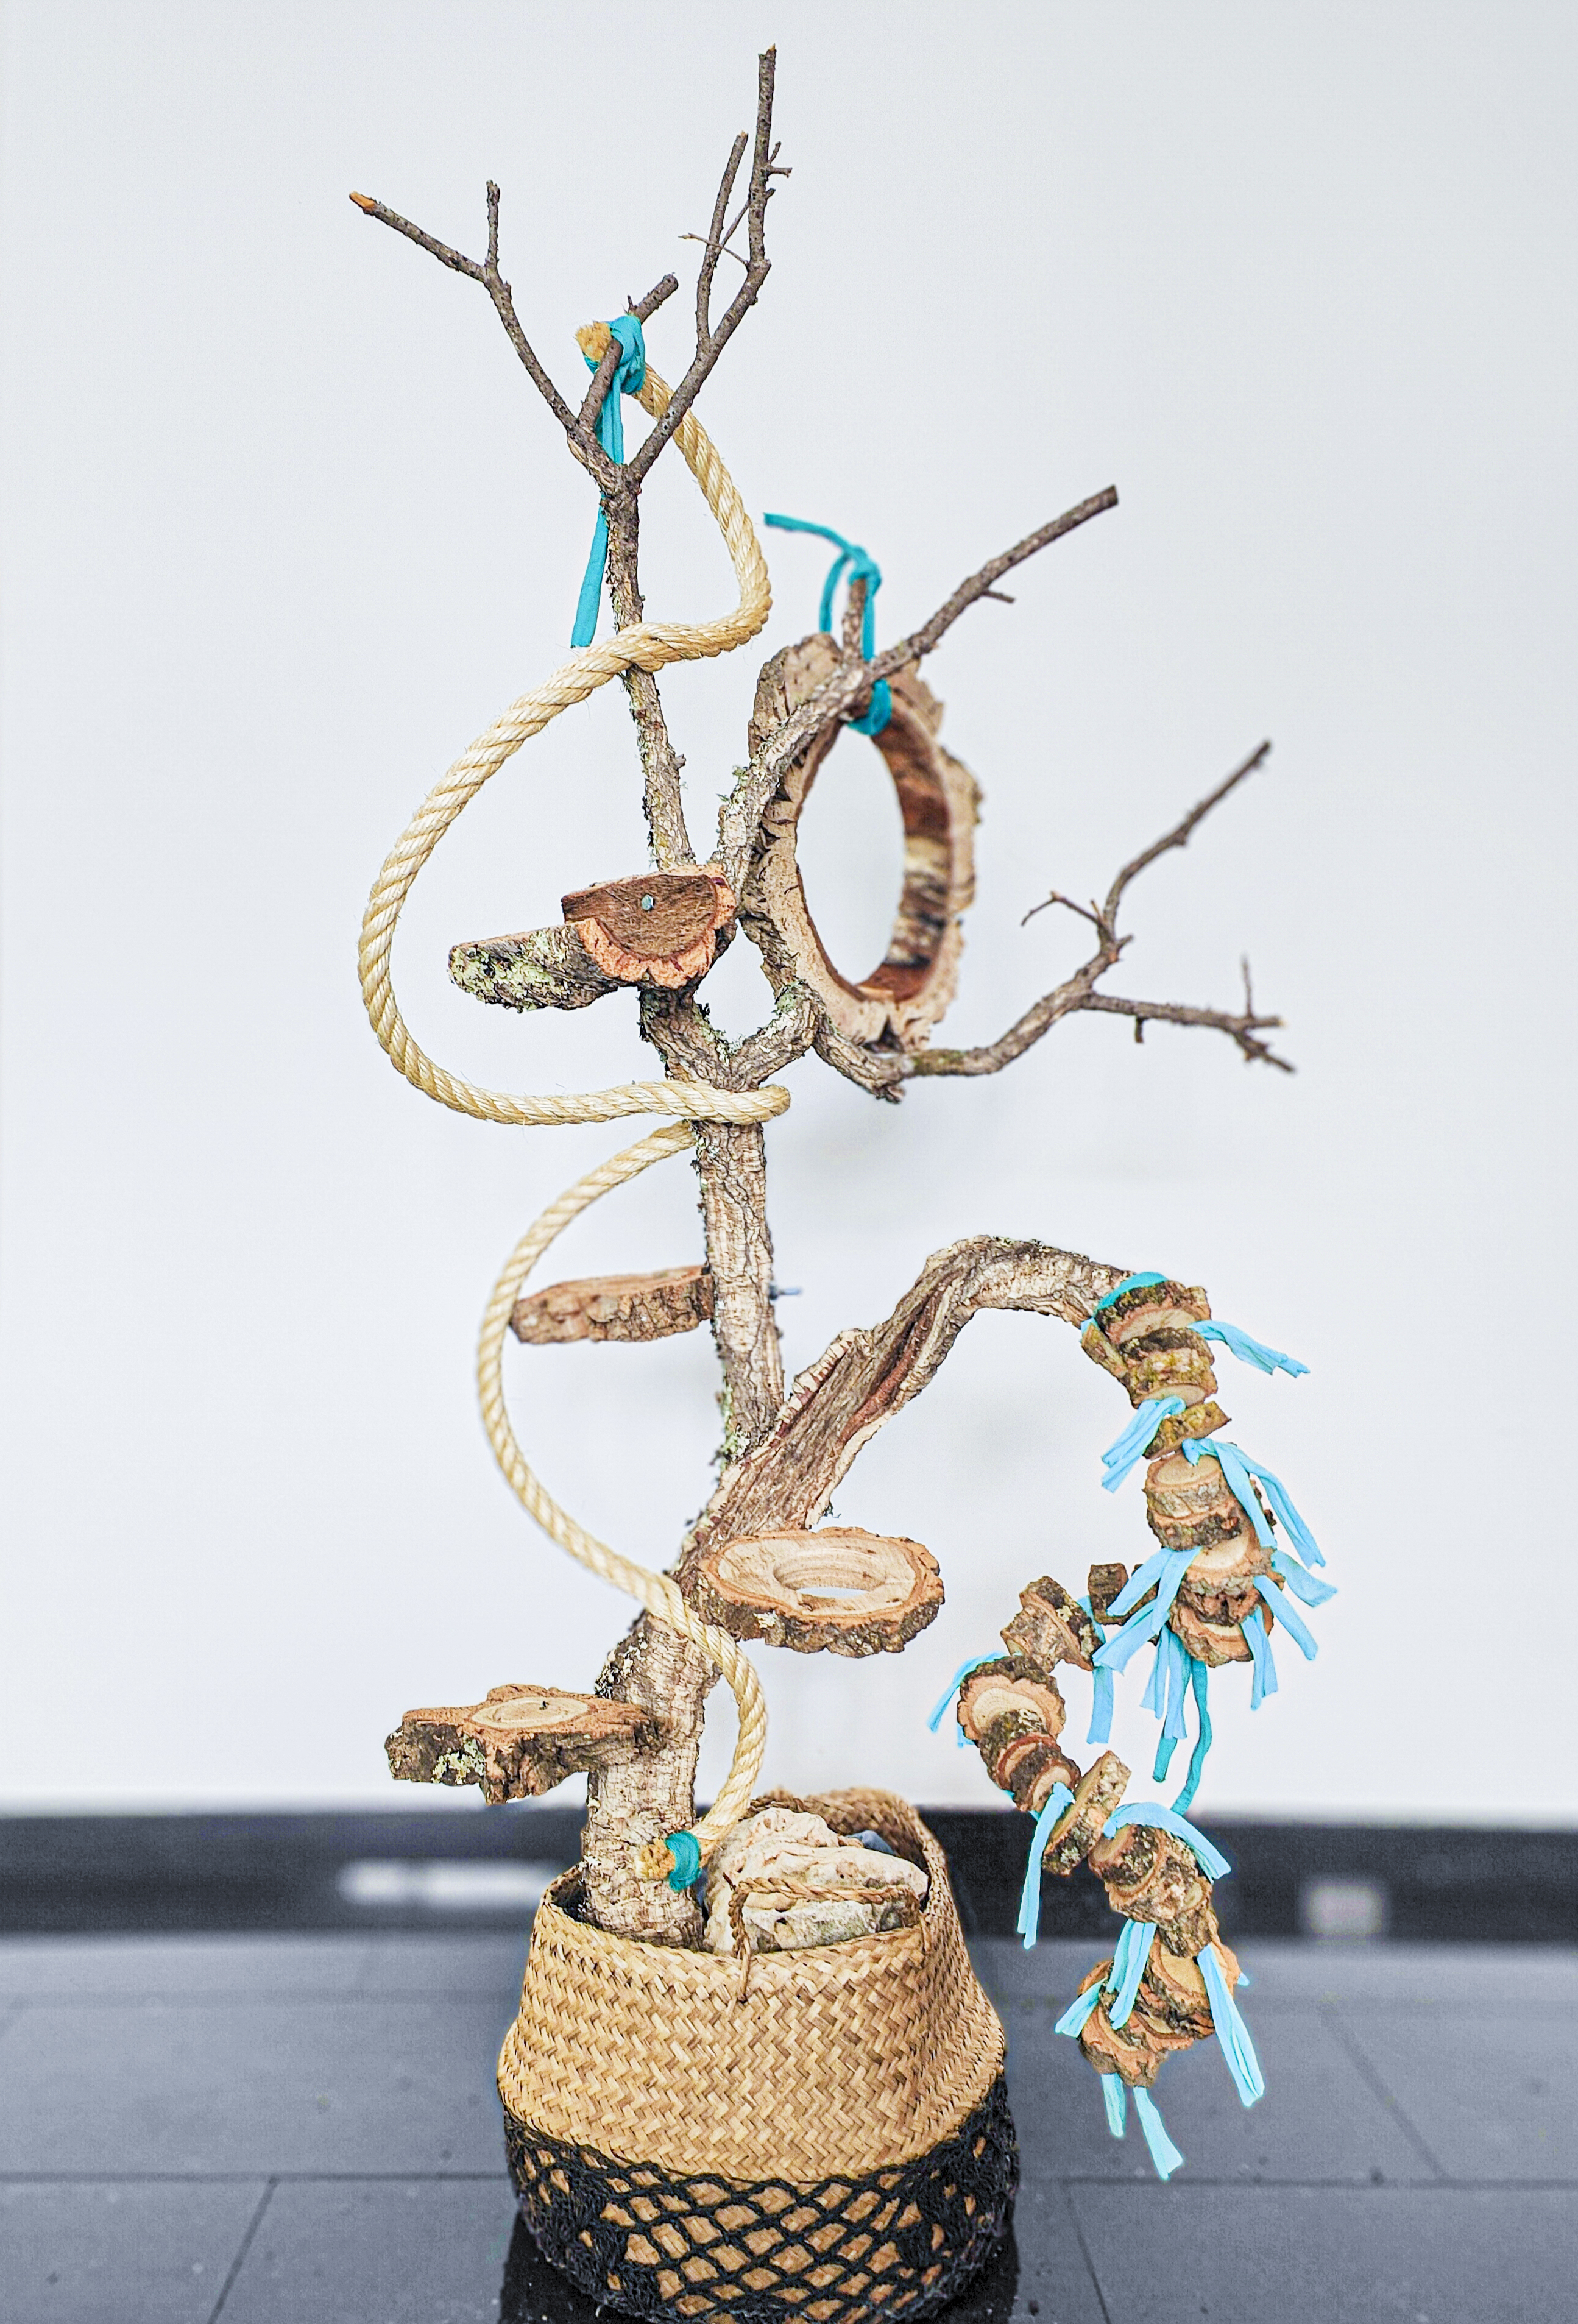
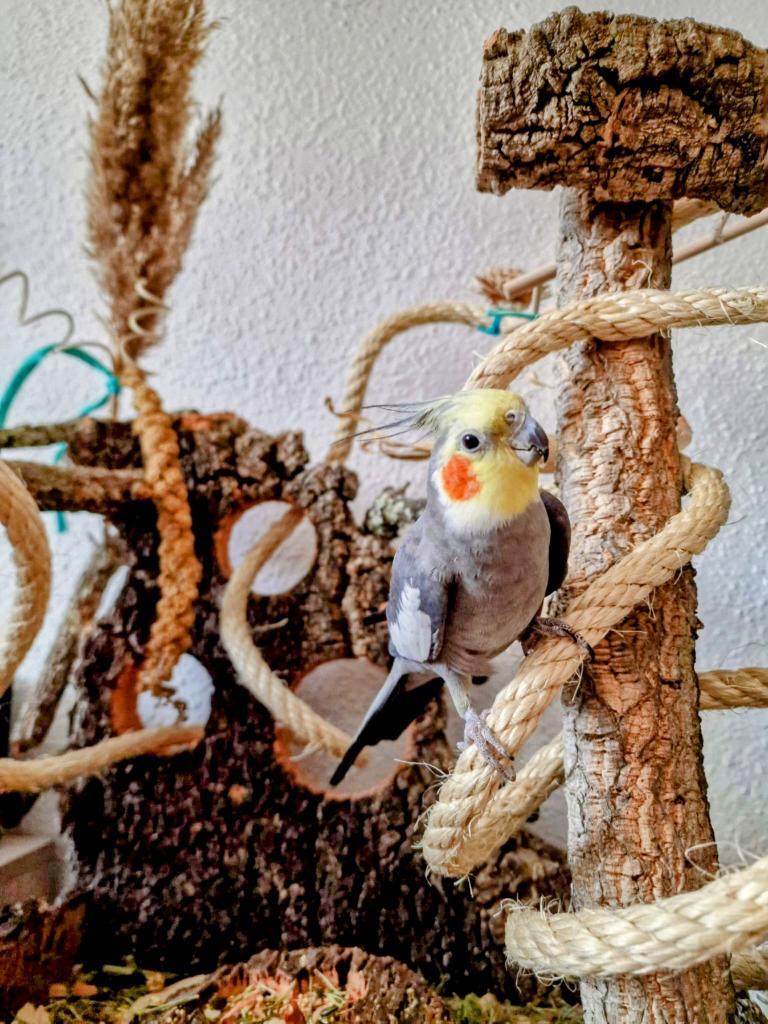
result
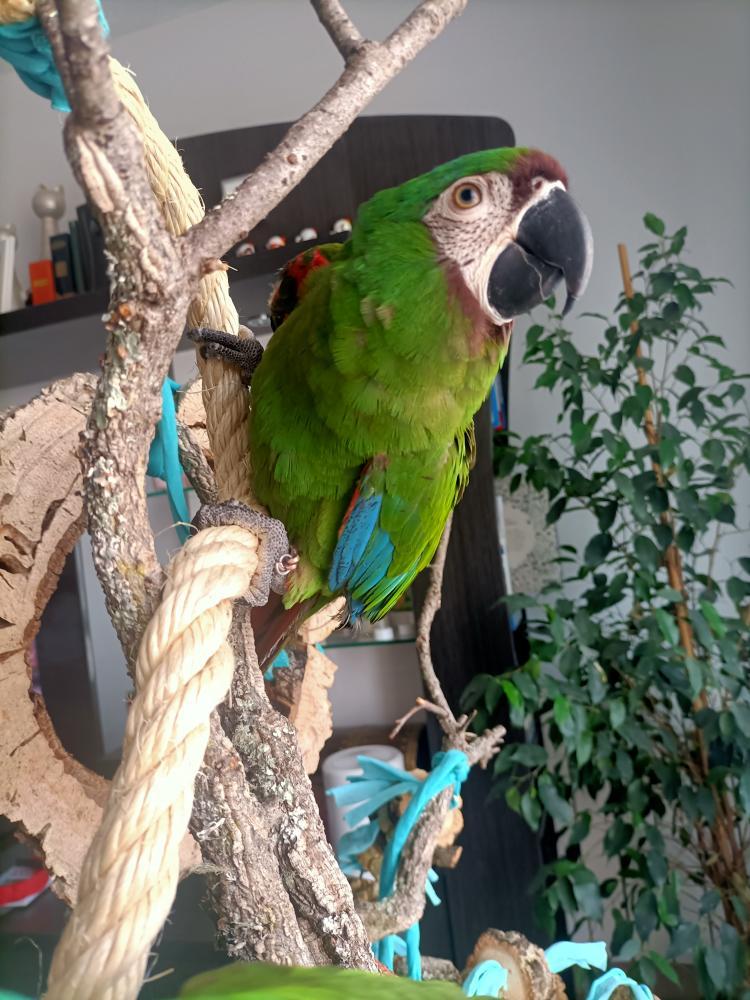
UNION OF SARA'S PROFESSION AND PASSION
INTERIOR DESIGN AND PSITTACIDS
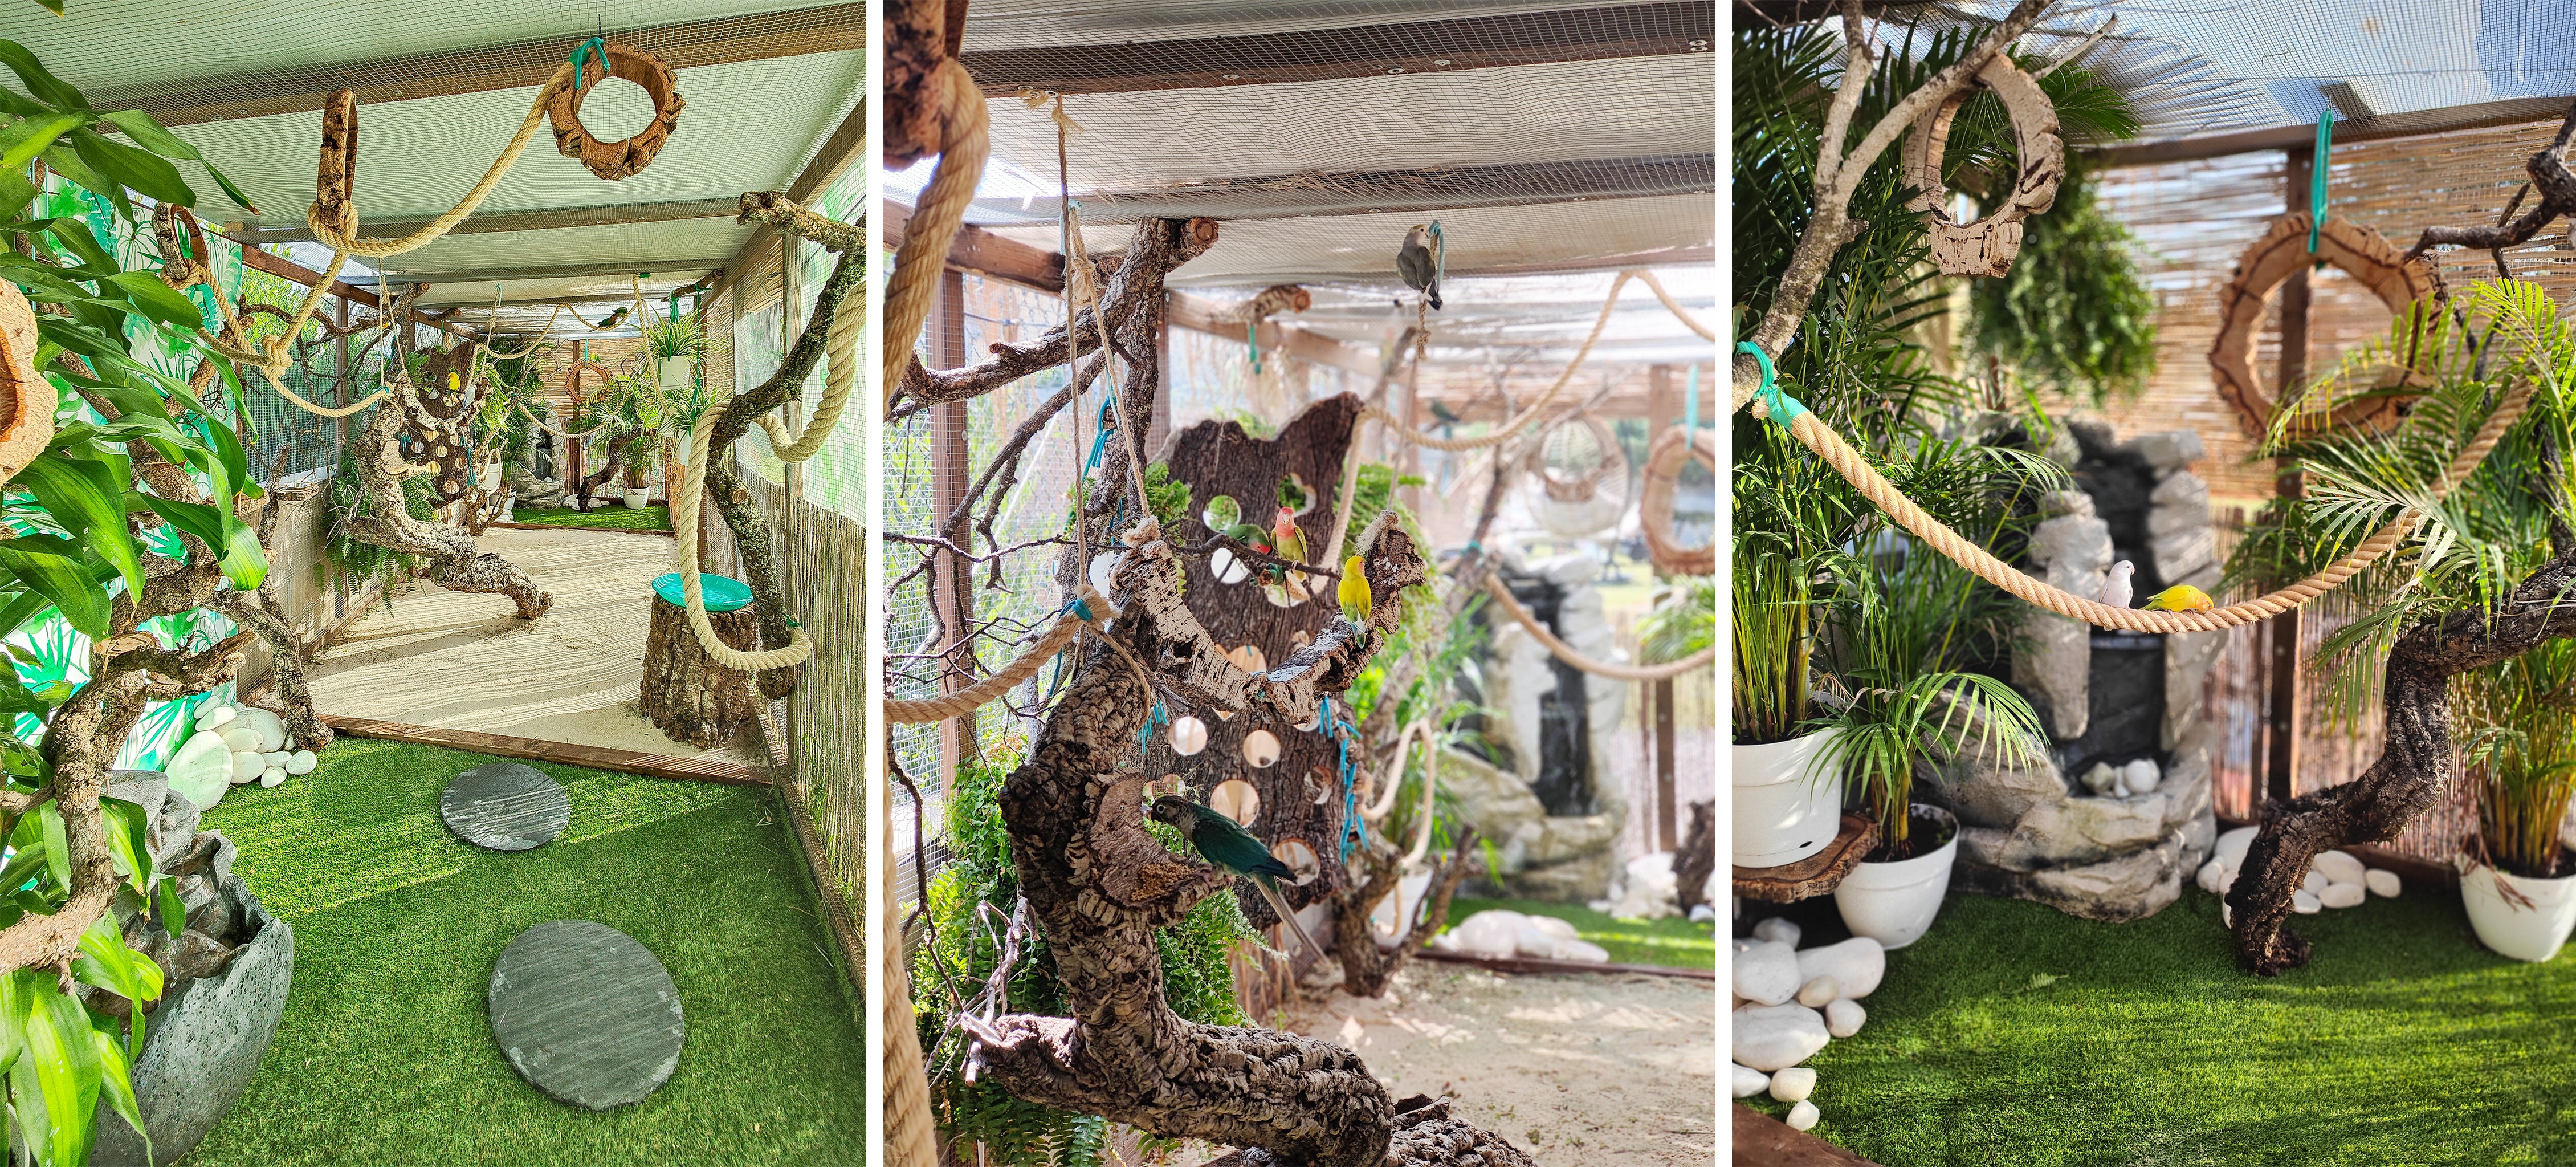
Can't a home with parrots be pretty?
Can't a flyover be a paradise?
We say, YES!
And we not only say it, but we have demonstrated it with our own example. We have gone from having cages and parks, to an indoor flying area and now an outdoor flying area. In all cases, we have always tried to give the best to our little ones.
A cage or space for parrots must be useful, safe and meet their needs, but...
What if we go further?
Who says it can't also be cozy and a paradise for them?


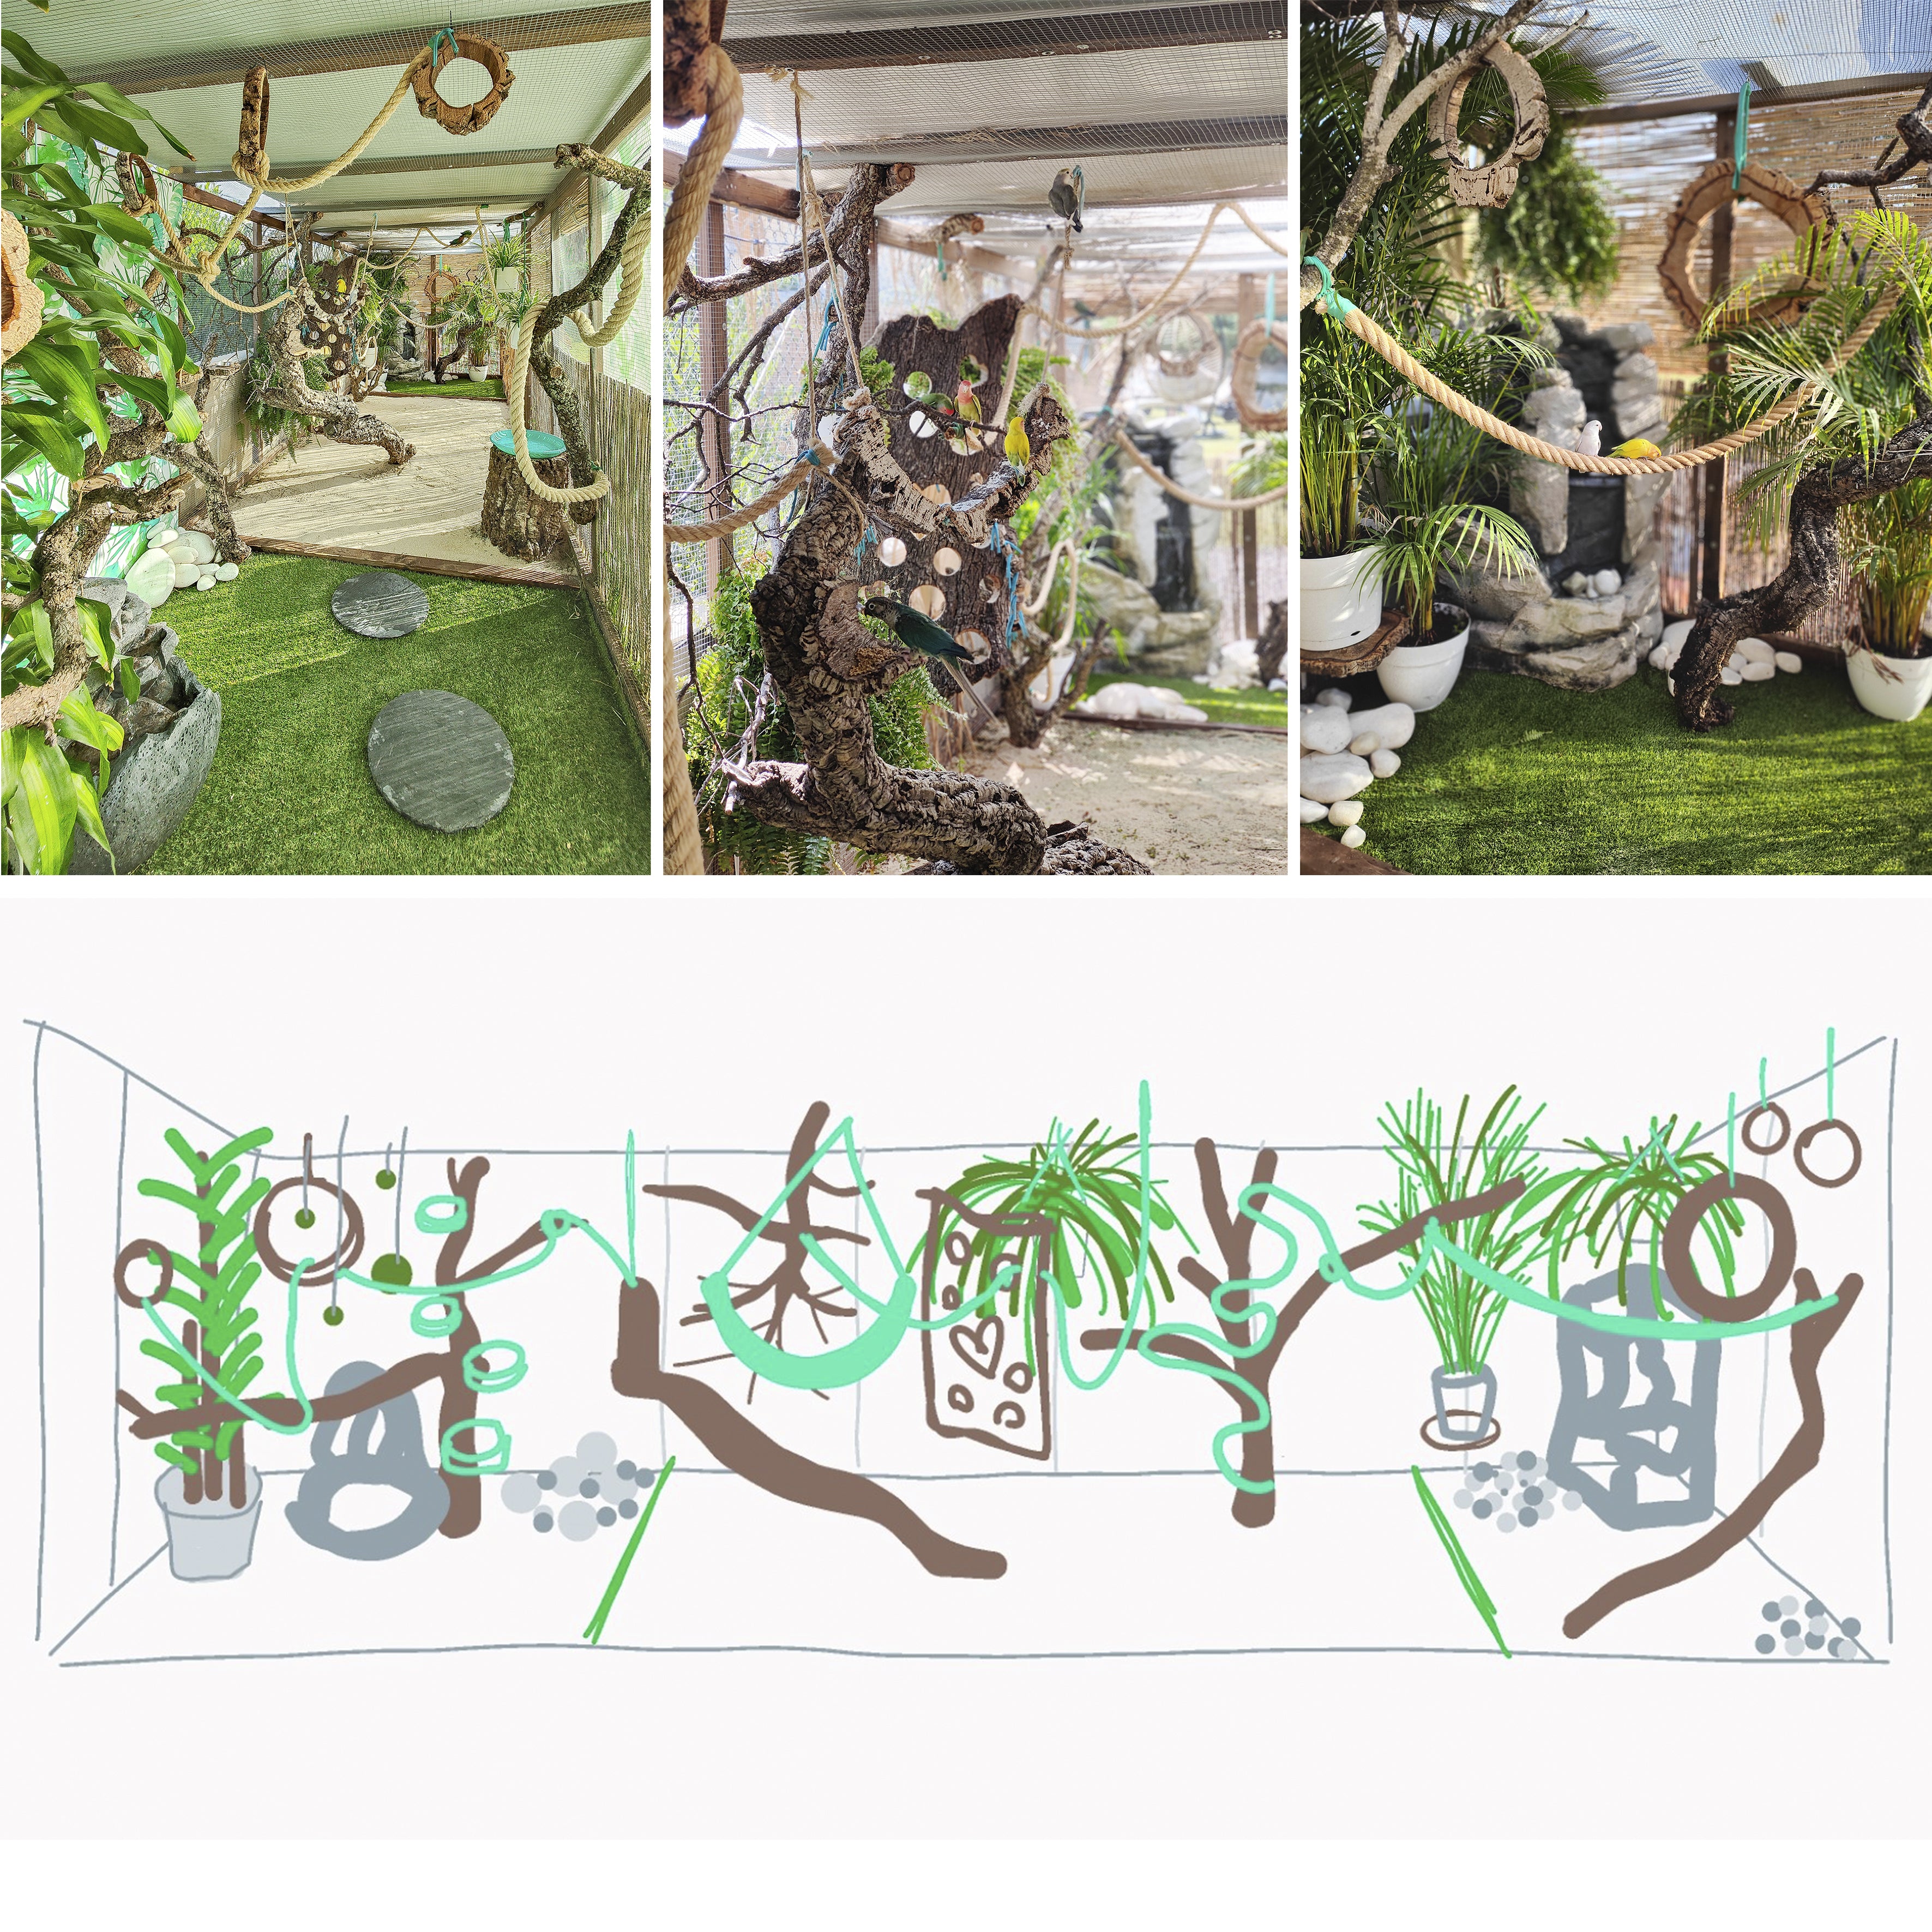
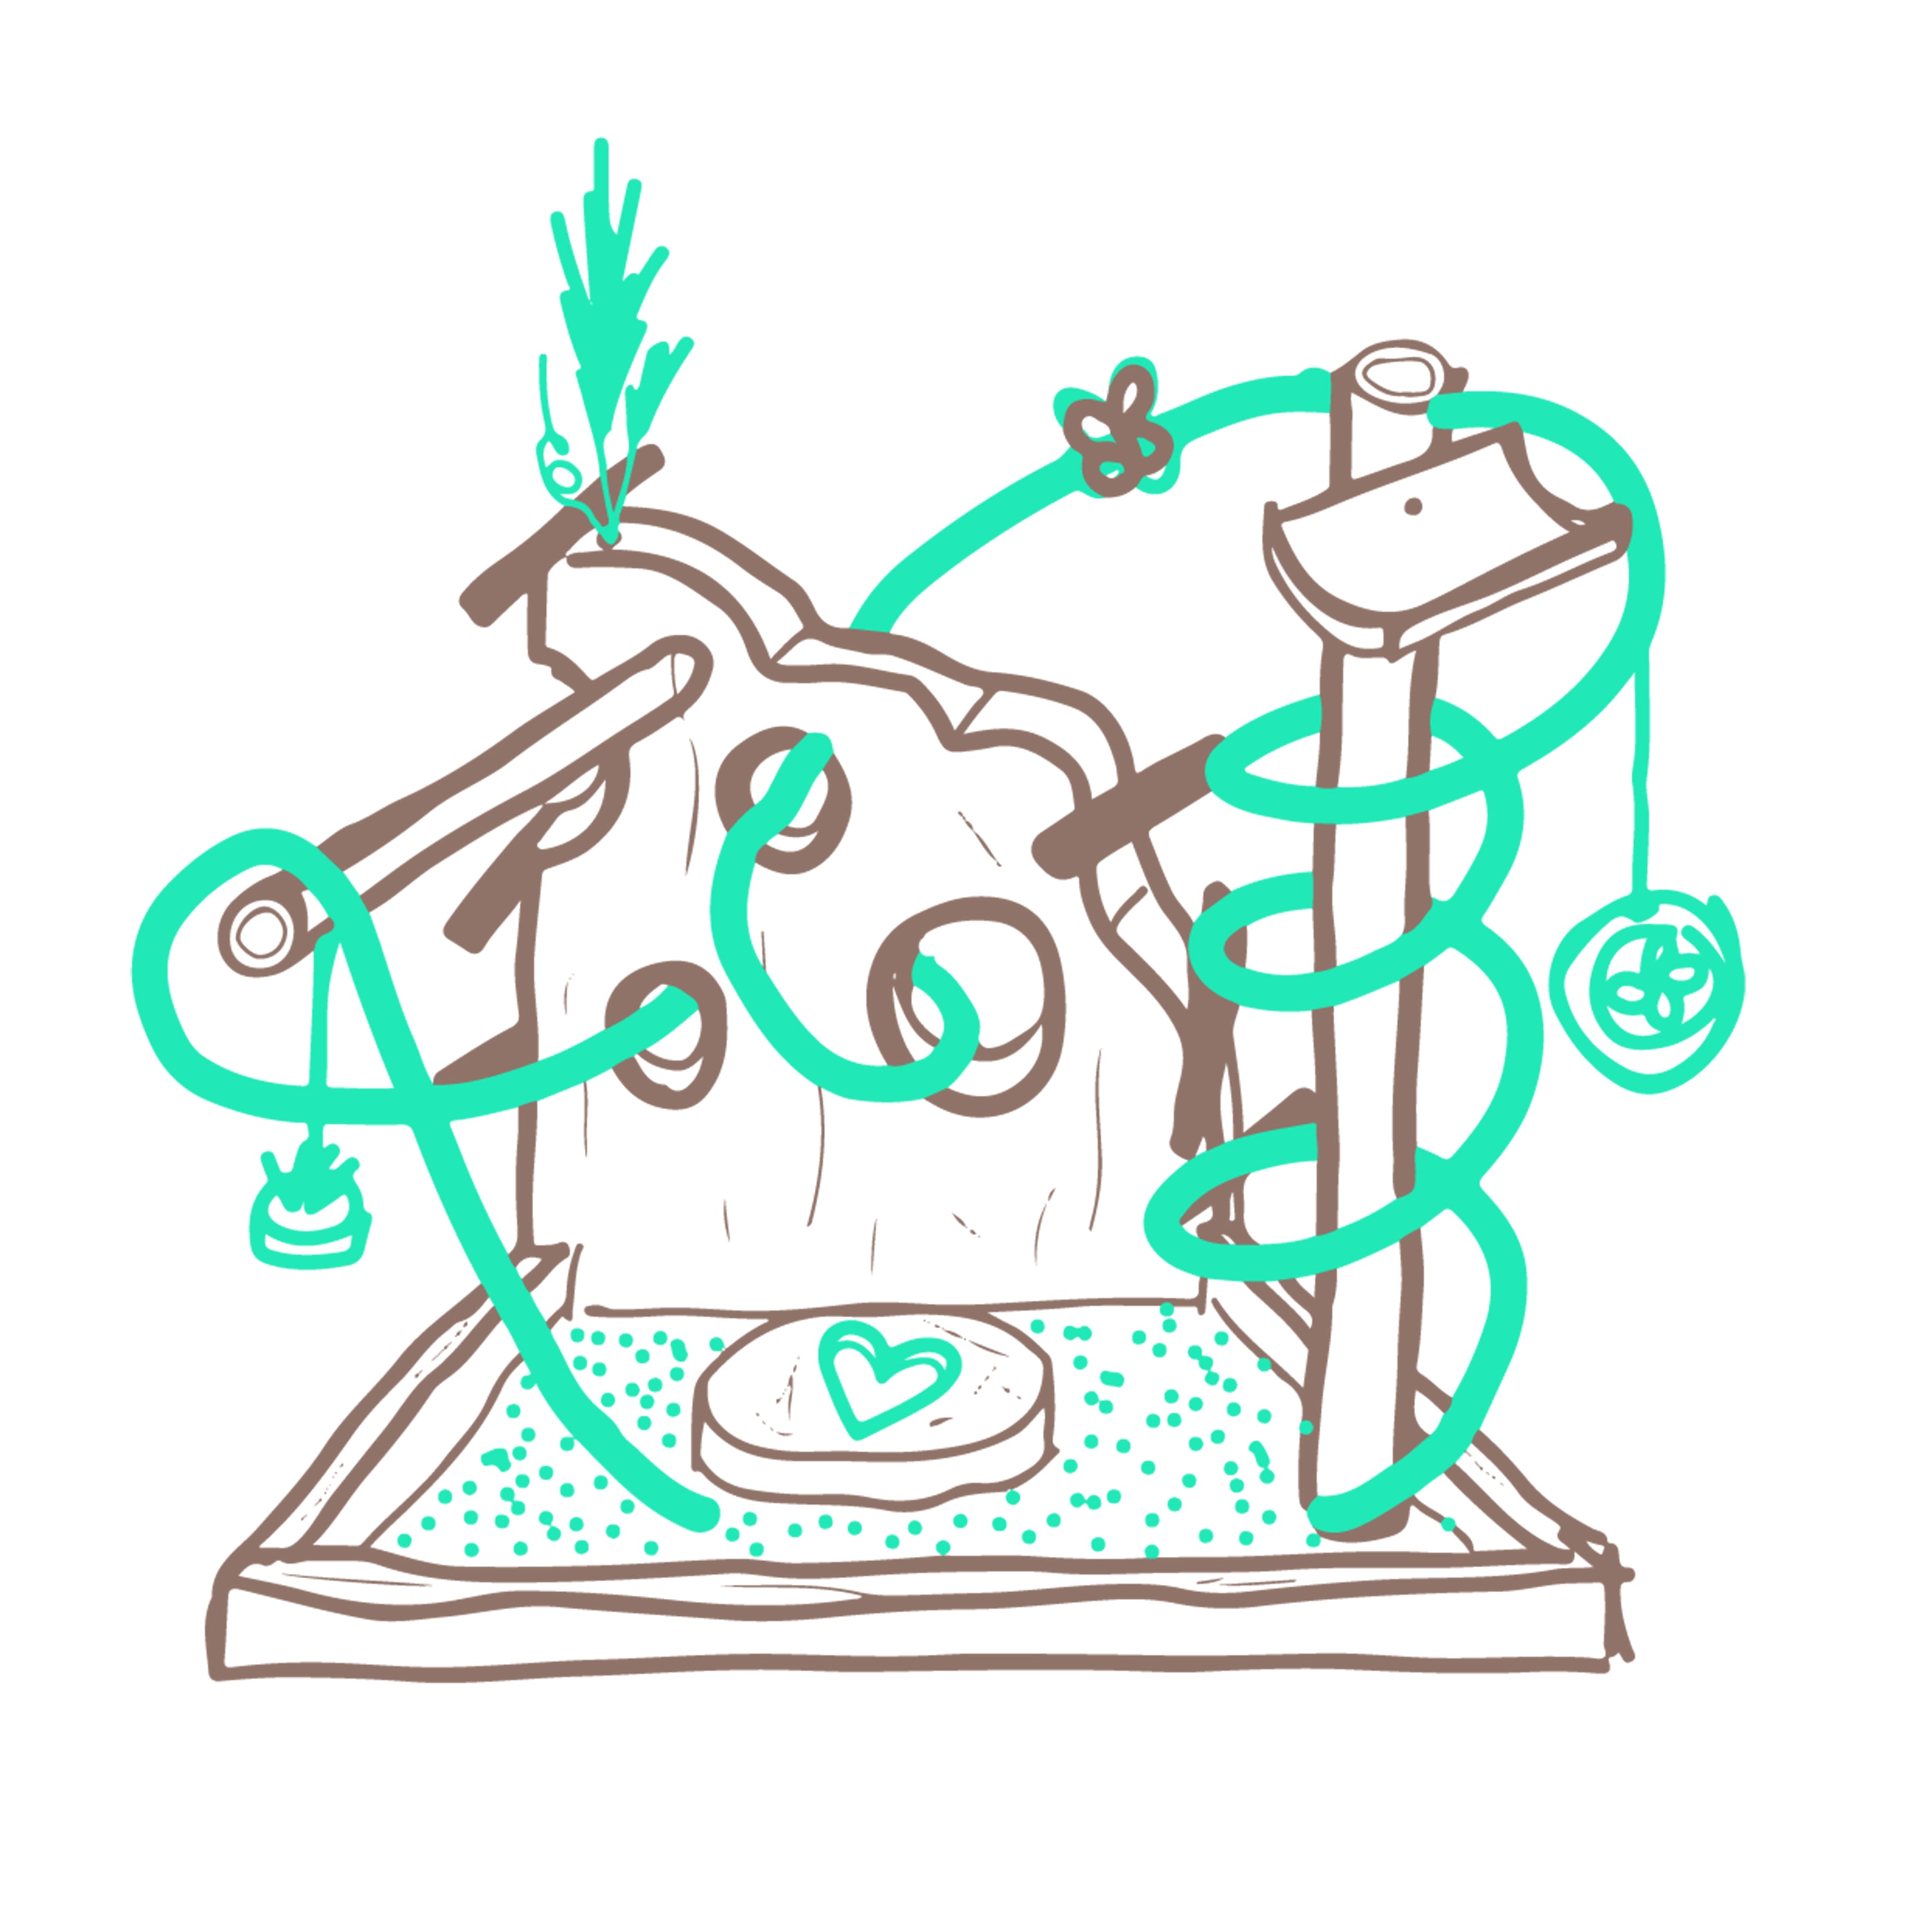
drawing
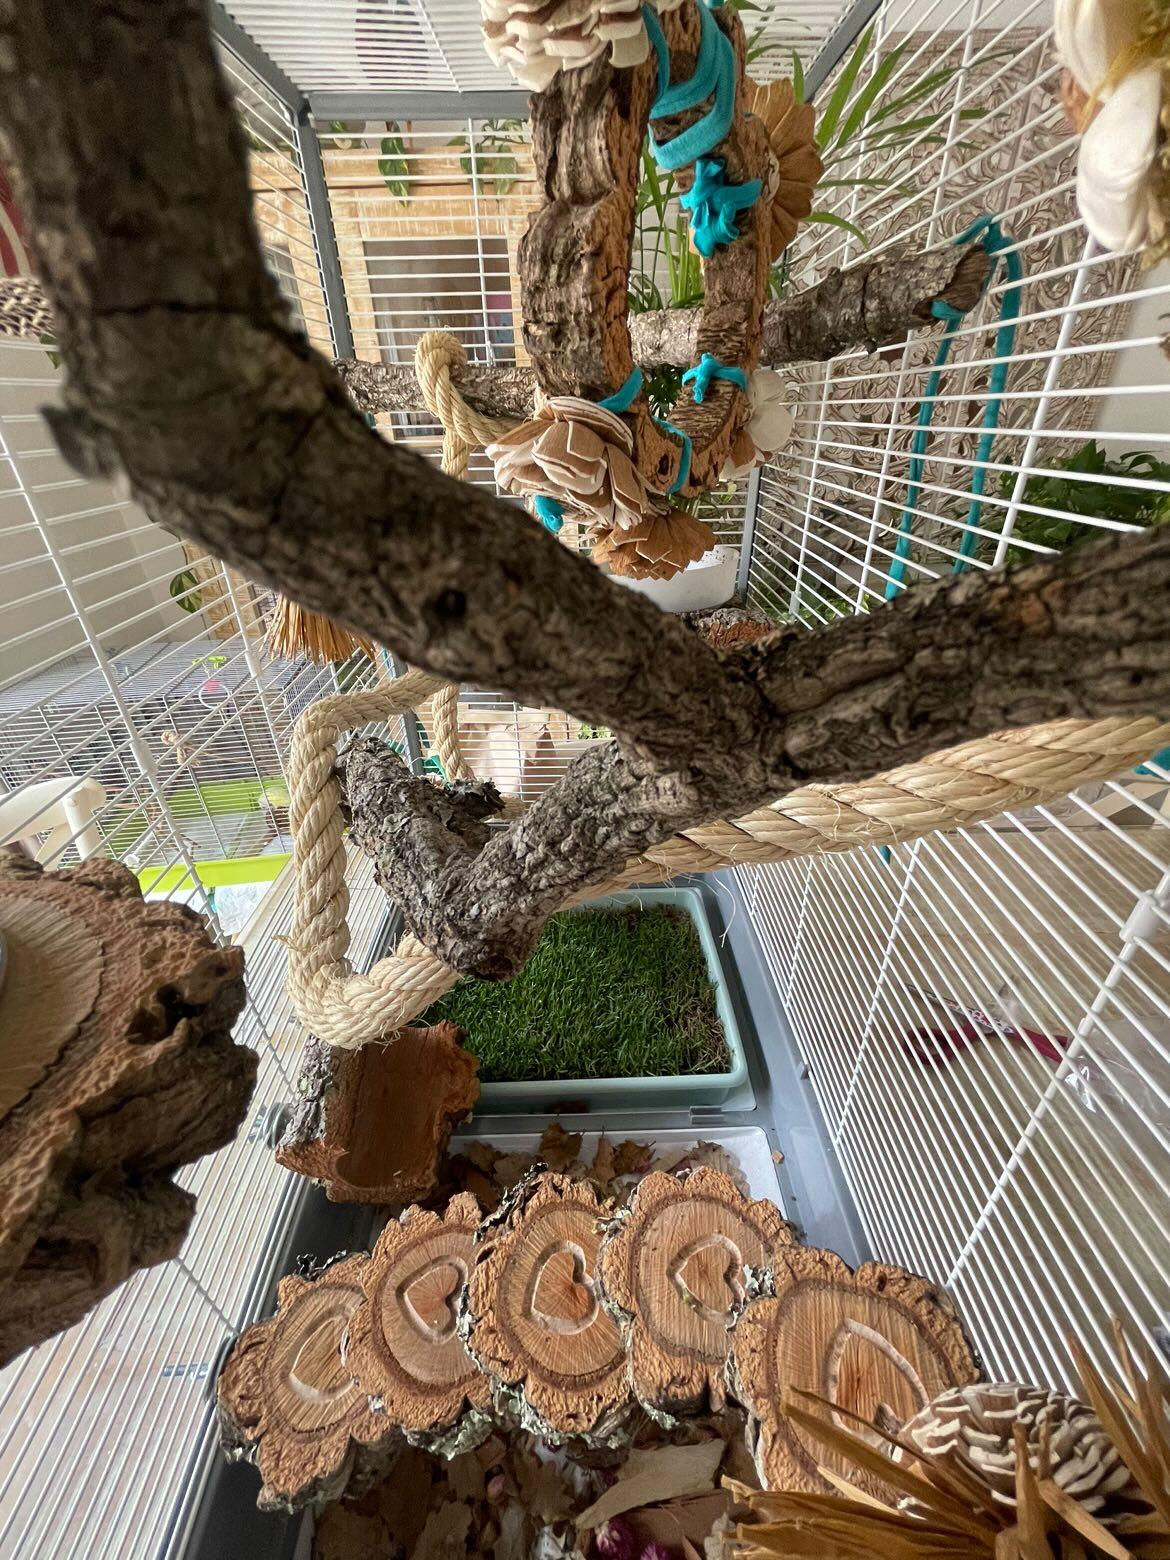
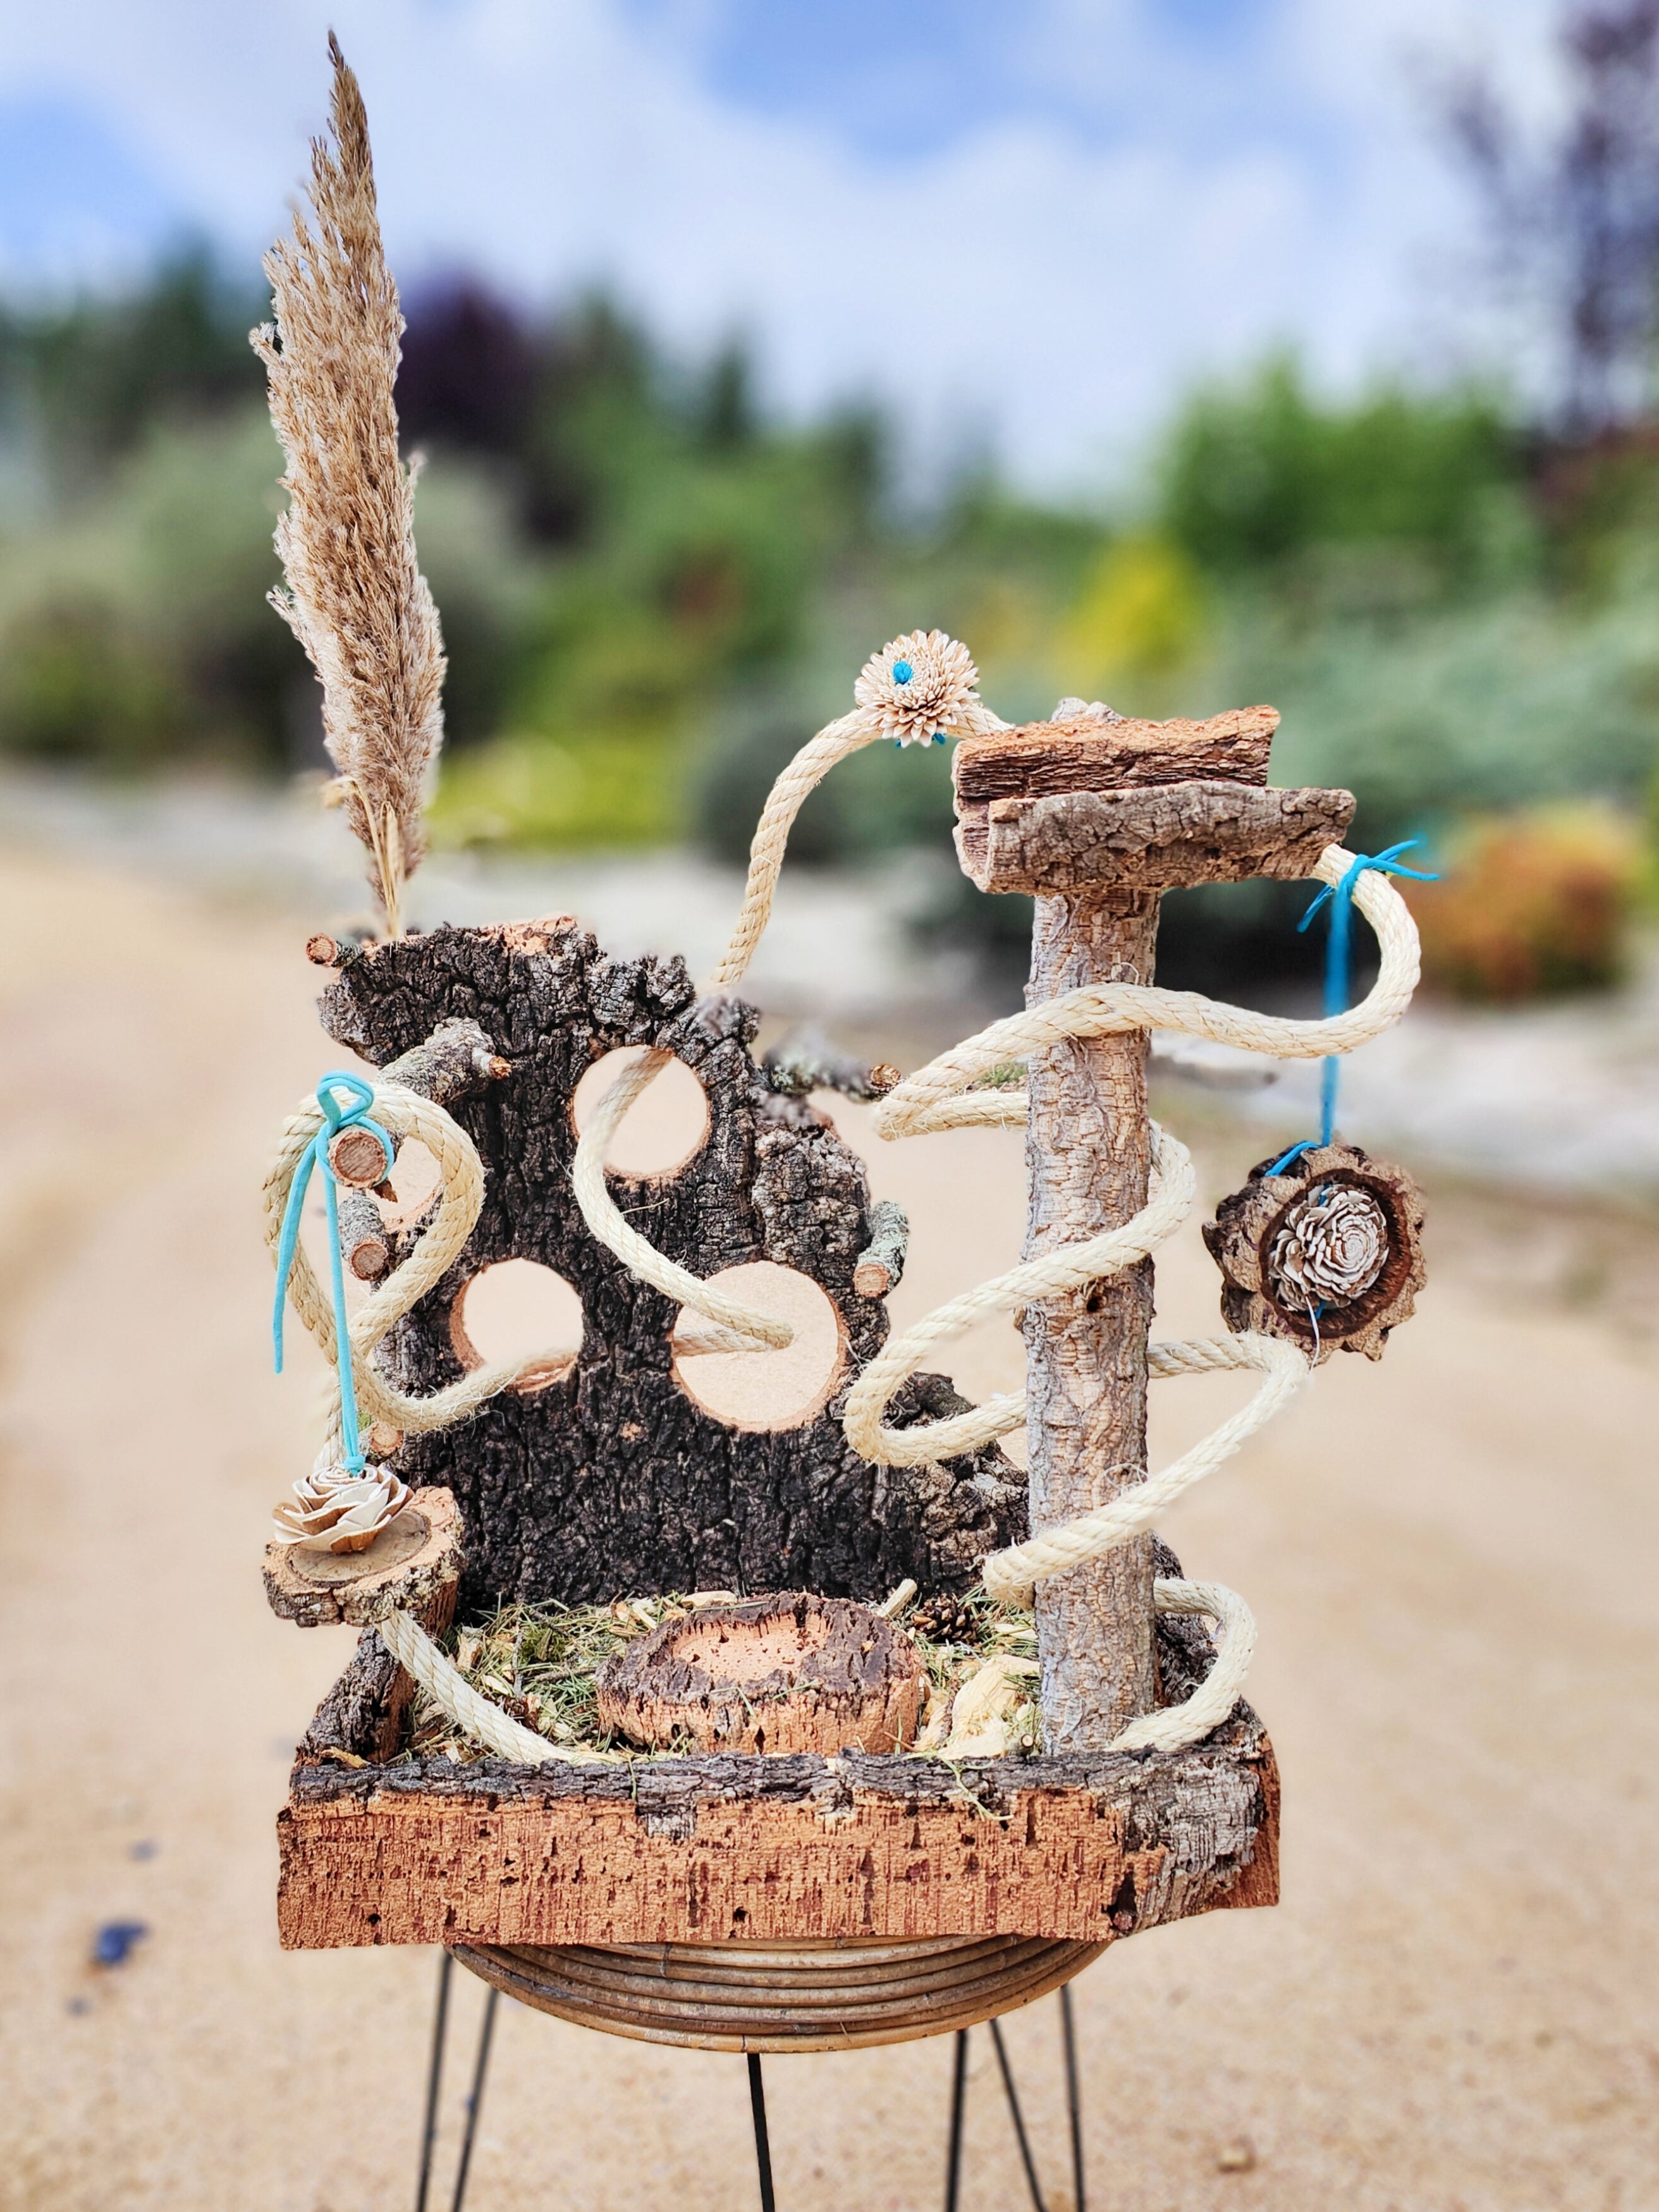
reality
this is what you can get for your little ones
from drawing to reality
(slide the arrows to see it)
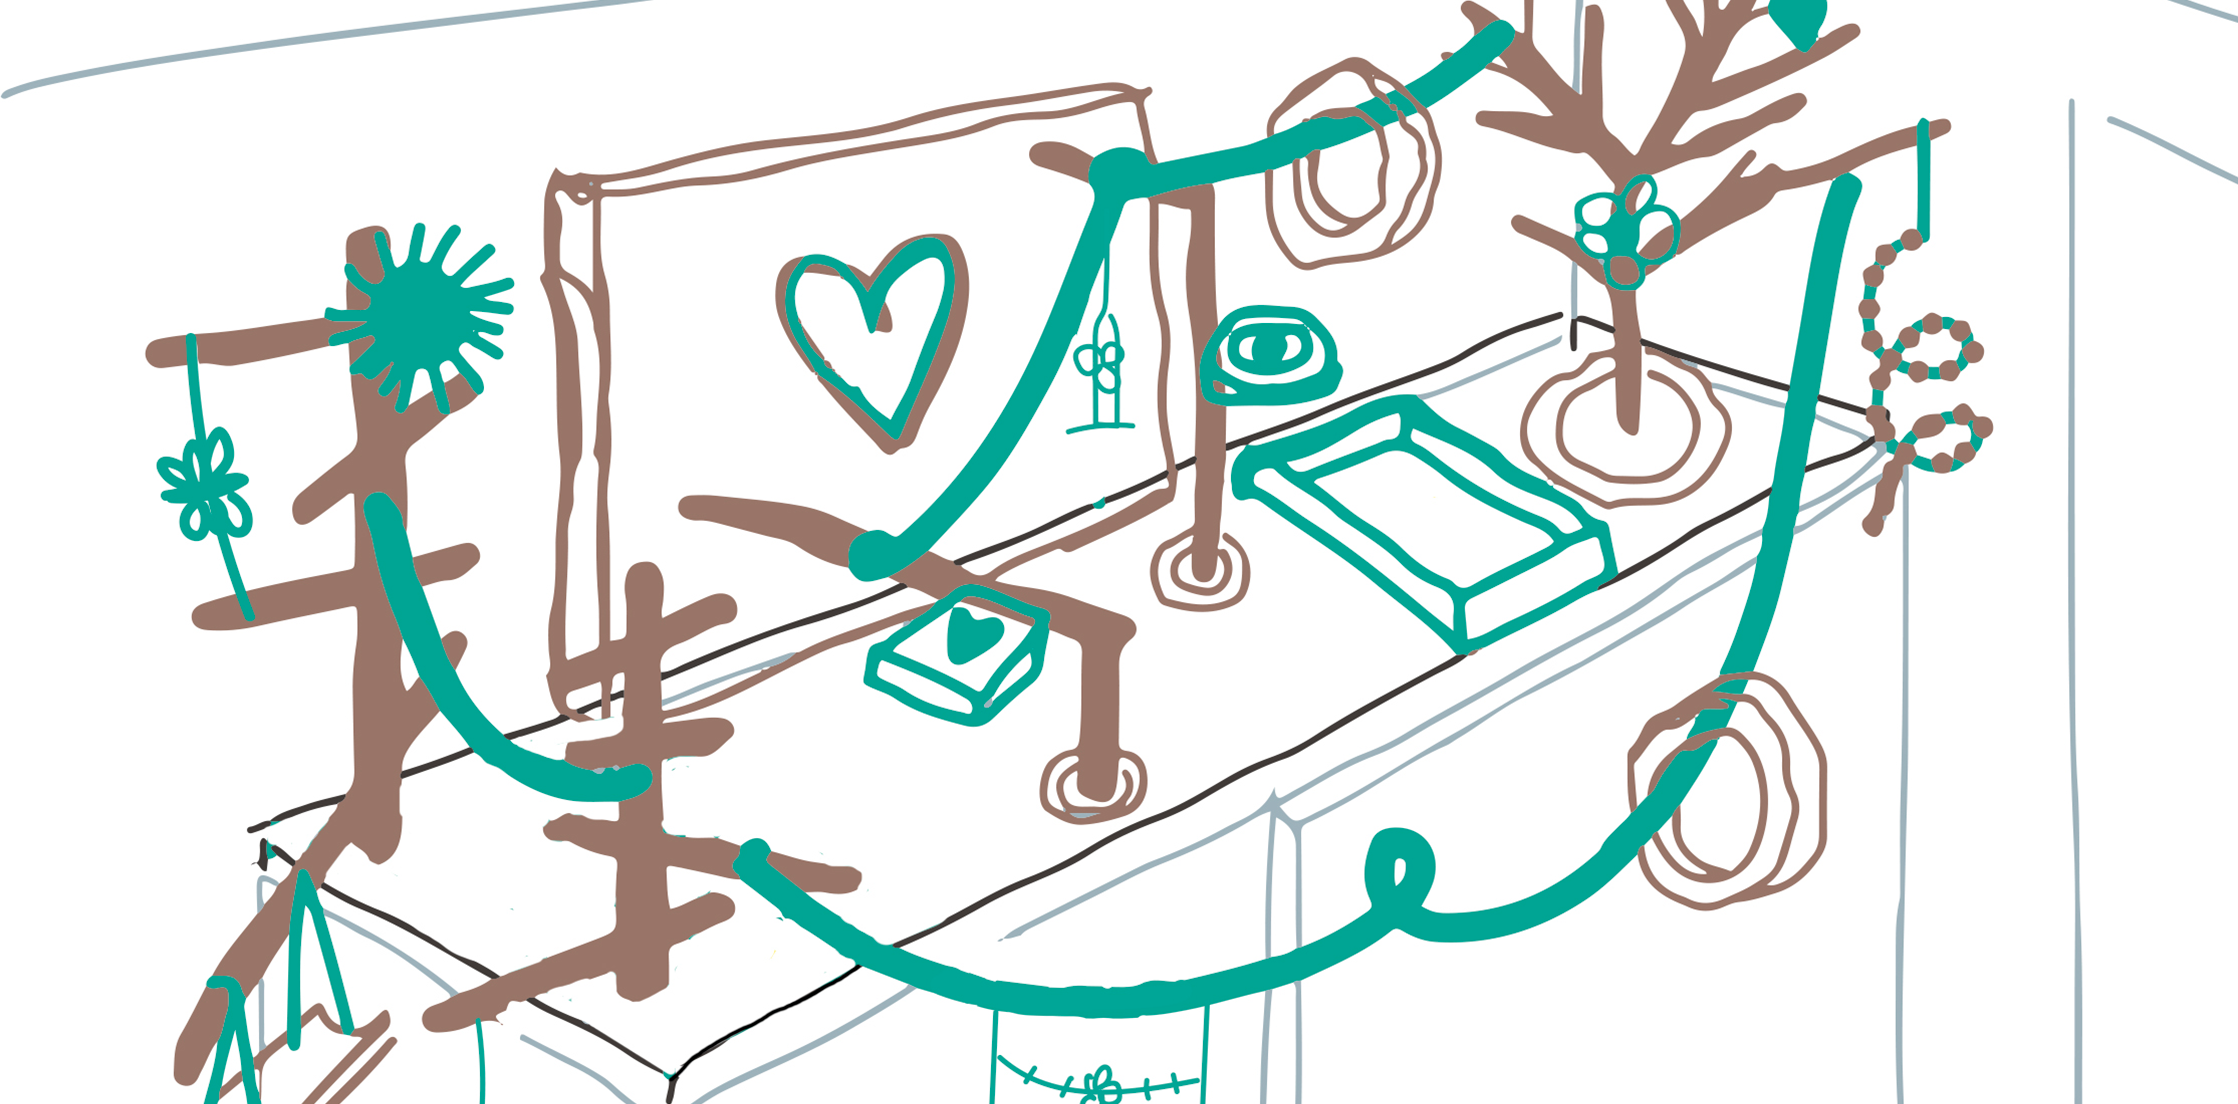
drawing
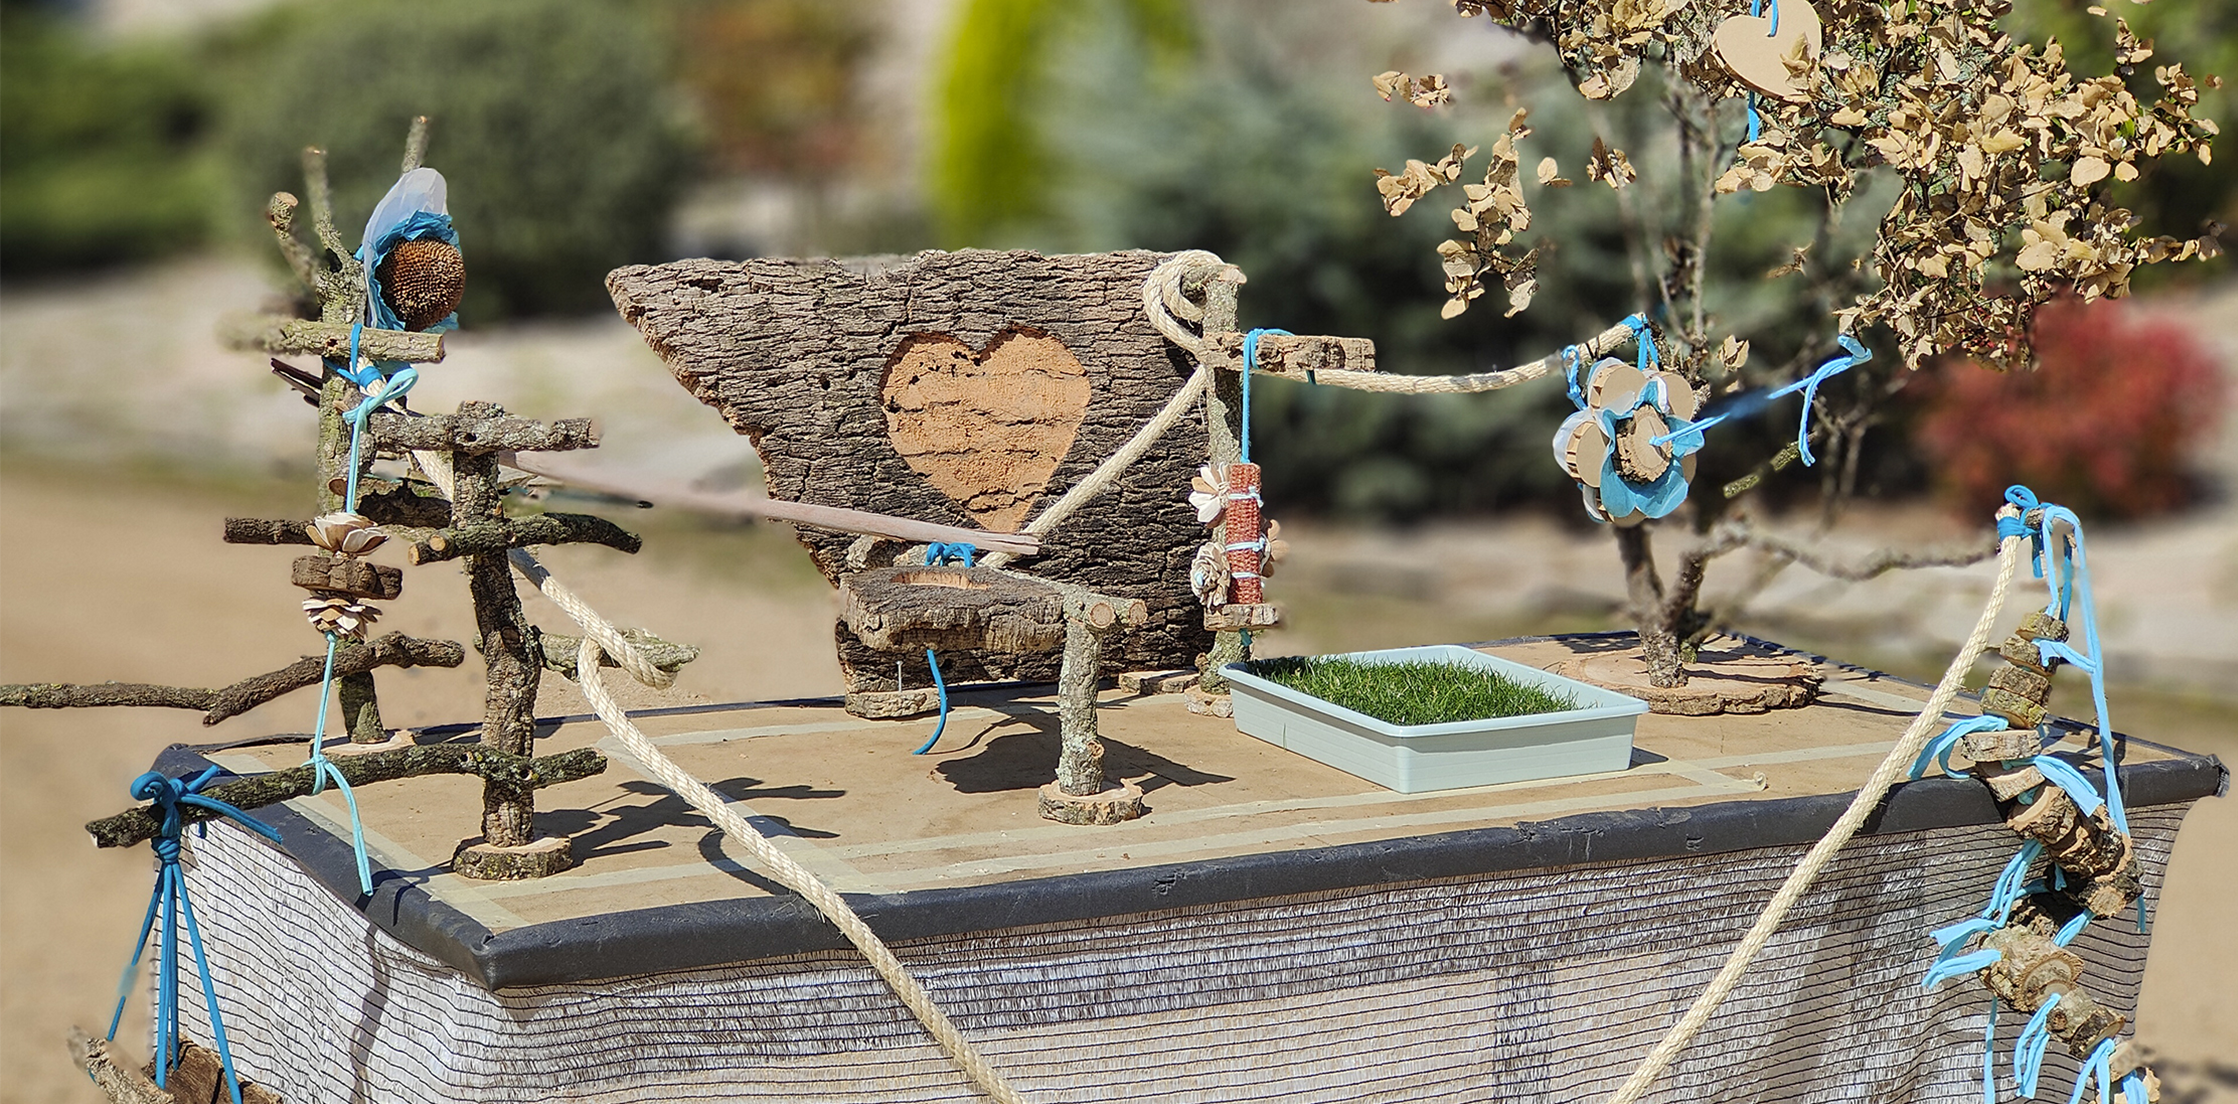
result
Do you dare to do a space design project with us?
The first step is to choose where to do it.


work methodology
These are the steps to achieve your space design. Adaptable to all types of space and species of parrot you have.

Talk to sara
The first and ideal thing is that you tell me beforehand what your idea is. Send me a message on Instagram or by email, we'll talk, tell me a little about what you want and I'll guide you on what type of design you should choose on the website (cage size, type and size of wing, park sizes, etc.) .

pay for the design to get started
Once you have talked and chosen what type of design best suits your needs, the next thing is to buy the design. To do this, place an order with the chosen design, and you will automatically be on Sara's design list.

contact you and questionnaire
Once this is done, I will send you a questionnaire with a wide variety of questions that will be the key to ensuring that the design fits completely with what you want and that your little ones love it (measurements, tastes of each animal, needs).

do the design
With all the information and everything we have talked about and the photos you have sent me, I start making the design with the aim of capturing everything that is in my head and making what you want a reality.
Once finished, I will send it to you by email, and I await your feedback to comment on what you think.

your reaction and budget
When I have the OK, I will make the budget and send it to you (remember that you don't have to take everything, or maybe you don't take anything and do it yourself, you can look for equivalents that fulfill the same function and/or form).

order, payment and manufacturing
If the quote is accepted (or part of it), the order, payment and subsequent manufacturing proceed.

shipping and assembly
Once manufacturing is completed in our workshop, we proceed to package everything with all the necessary packages. We send it to you, and you assemble it at home with the step-by-step design manual.

Sara excitedly waits for the result
To finish, we talk, we comment on how it turned out, how your little ones have accepted it, you send me photos and everyone is happy :)
We show you an example of a complete process of a
space design | little park
Applicable and adaptable to all types of space and for all species of parrots.

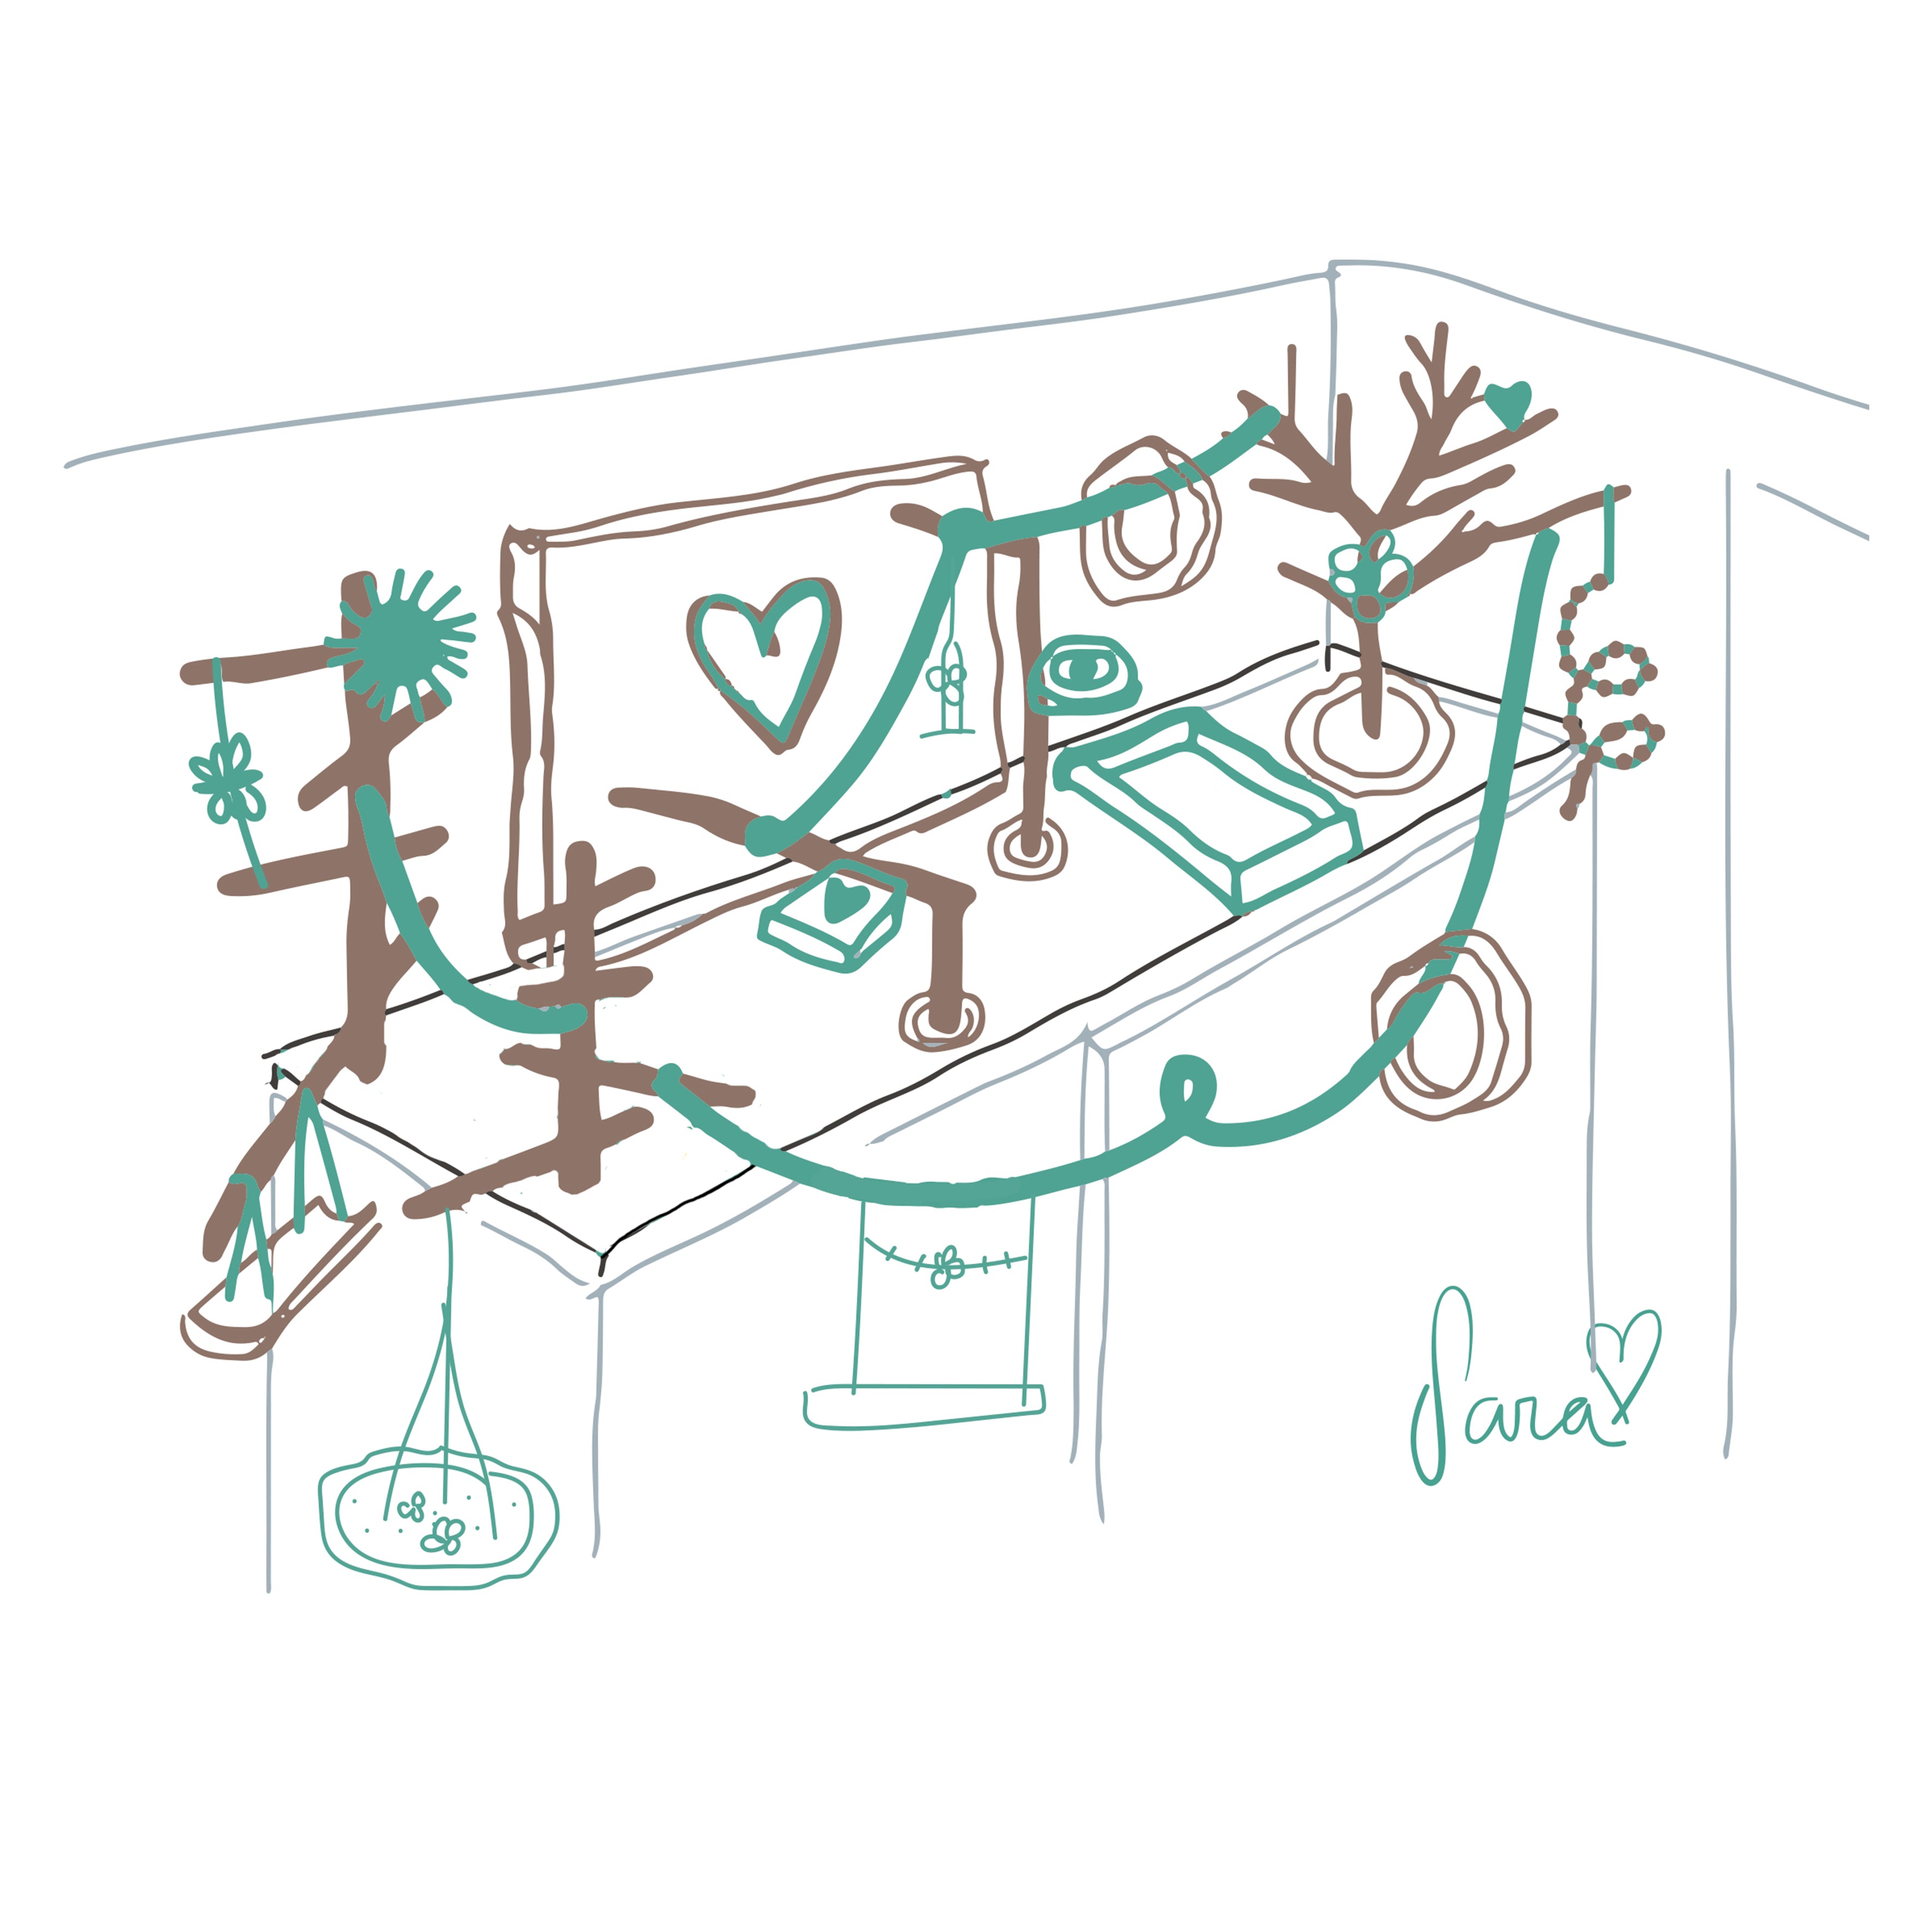
proposal

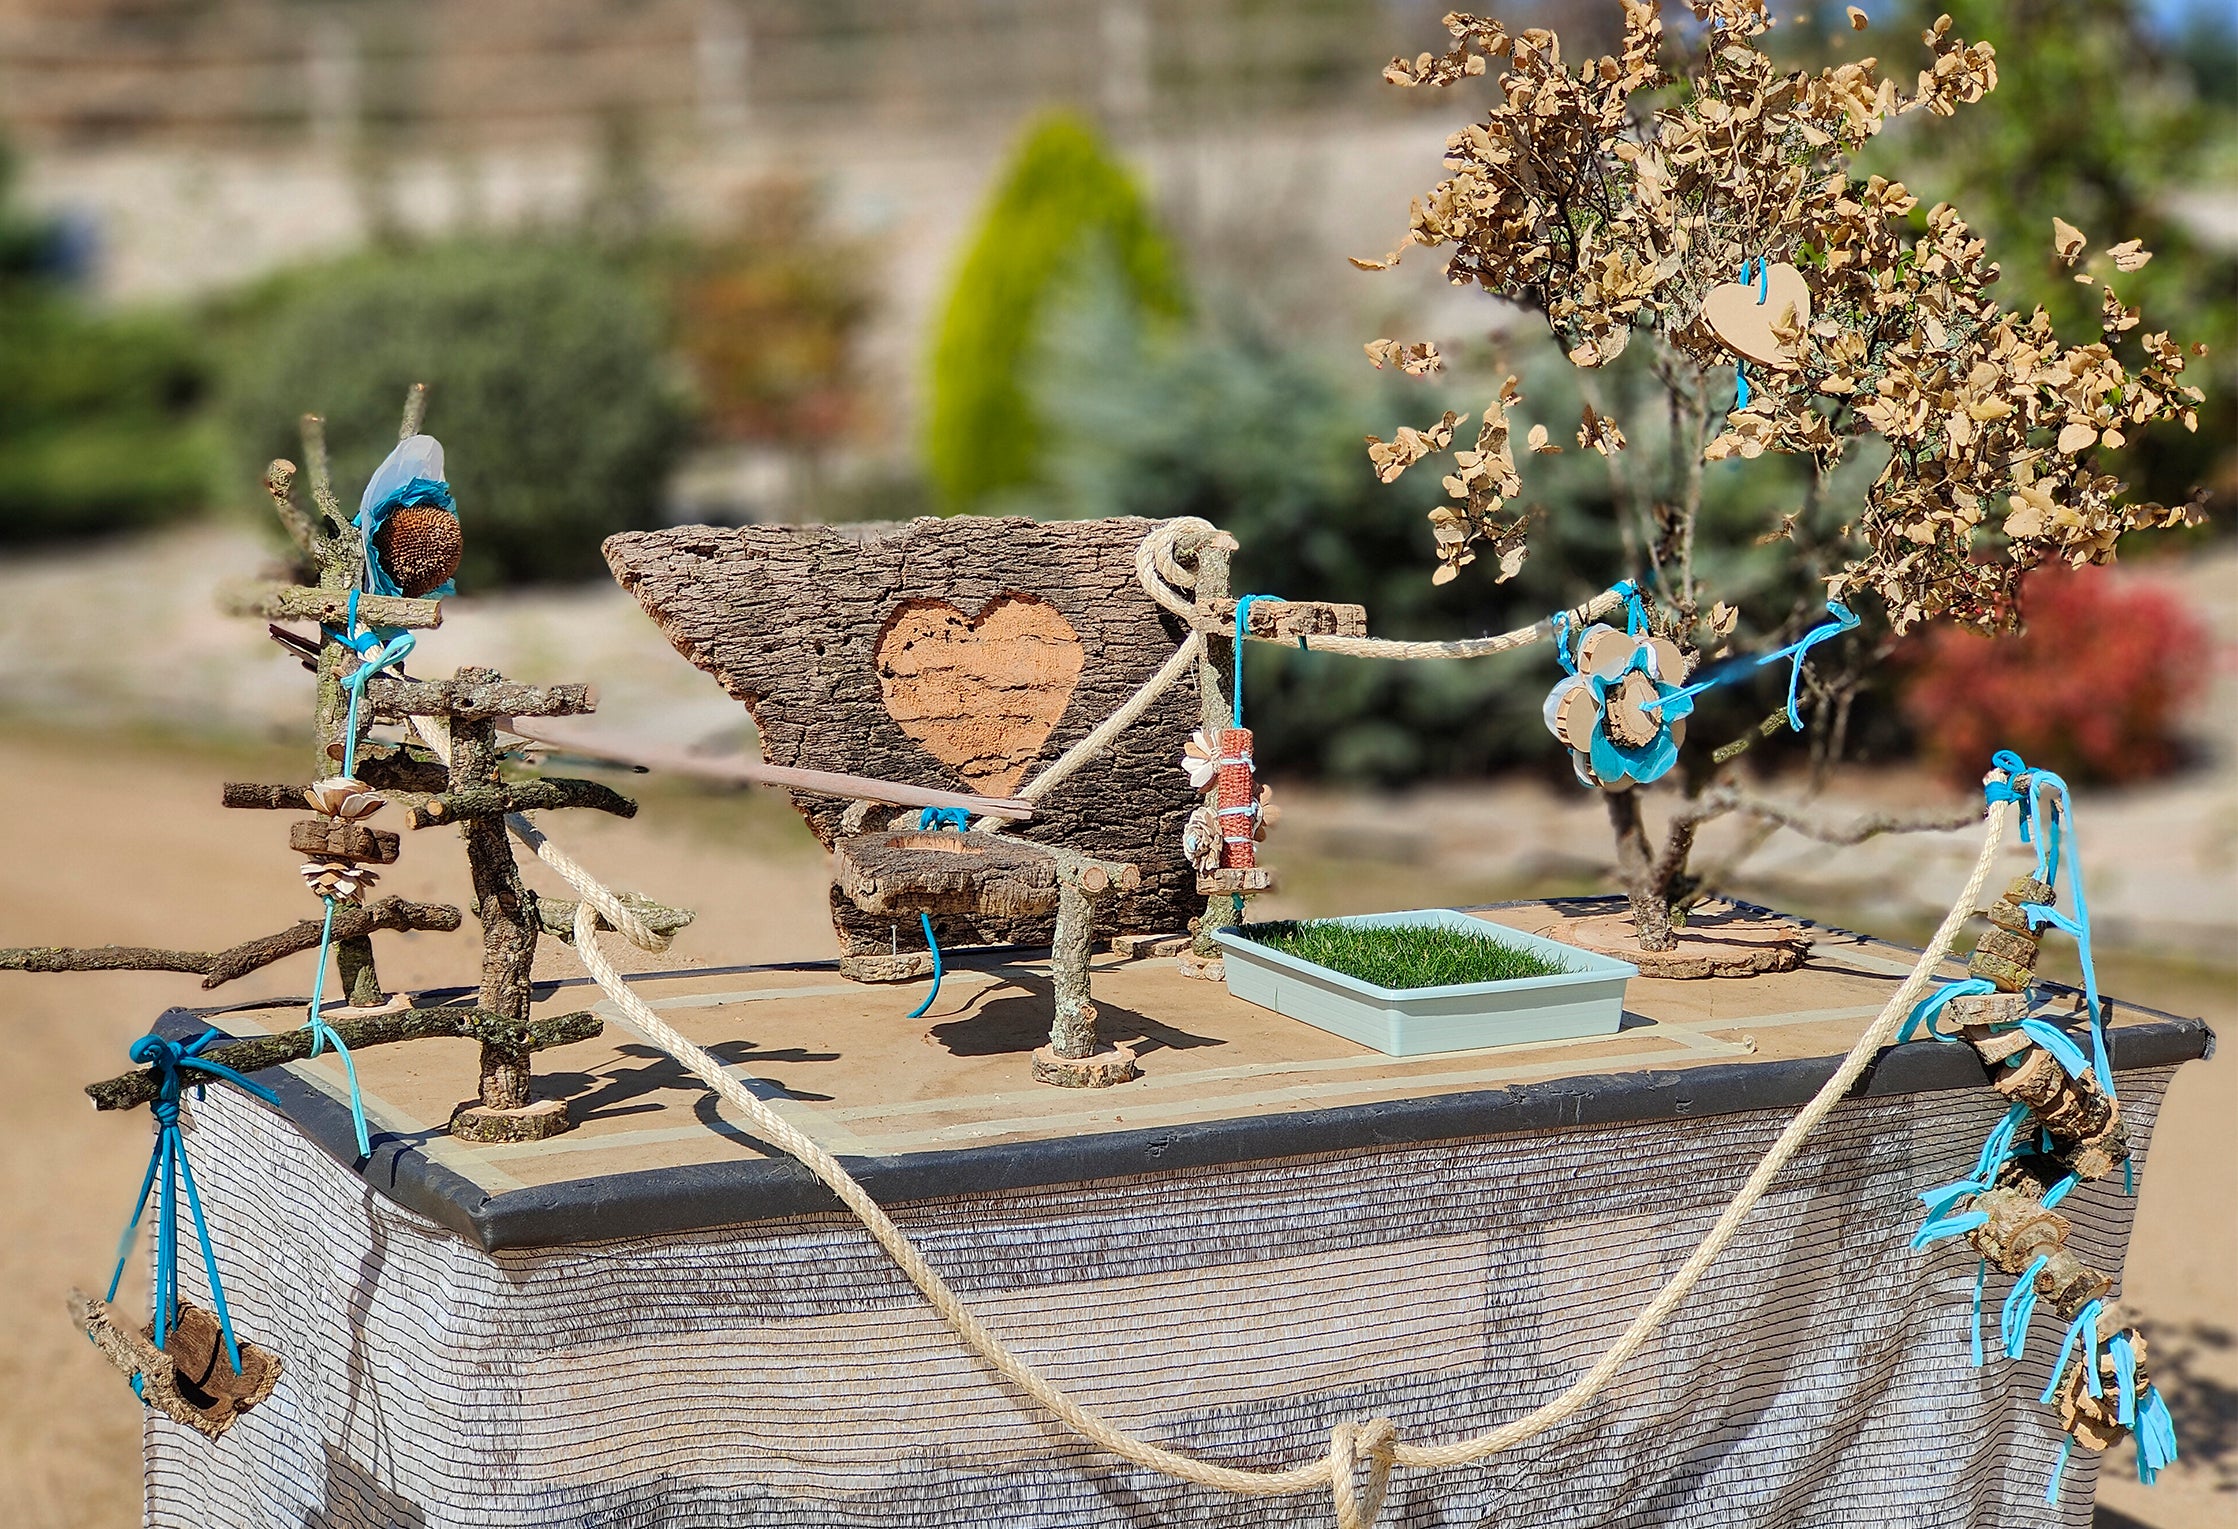
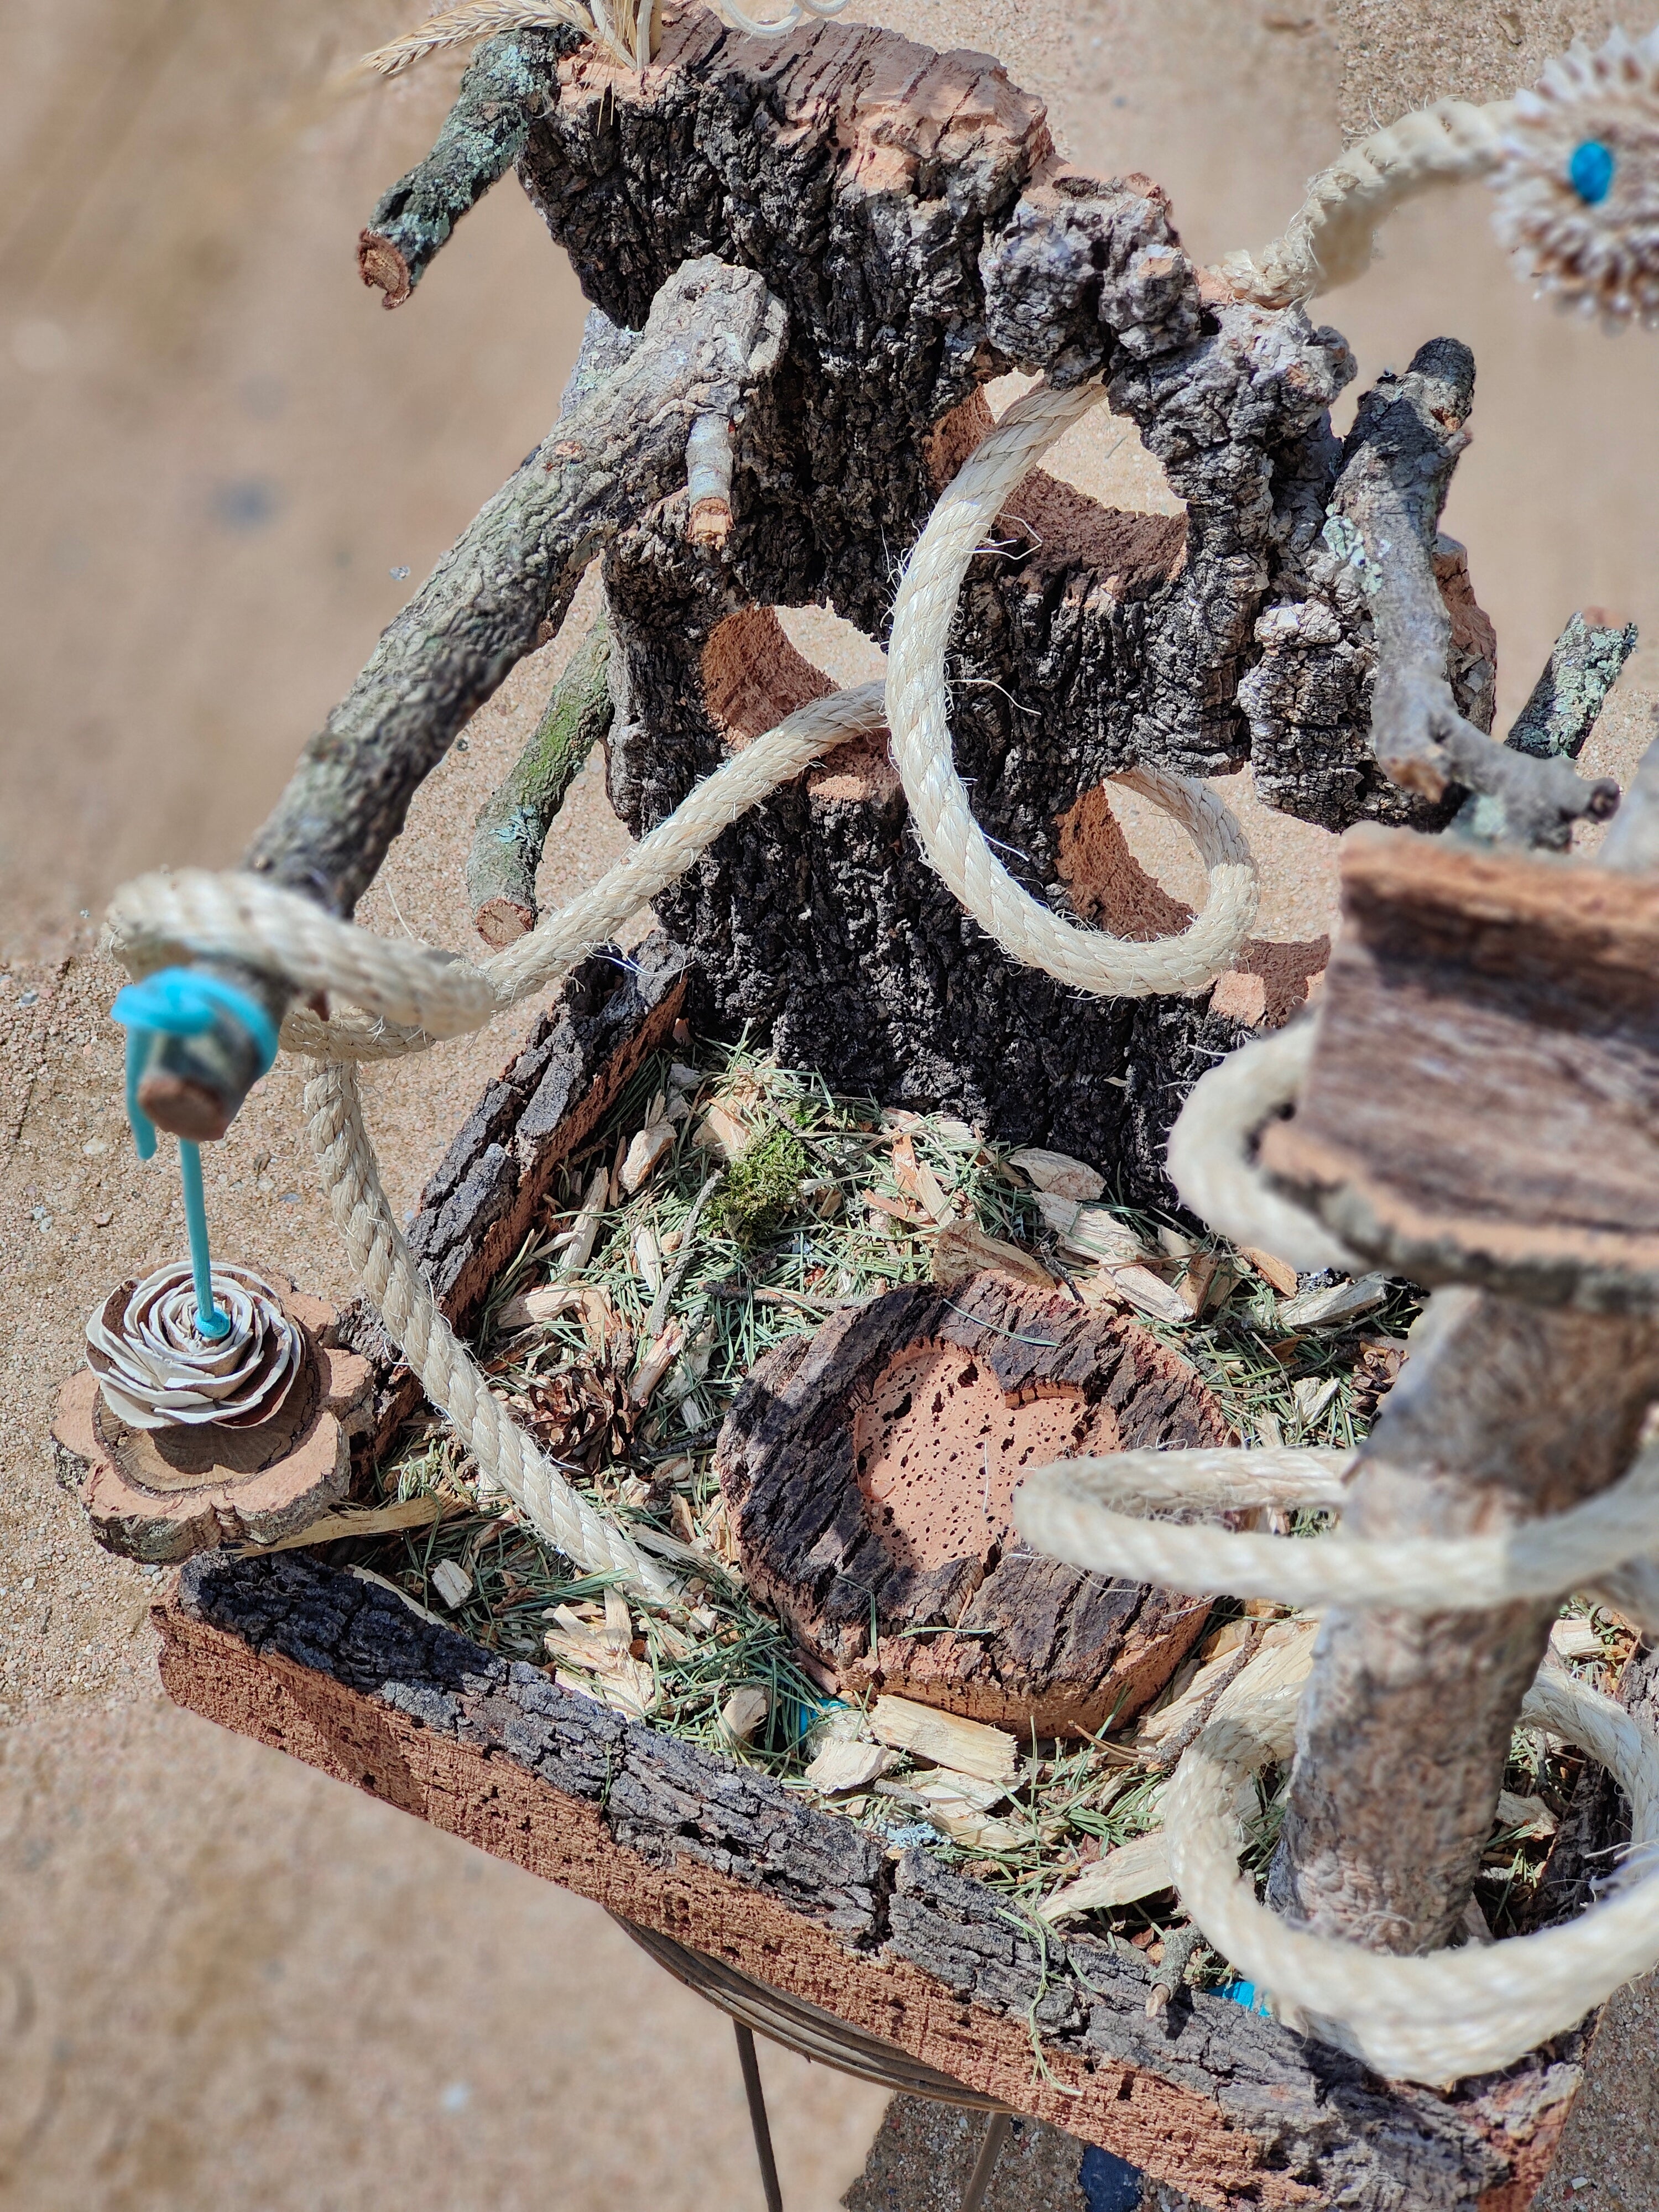
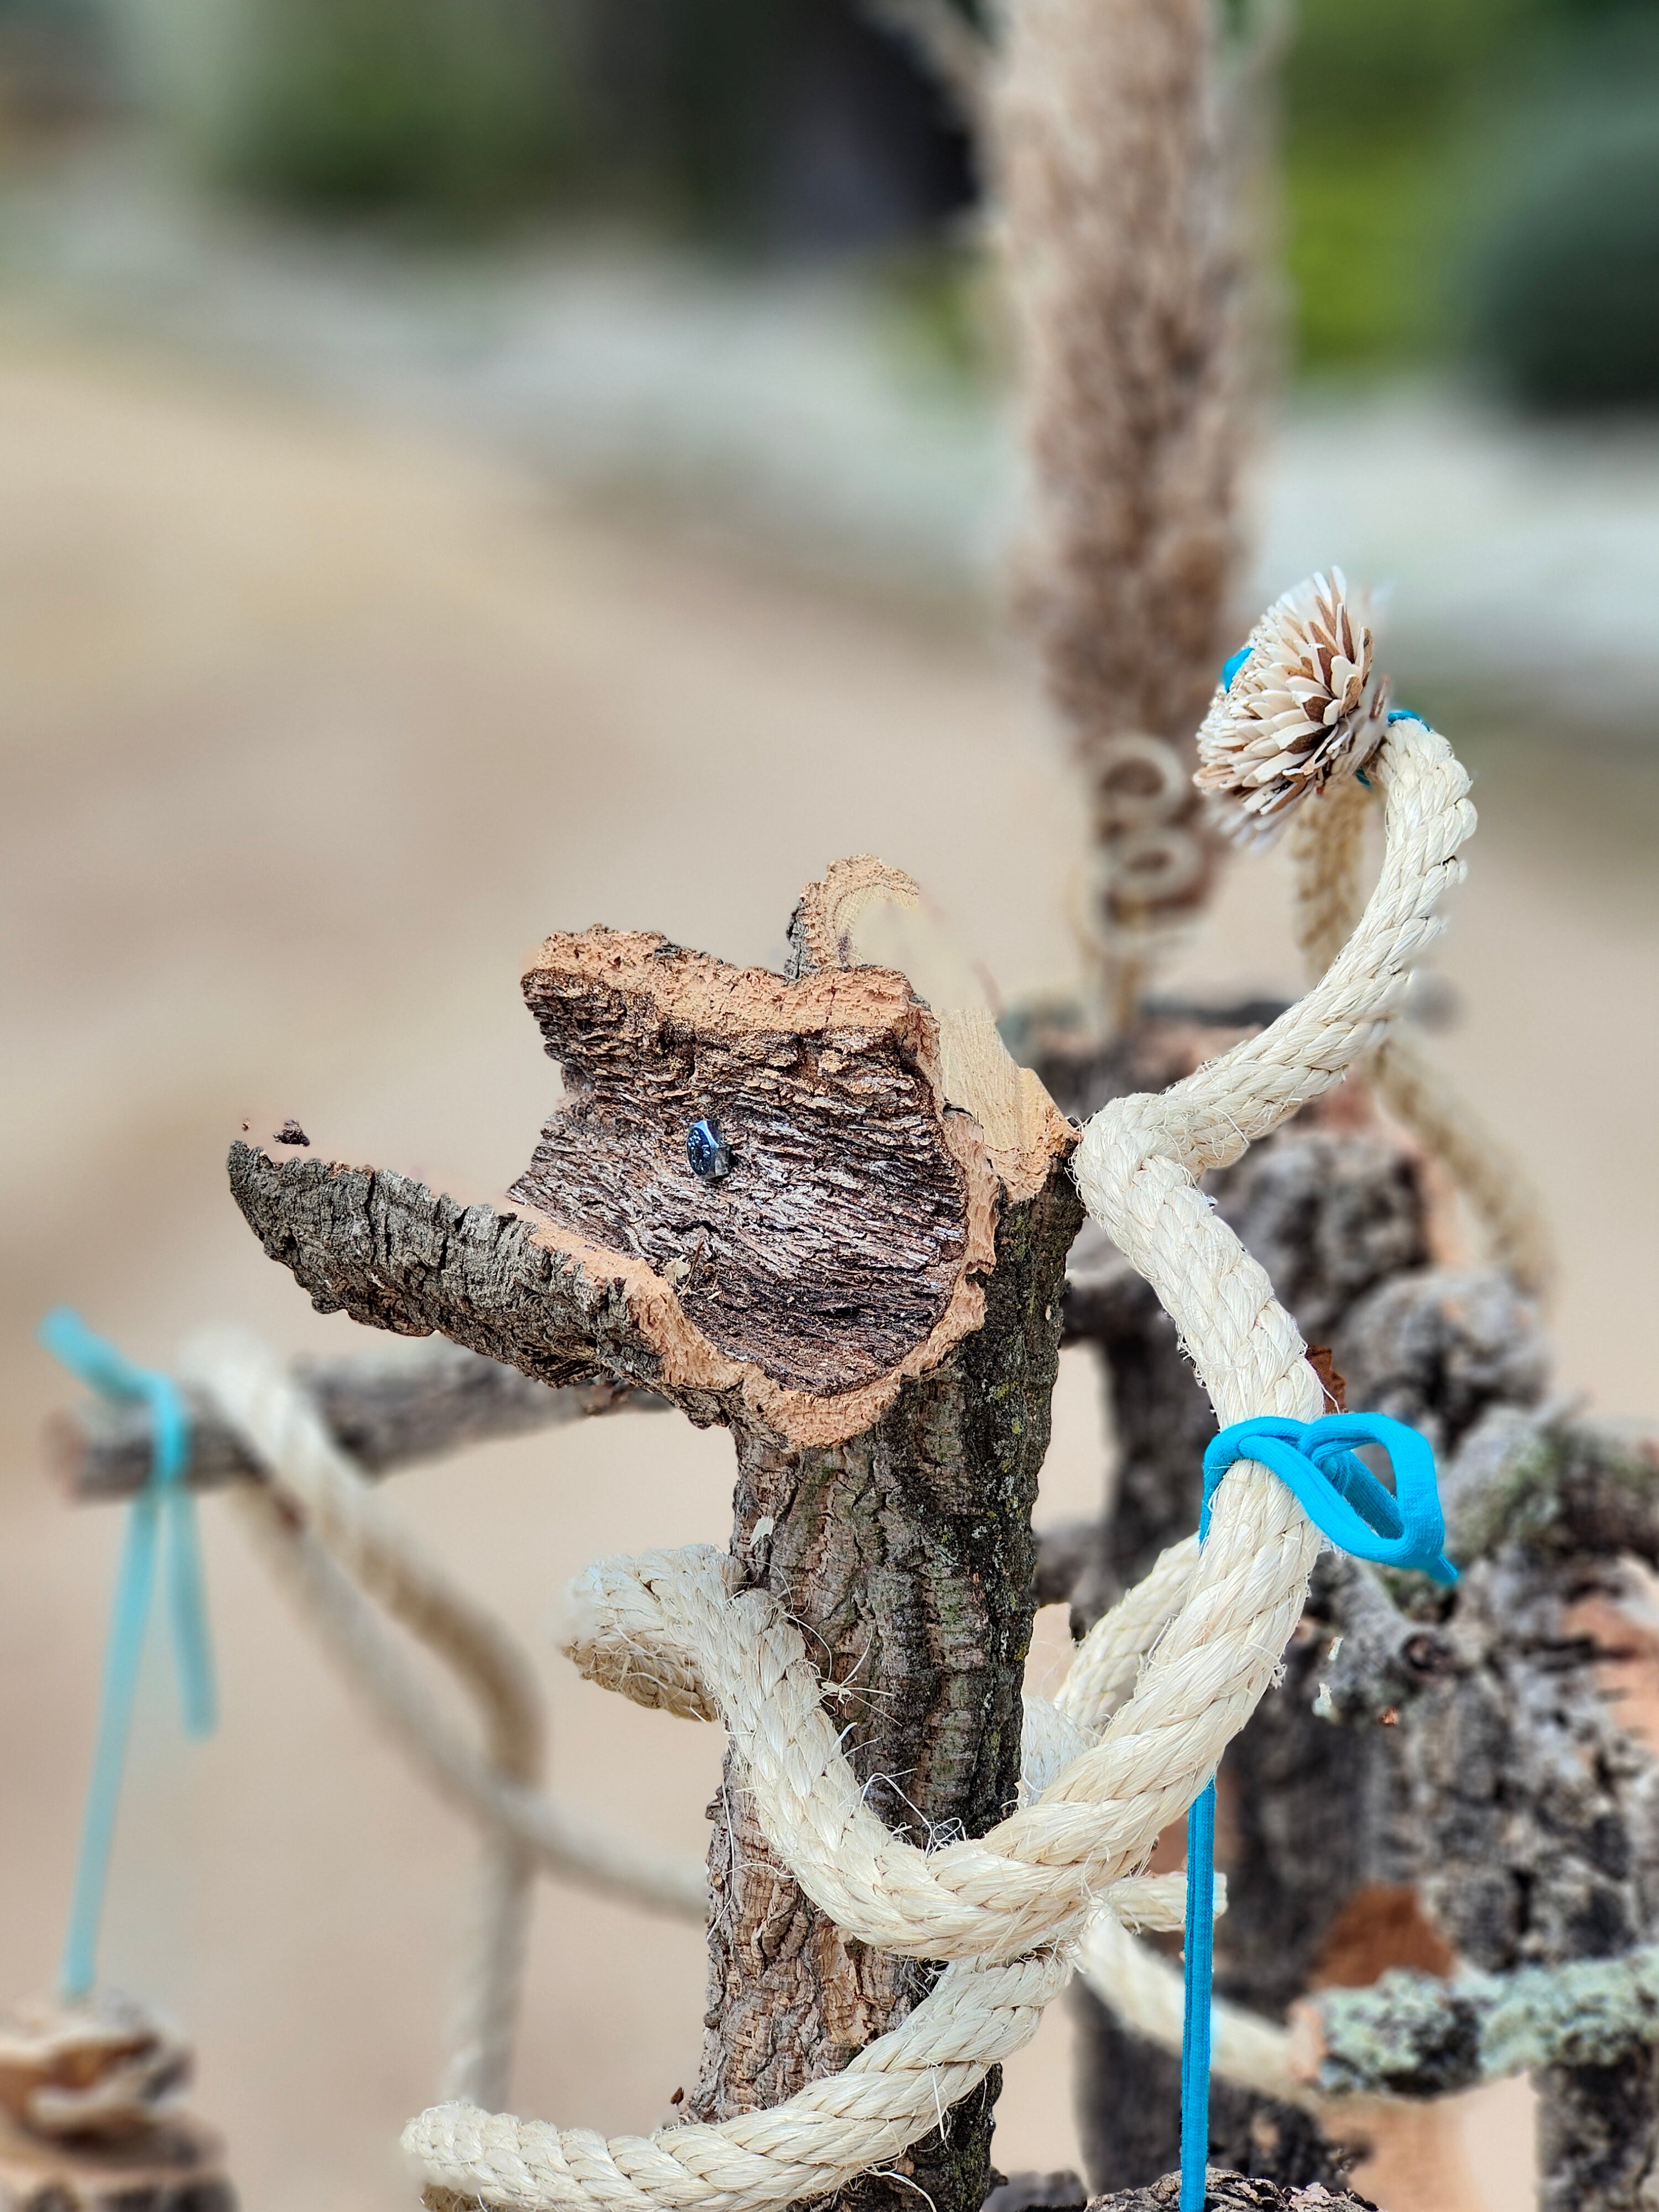
result and assembly in our workshop before being shipped
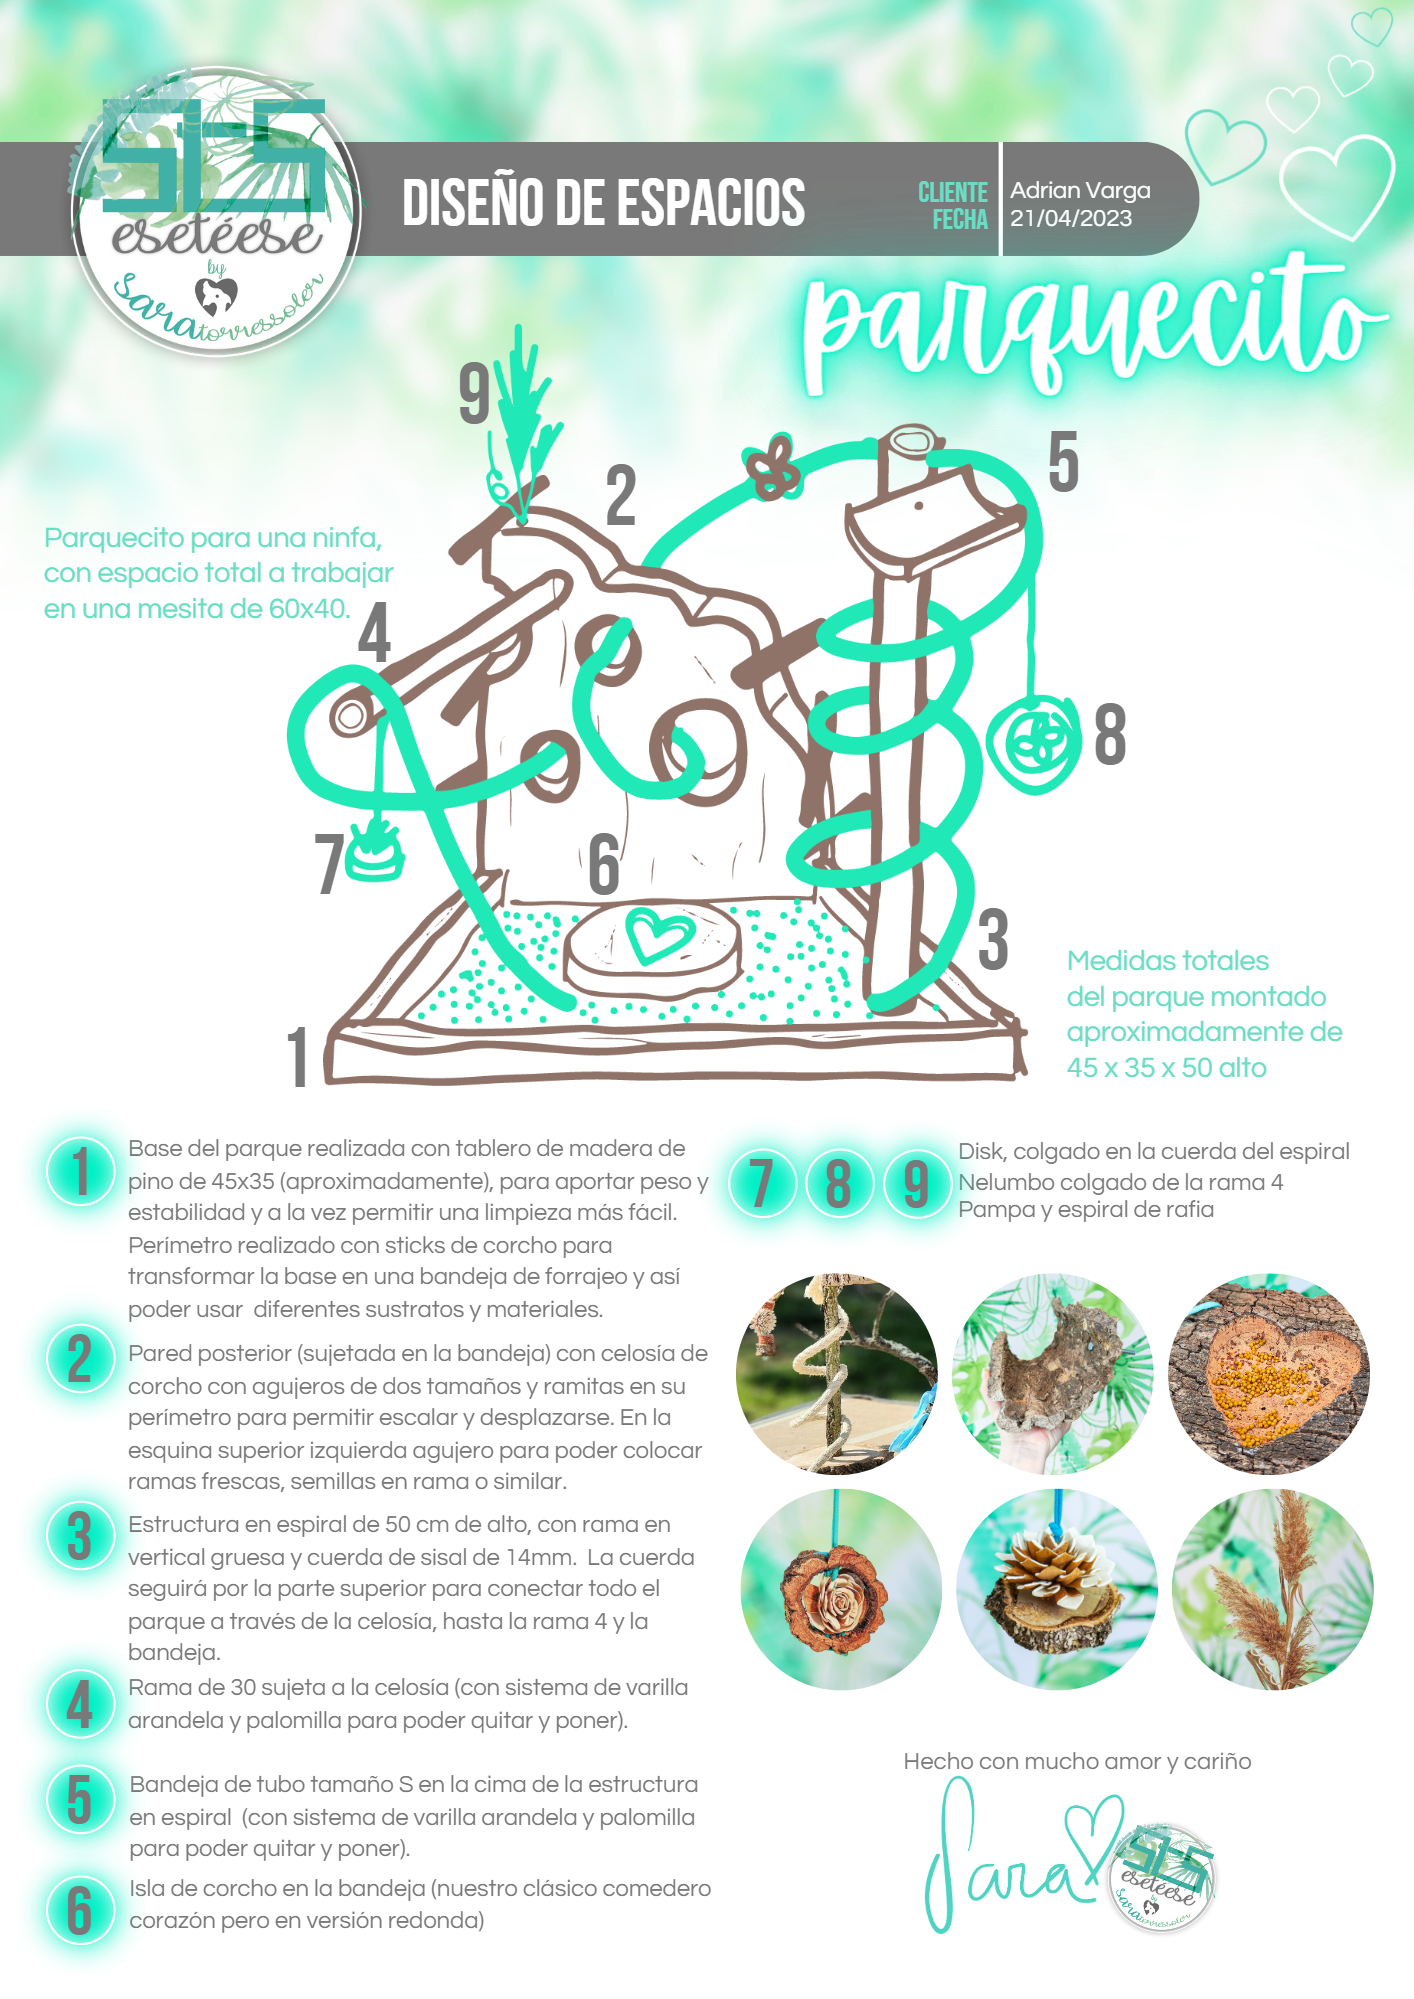
project presentation
happy customers
We show you an example of a PDF presentation
SPACES DESIGN | INTERIOR FLYER
This is how we present the projects.
The presentation is a PDF that is sent by email and becomes your complete property. As if it were an assembly manual , everything in detail, step by step, so that you can assemble (yourself, or someone for you such as a carpenter) and achieve the result that is in the drawing.
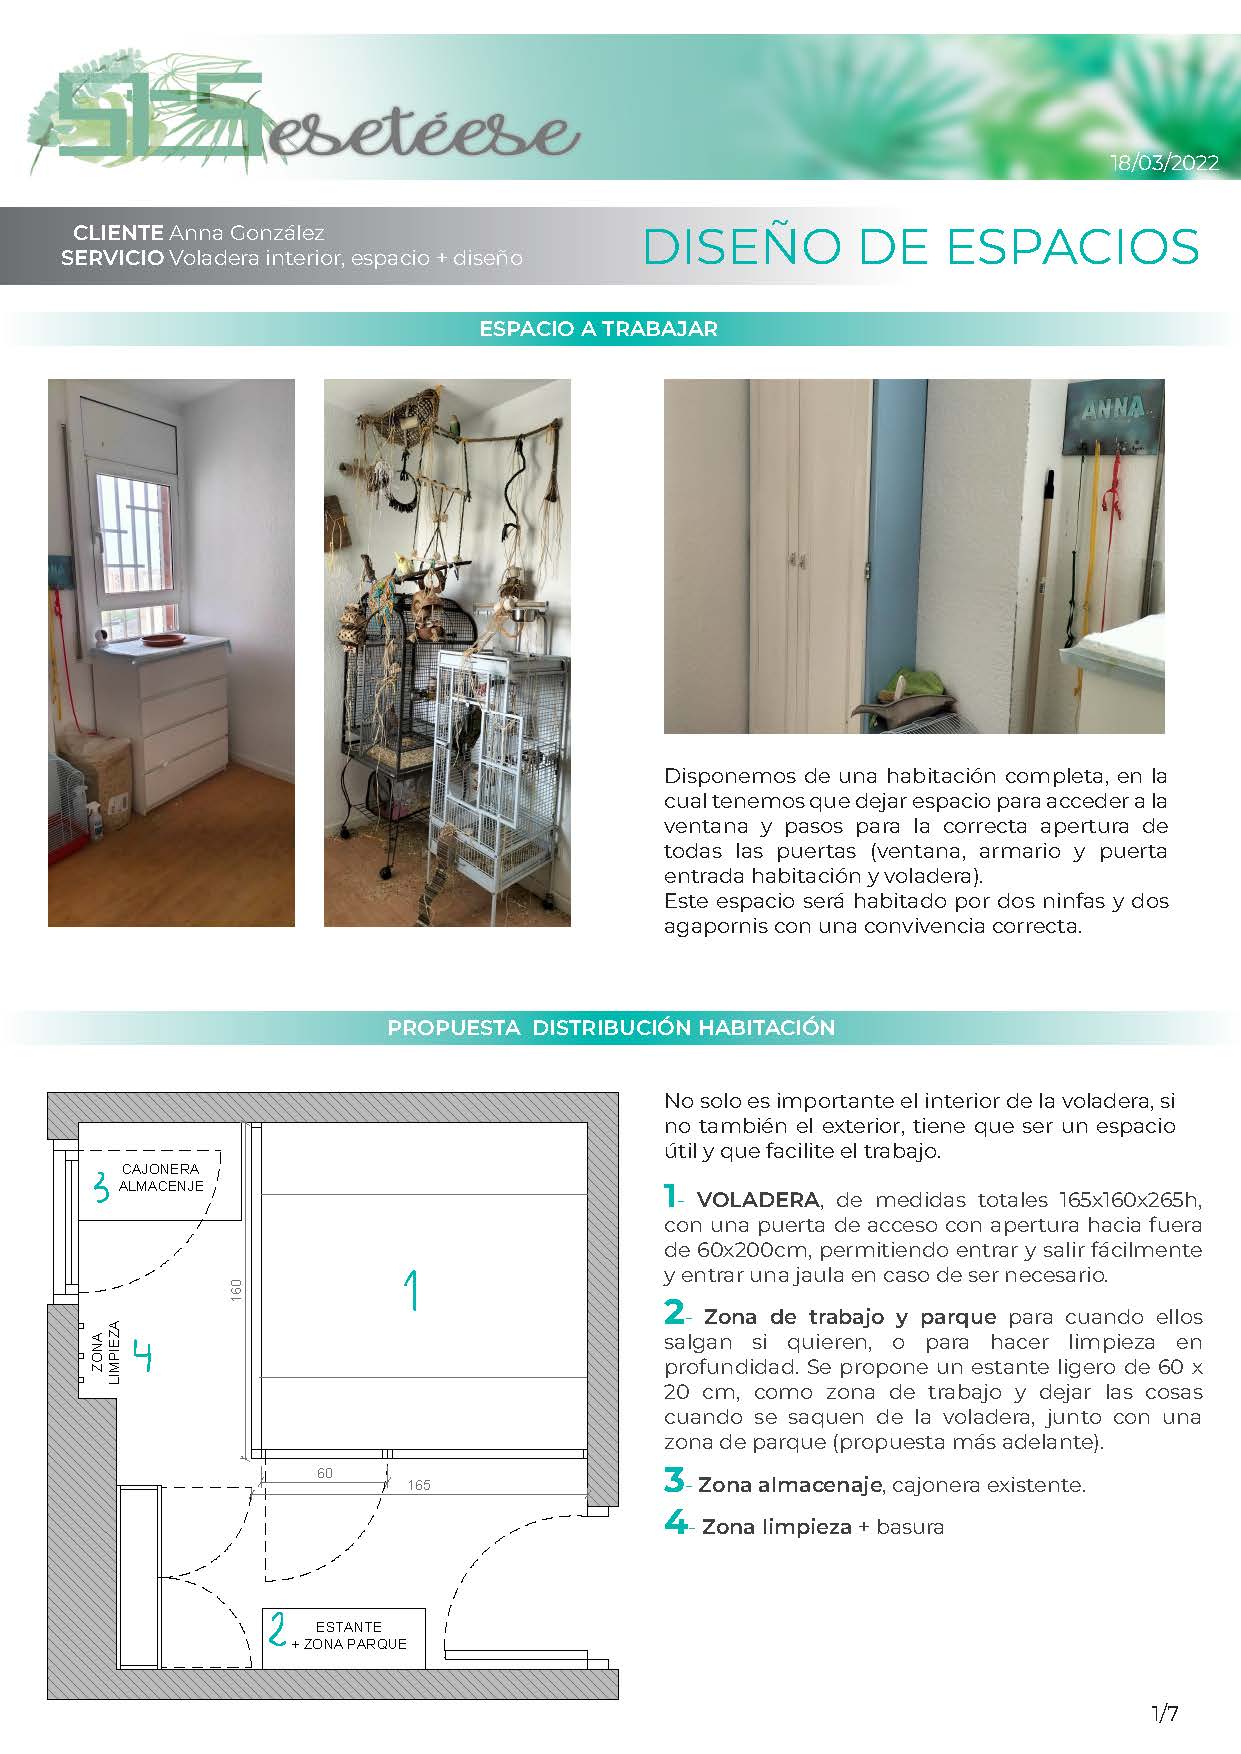
space analysis
The first step is to analyze the space we have, whether it is an interior or exterior overhang. Possible obstacles (windows, doors, walls, objects that cannot be moved). And once we have everything clear through a technical plan, we begin to distribute according to the conversation with the client and the questionnaire in step 3 ( see work methodology above ).
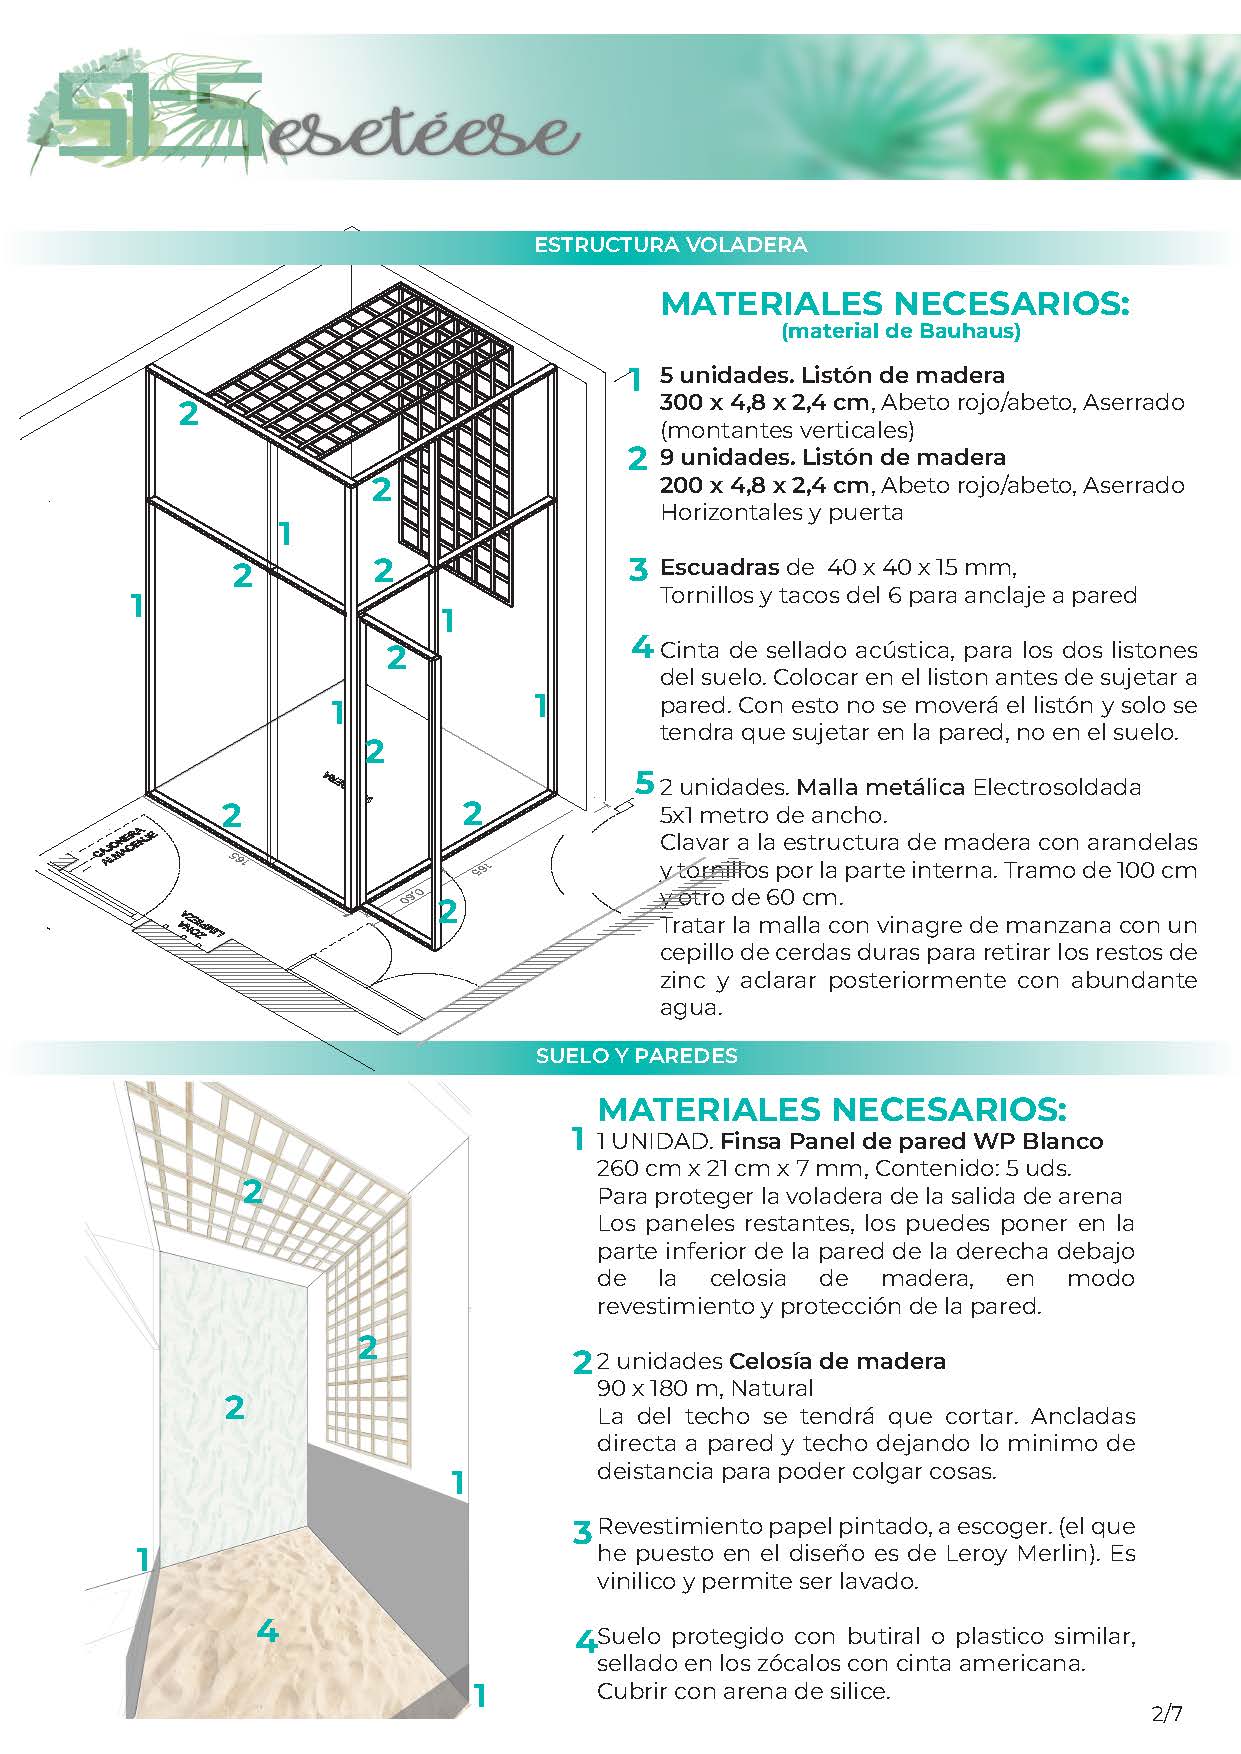
cantilever structure, walls and floor
With a 3D drawing, it is indicated down to the smallest detail how the structure has to be assembled, and at the same time all the material necessary to do so (wood and hardware).
On the other hand, a proposal is made for wall coverings (panels, lattices, wallpaper) and also pavement (sand, grass, etc.)
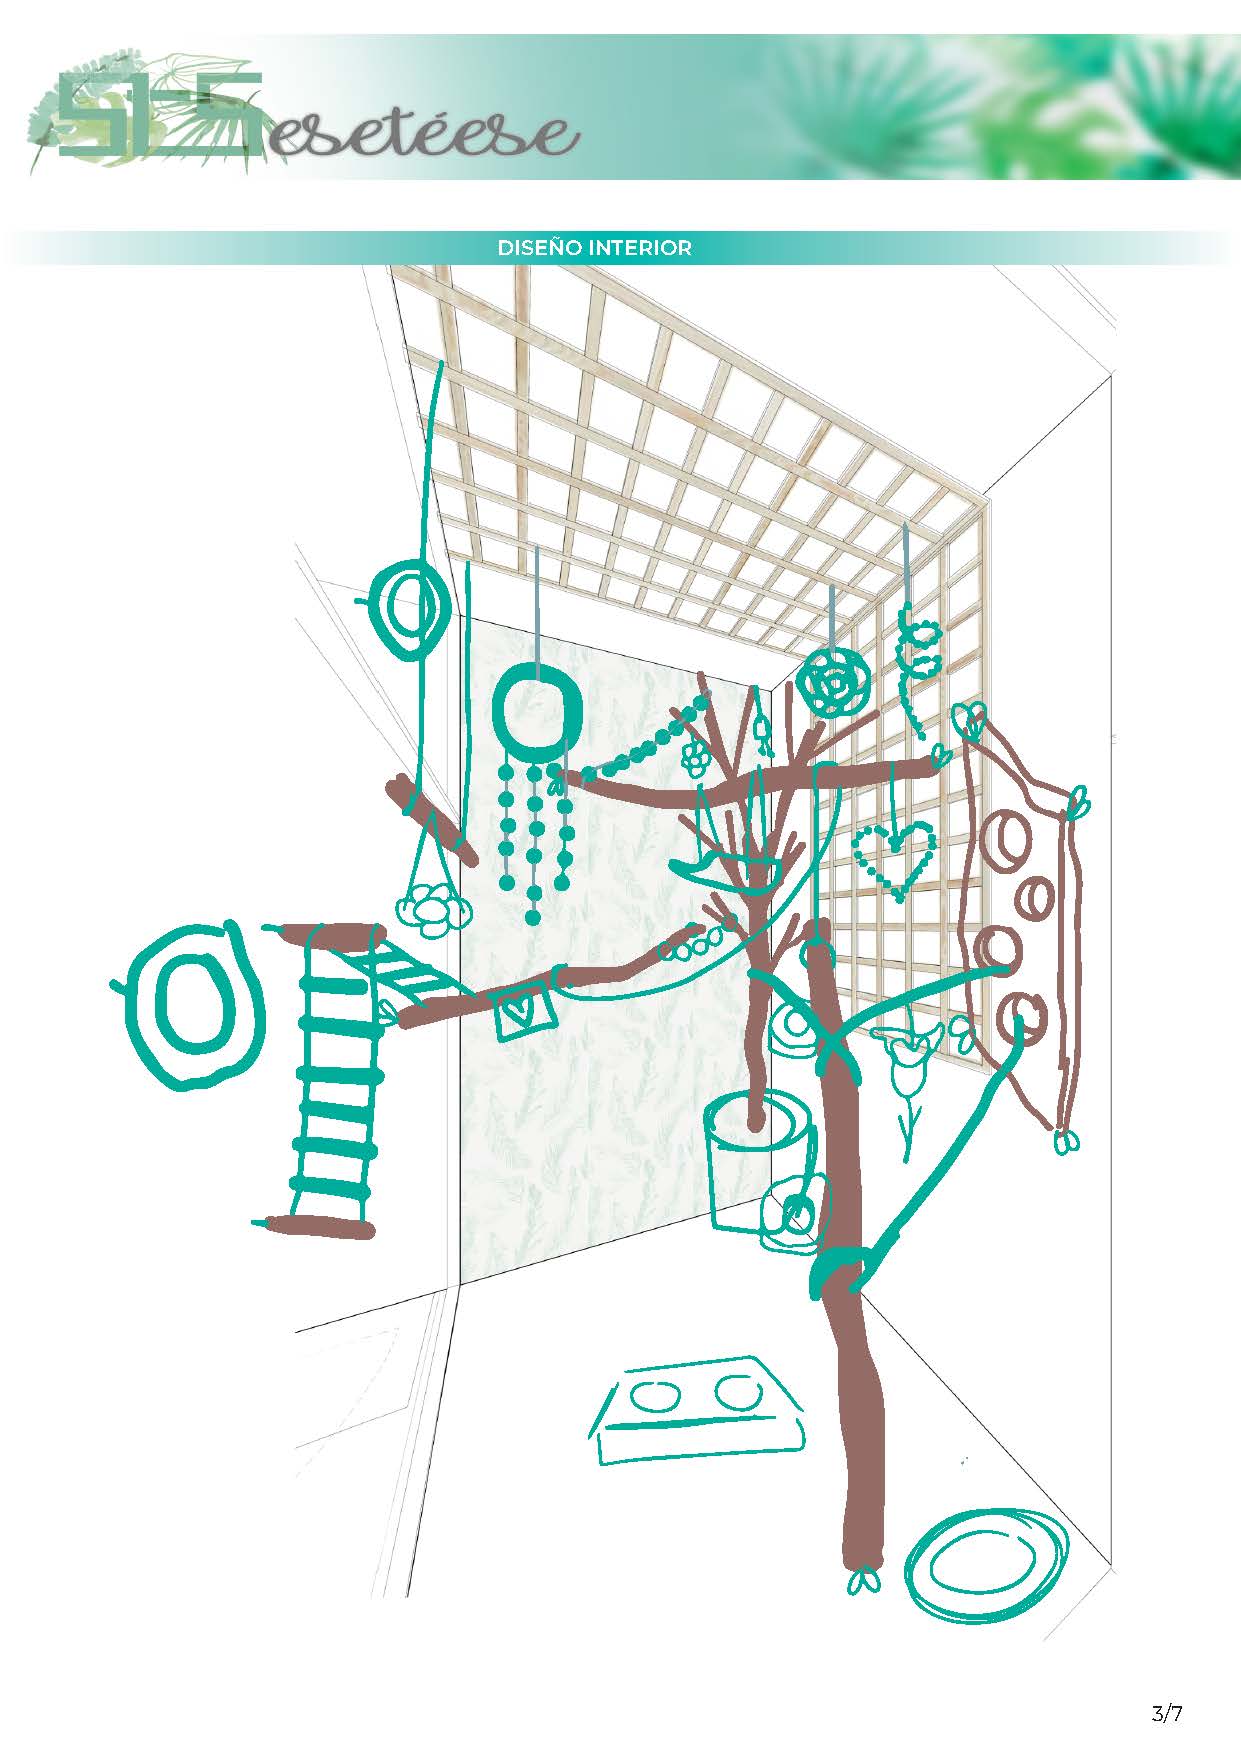
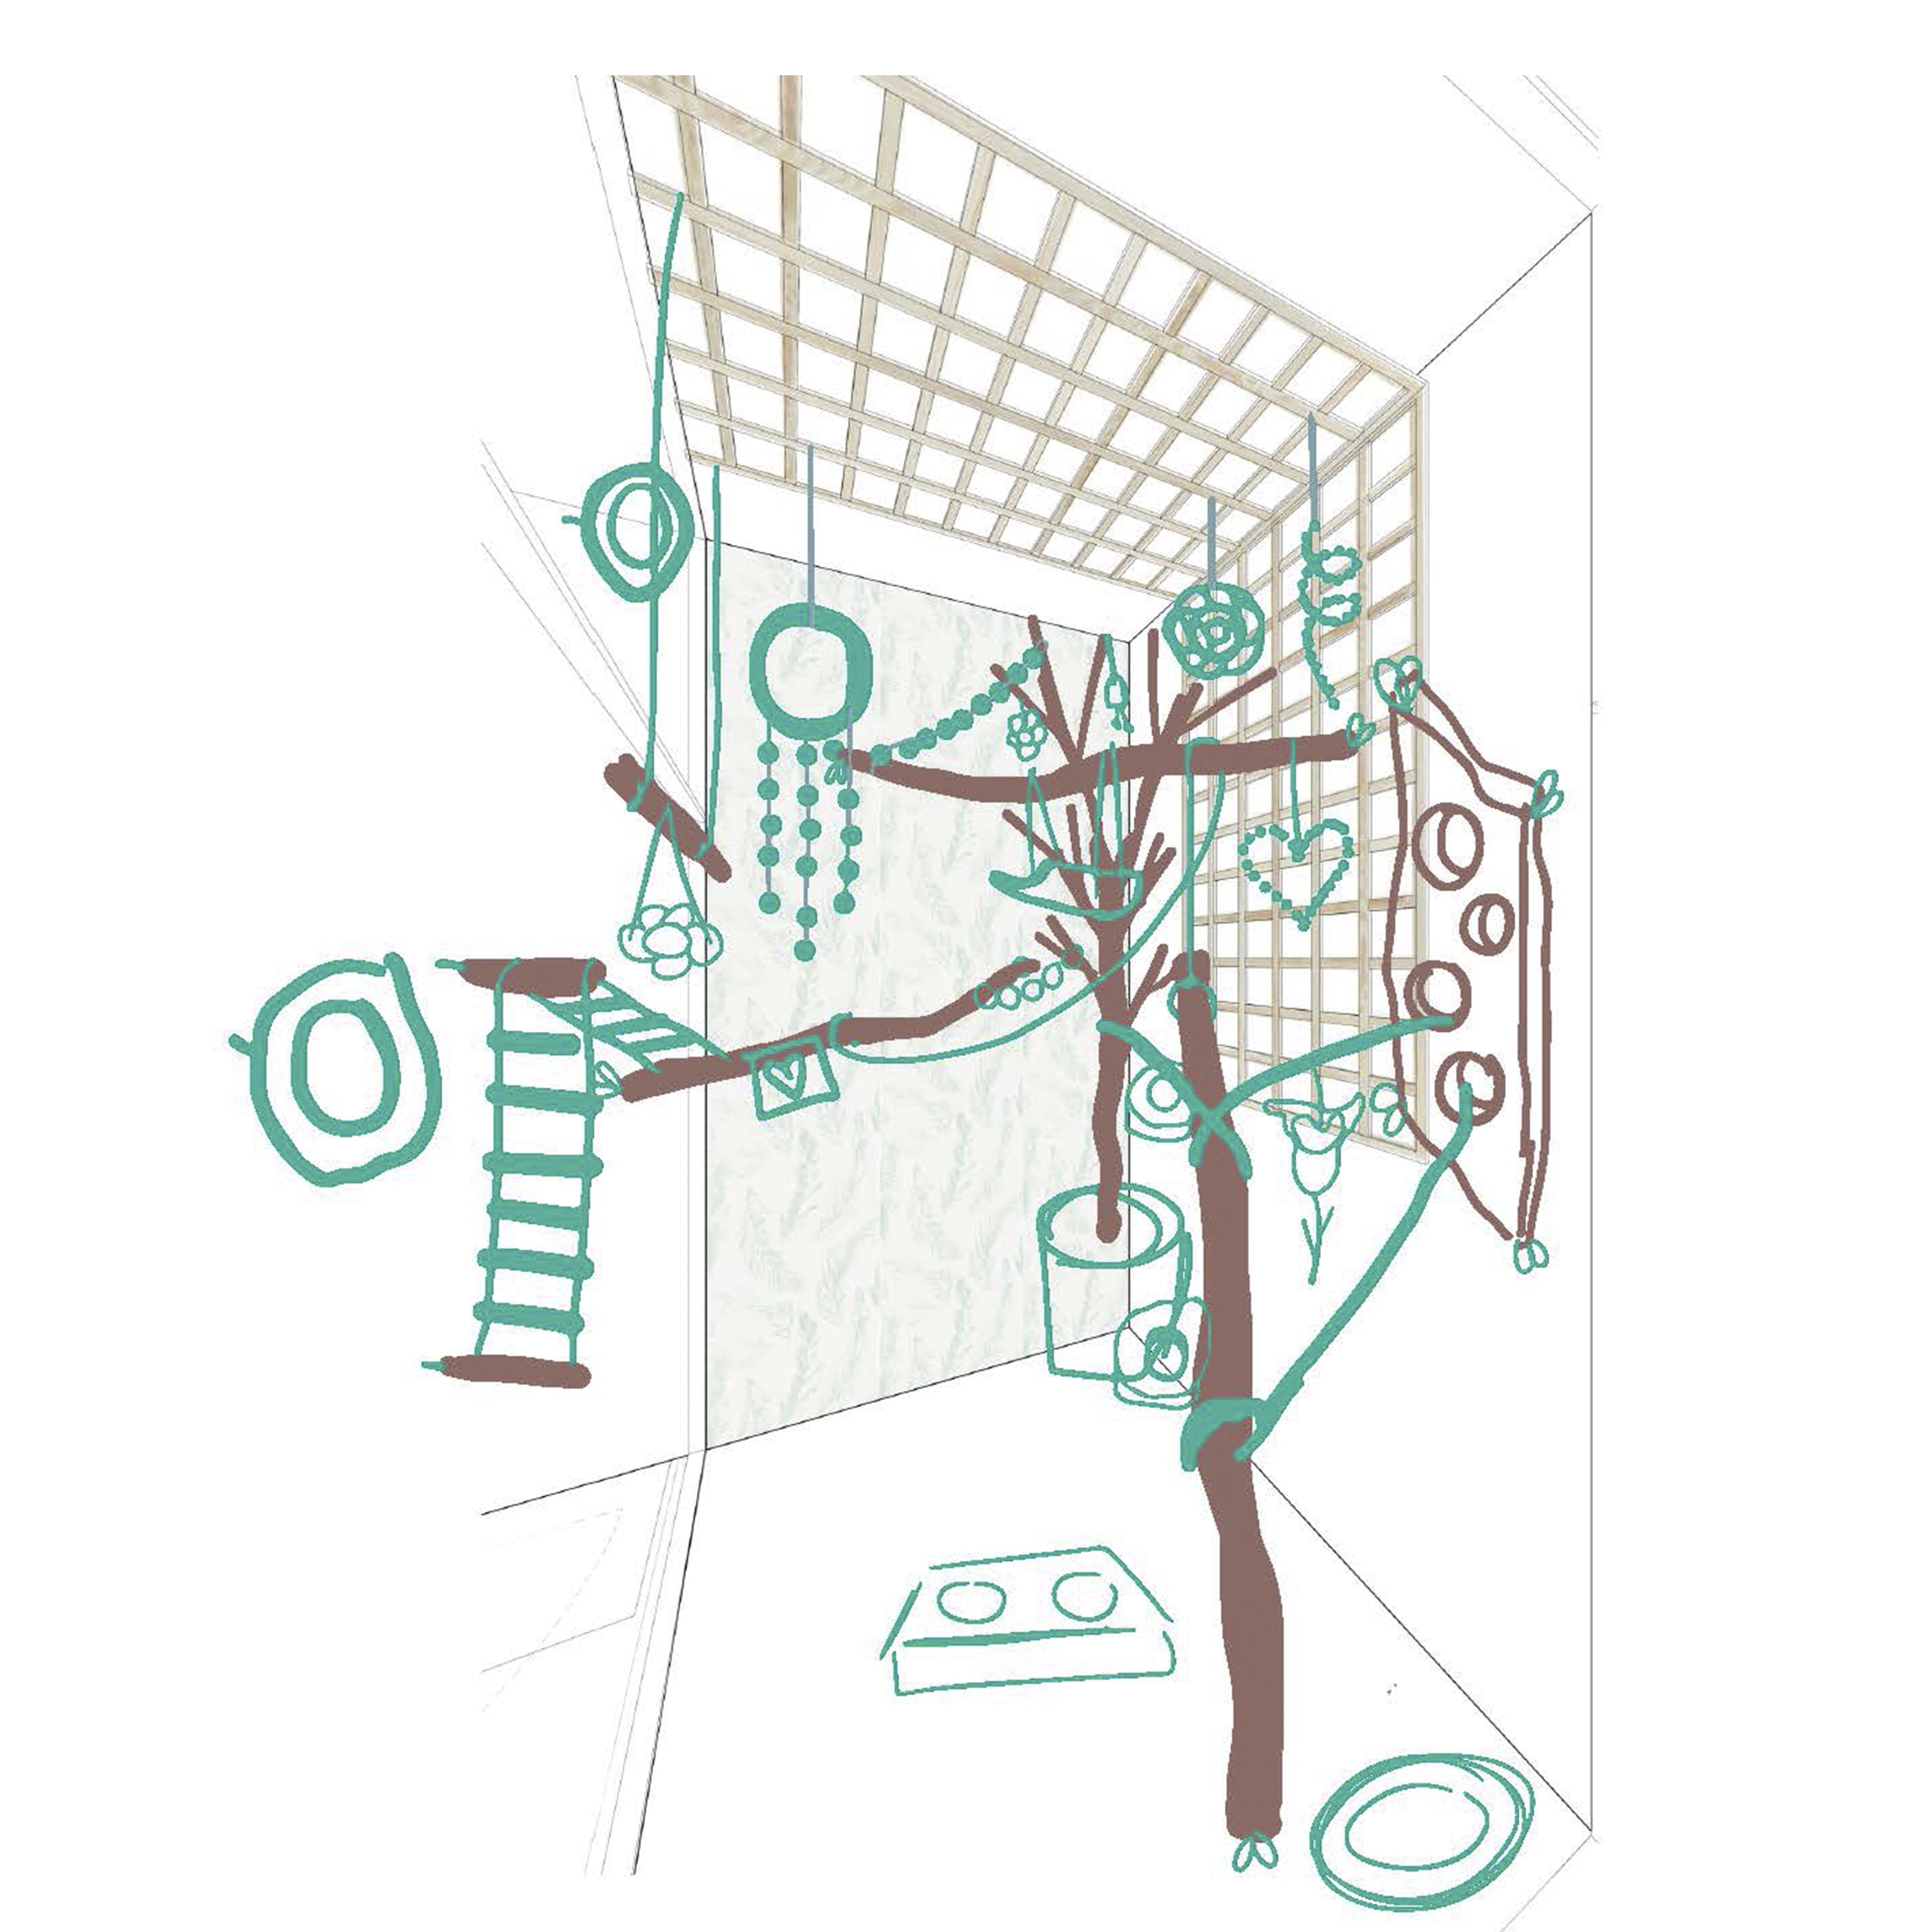
INTERIOR DESIGN RESULT
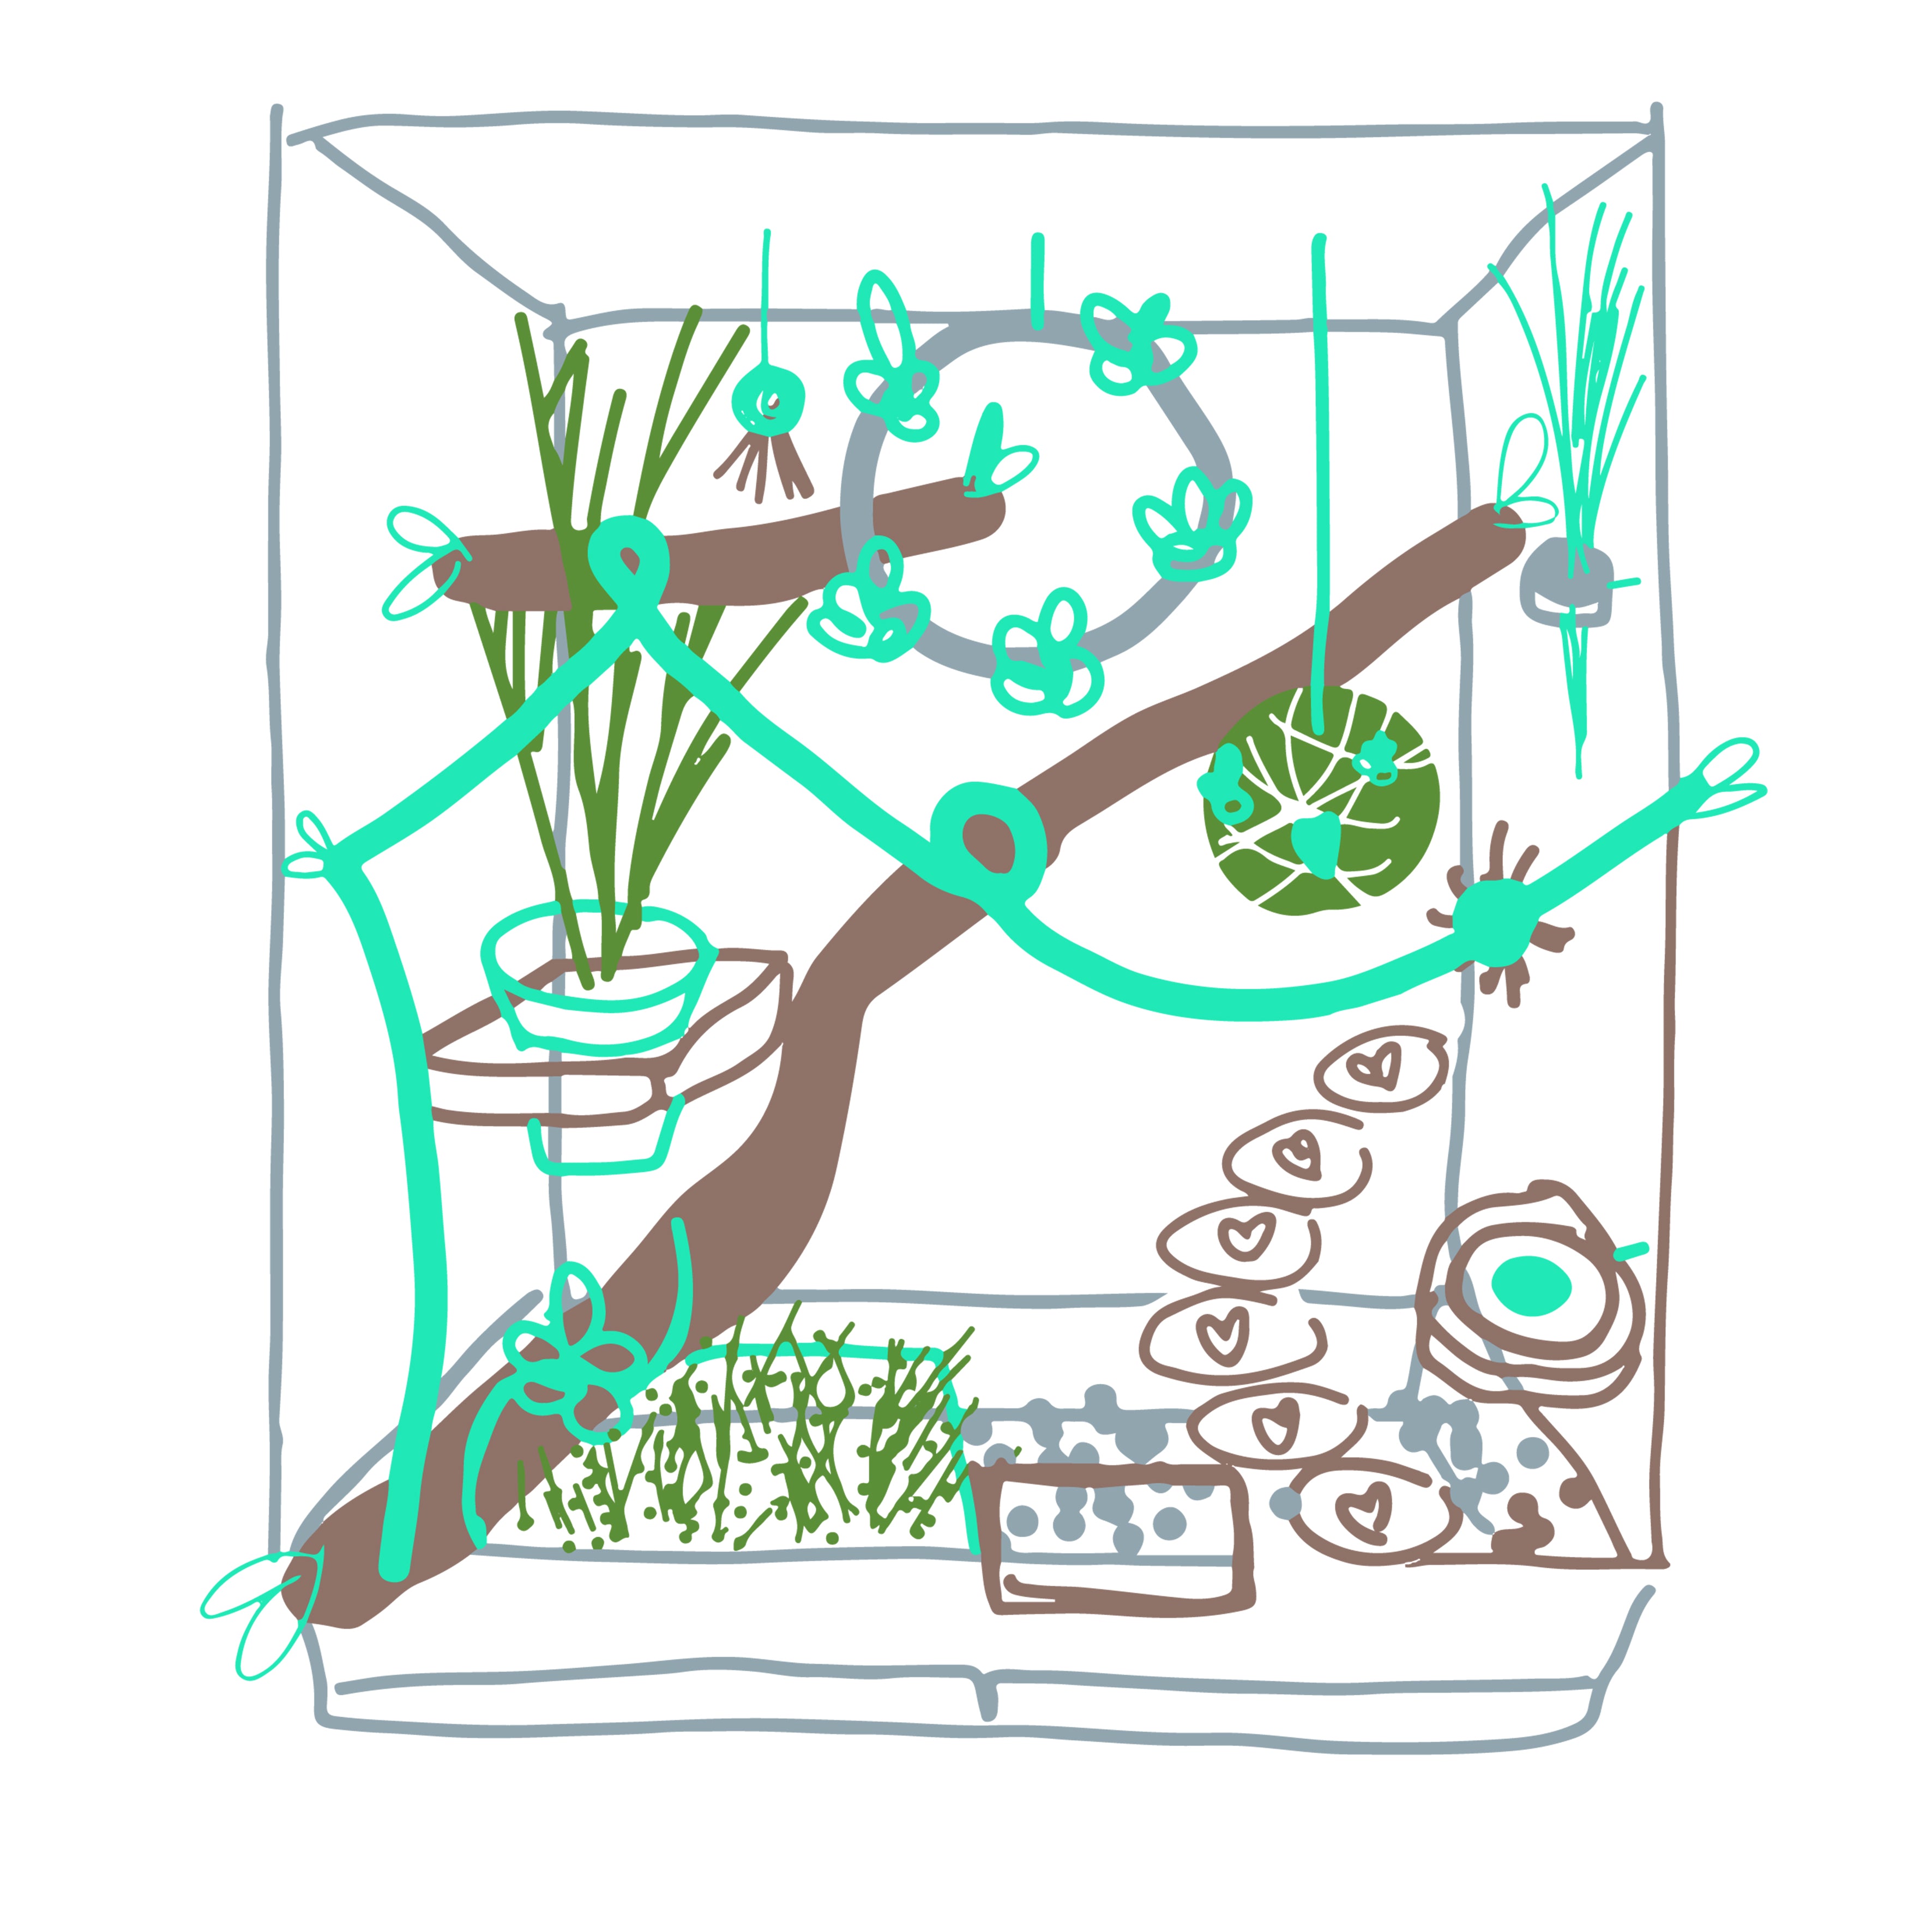
Global drawing with EVERYTHING that the design has. Drawn by hand and in perspective to be able to see all the parts and corners as much as possible.
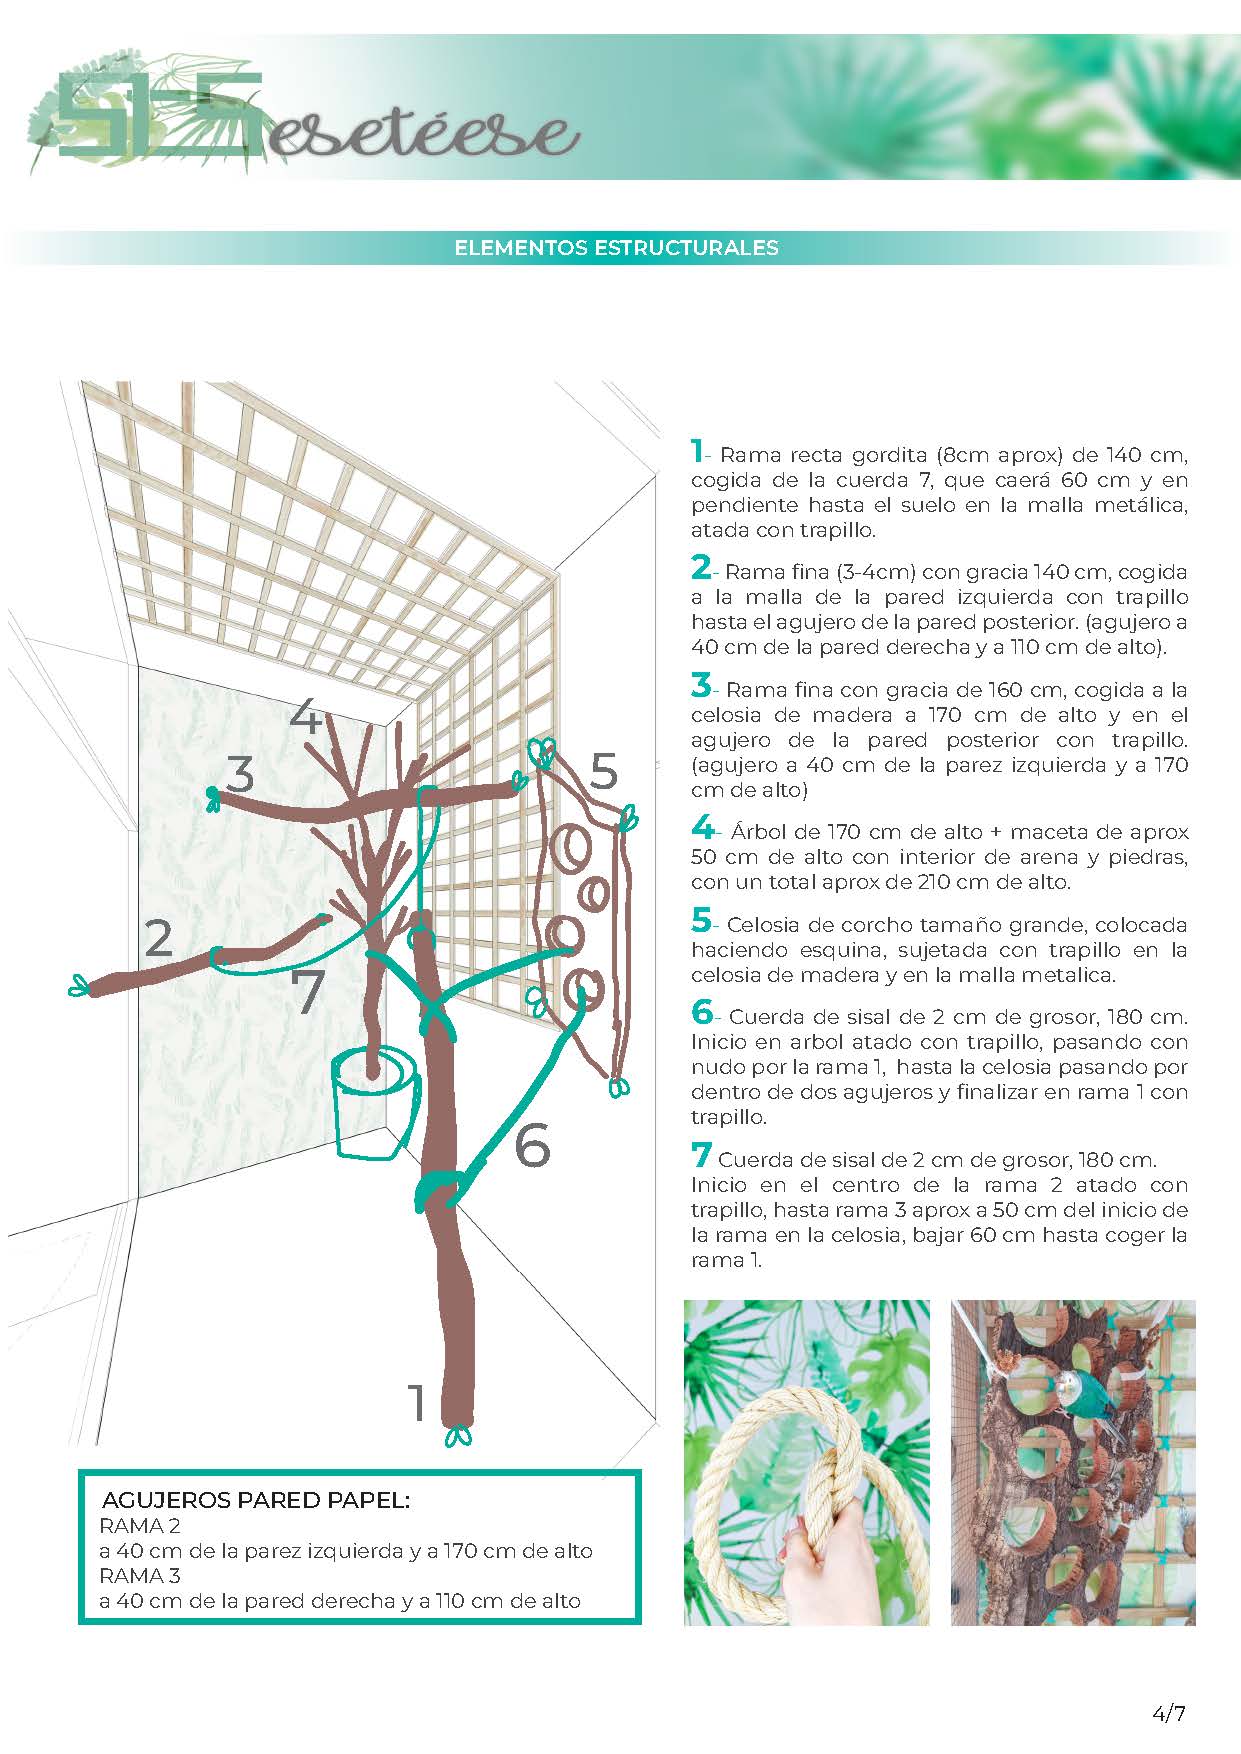
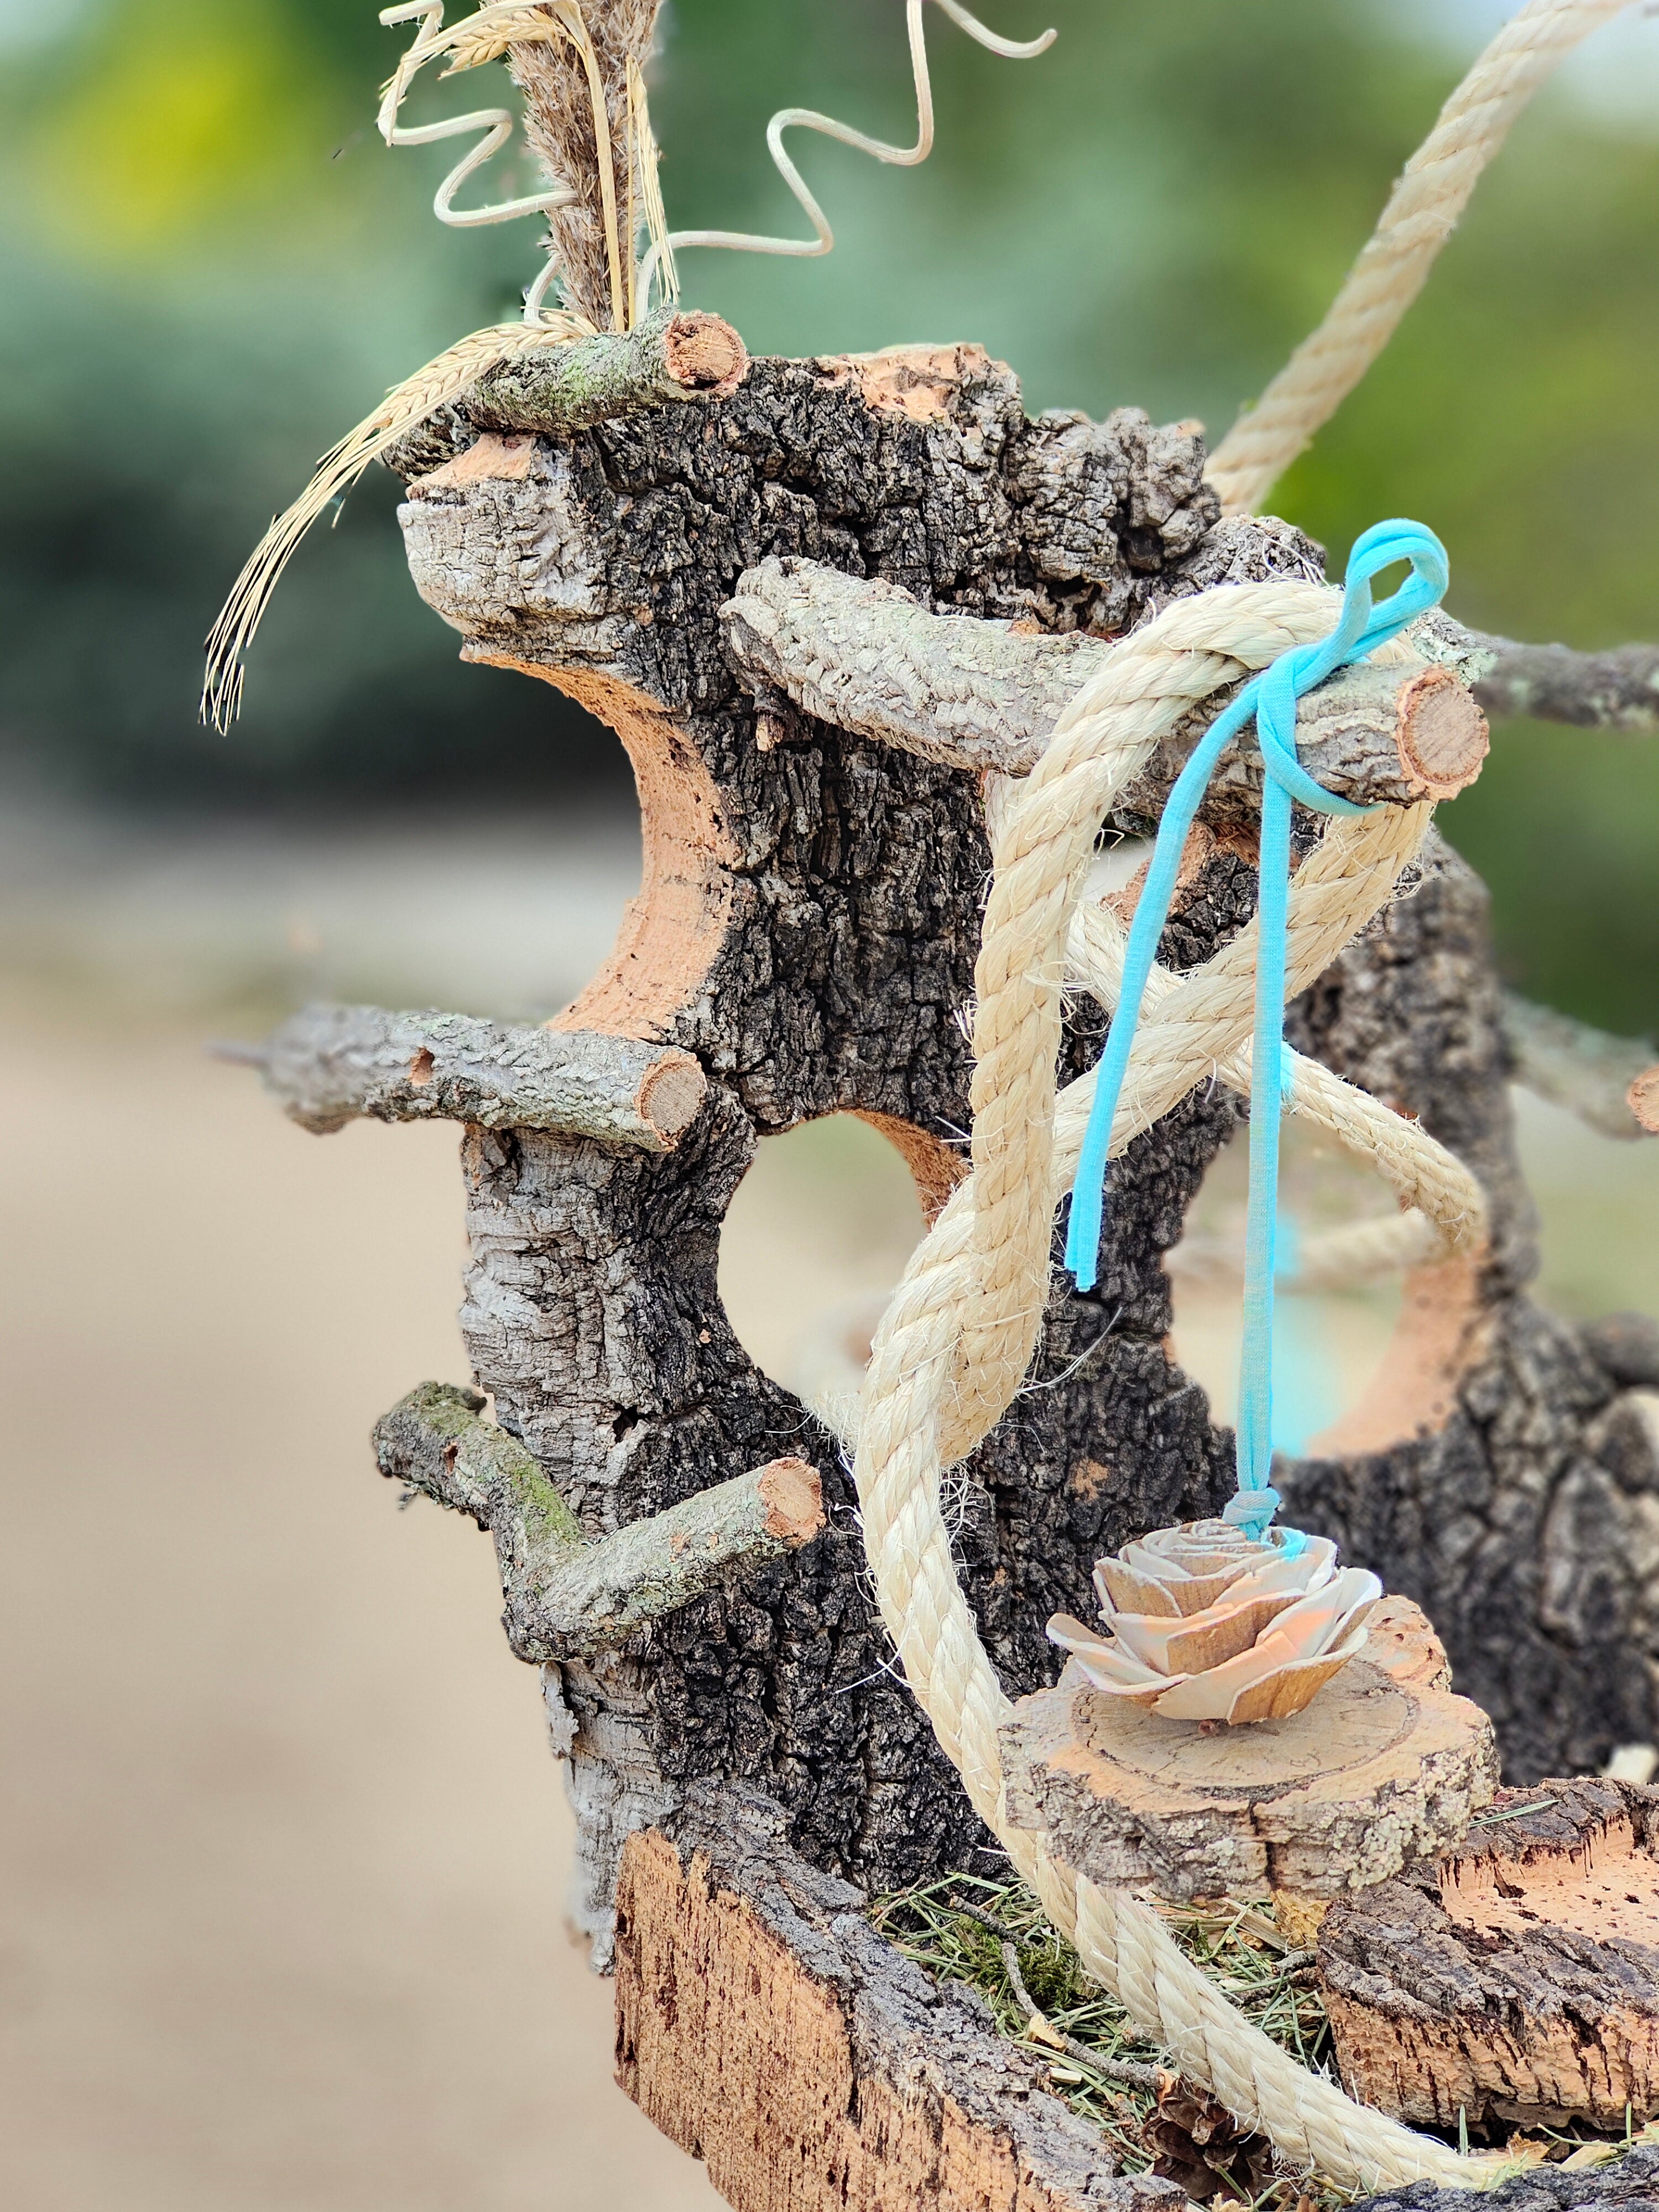
structural elements
Once the overall drawing has been presented, the most important thing is to separate the elements by steps.
The first are the structural elements, such as branches, trees, ropes and larger elements that have a great role in the space. These pieces will be the ones that will mark the distribution and from which the rest of the elements will be placed.
All this is detailed in the manual, where it has to be placed and how, and even if holes have to be made.
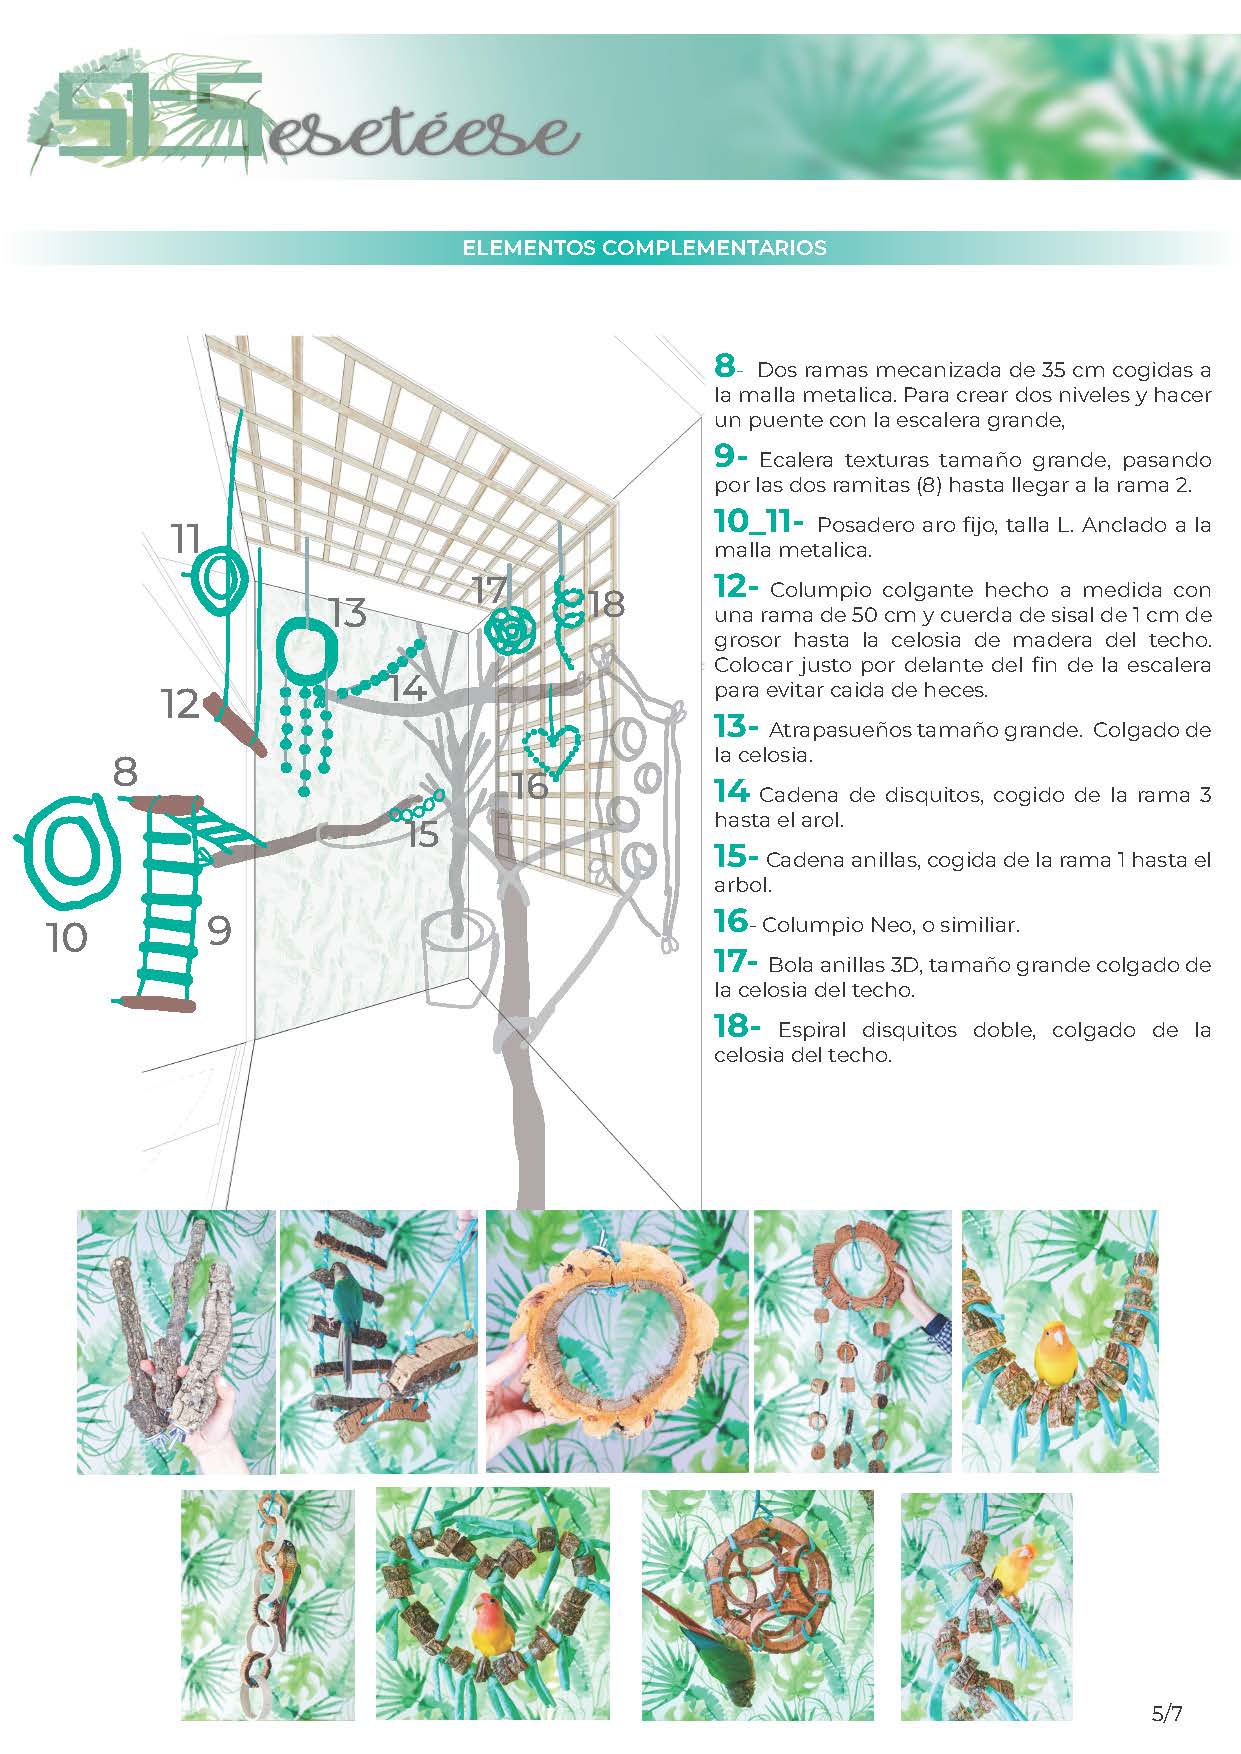
COMPLEMENTARY ELEMENTS
For us, complementary elements are those that help us finish making connections (ladders, chains), or are the focal point of a connection, such as swings.
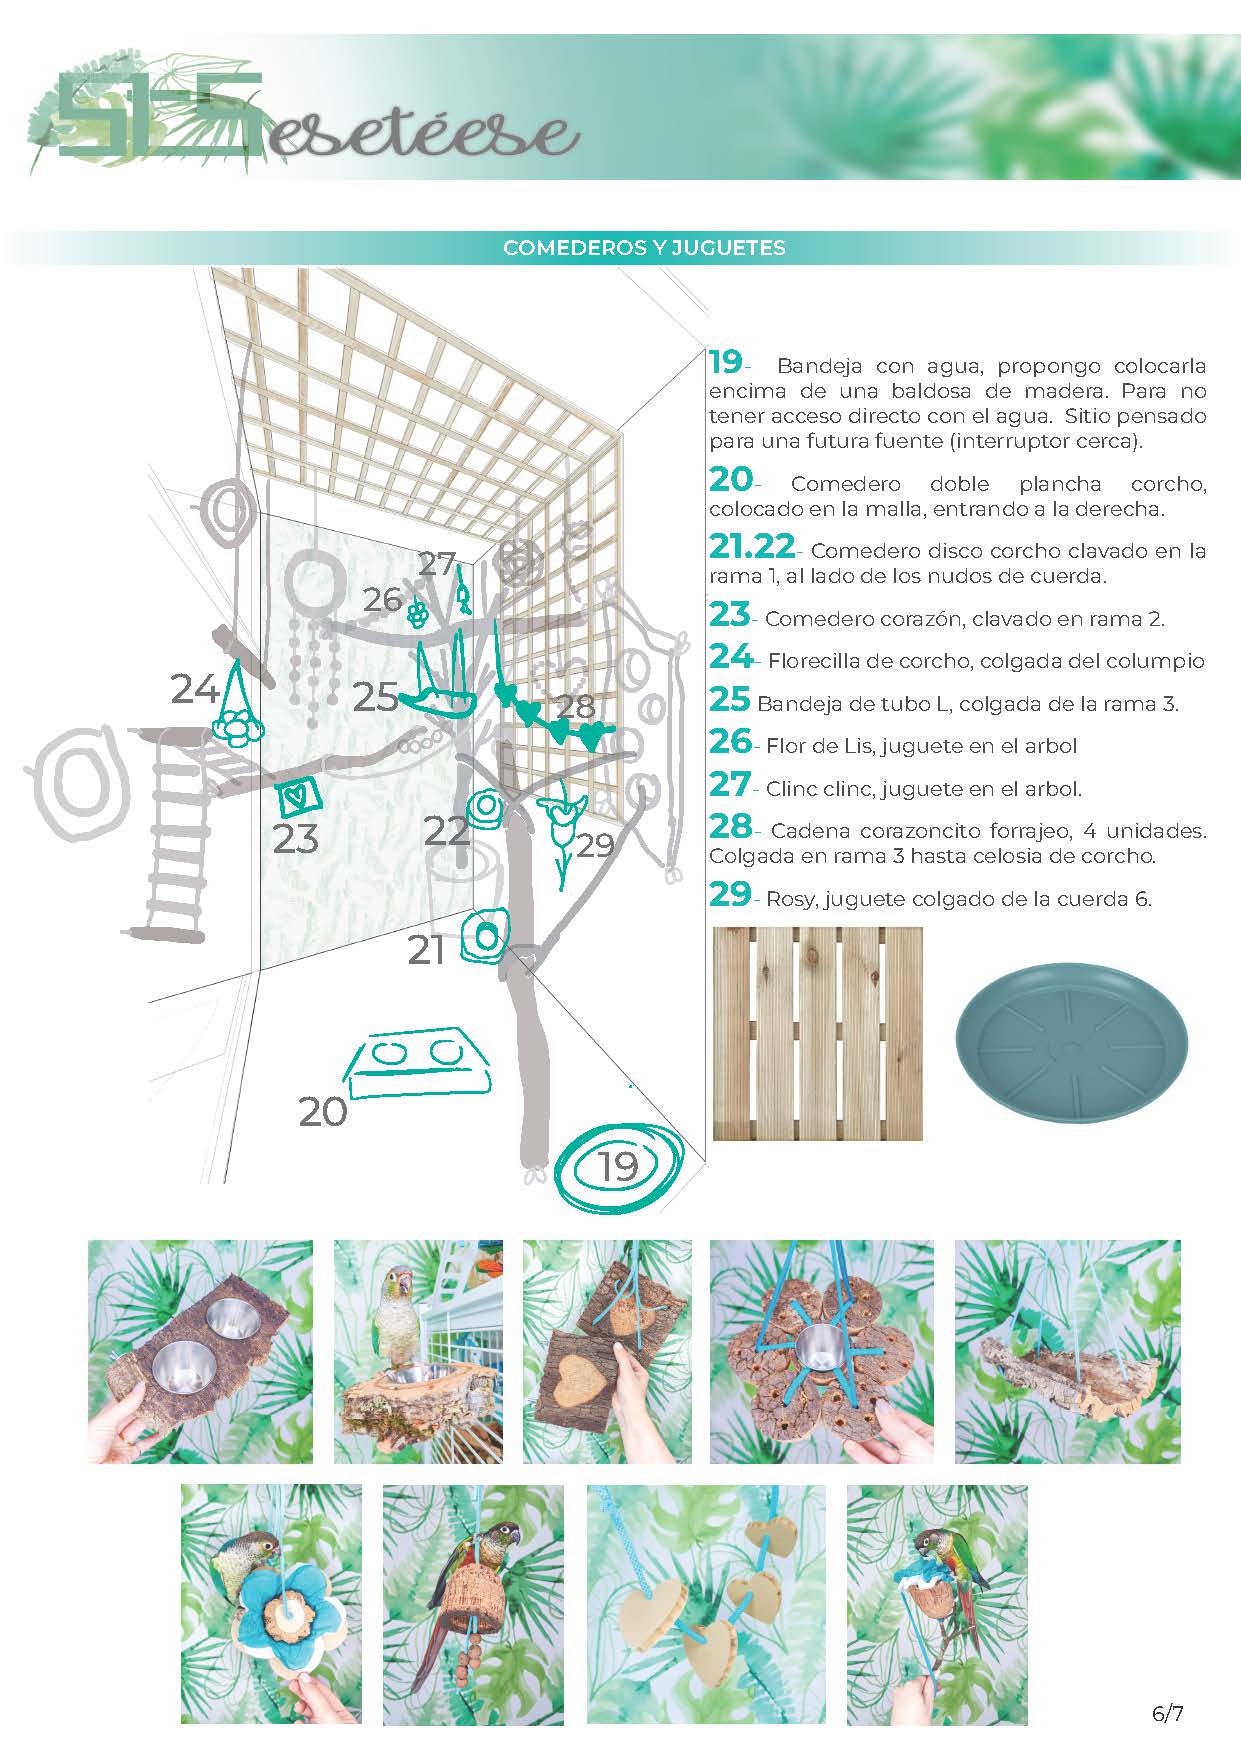
FEEDER AND TOYS
Distribution of feeders throughout the space, of all formats and uses, hanging, fixed, integrated into branches or walls.
Finally, we thought about a possible water area, either with a tray or a fountain. This area has the virtue of not having anything on top of it to avoid falling feces.
possible extras
It is very important to take into account all the useful space. And the precage is a very important area, not only for the caregiver to have all their things, but also for our parrots, since it will be a space that they will also use when we have to clean or have to take them out for whatever reason.
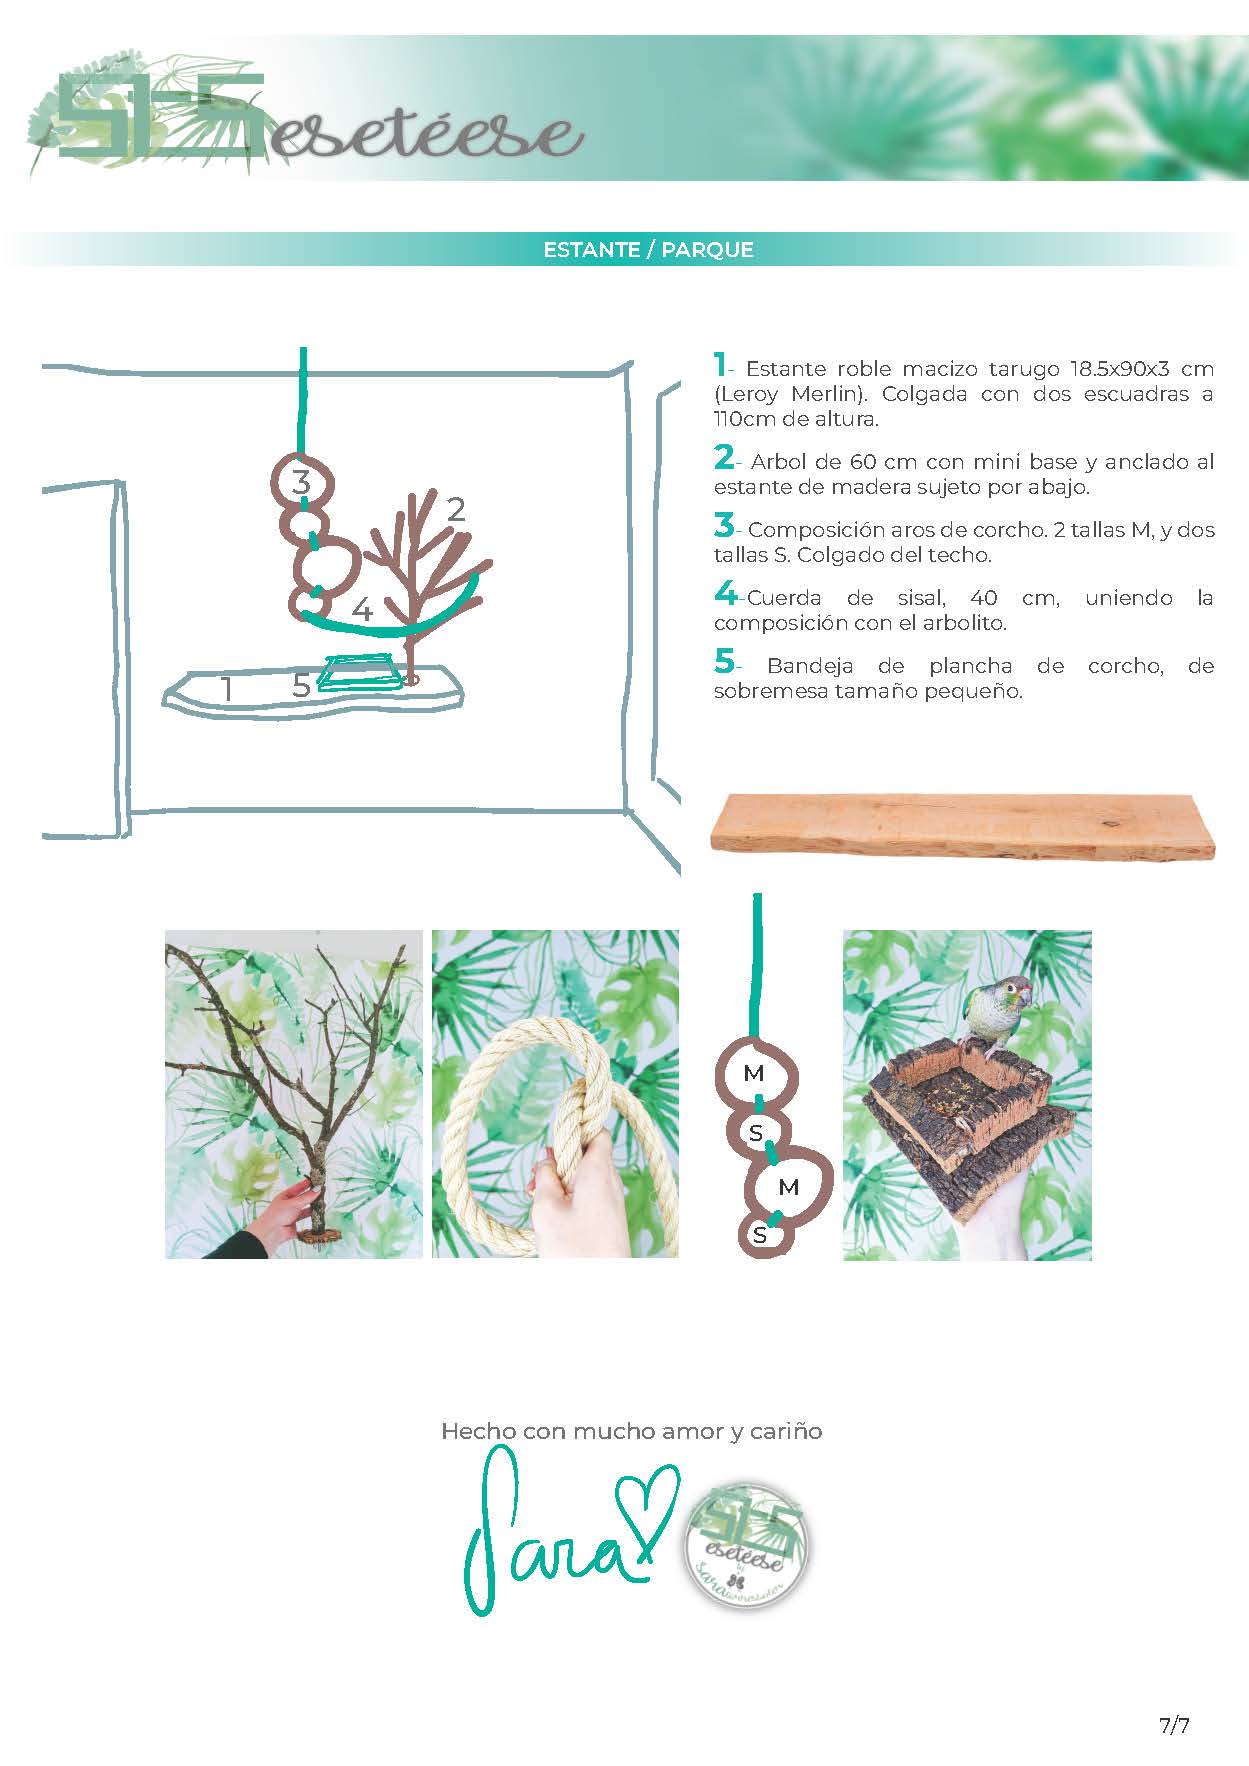
In this case, this project included a small park and a shelf to prepare enrichments.
YOU HAVE DOUBTS?
I'm here to talk to you, ask whatever you want